Managing Profiles via the Admin Panel
For users of the Email Sidebar on:


9 min read
Important
In March 2023 release, the new Admin Panel was introduced. The support of the legacy Admin Panel will be ceased soon, thus we strongly encourage that our customers switch to the new Admin Panel. This article contains two sections:
• Managing Profiles in the new Admin Panel
• Managing Organizations in the legacy Admin Panel
To use RG Email Sidebar Admin panel, special access permissions are required. To request the permissions for your organization, contact Revenue Grid support team by email. Admin panel provides tools for managing end users and some of its key settings it includes duplicate RG Email Sidebar Customization and Sync settings on Admin level.
Managing Profiles in the new Admin Panel
In RG Email Sidebar Administration Panel context, a Profile (previously, Organization) is a group of Users with shared basic settings which cooperate in a shared Salesforce space.
 The Profiles tab of Administration Panel provides mechanisms for defining synchronization configuration for a Profile.
Note
In the current implementation there is no way to limit the access rights for Admin Users, so an assigned Admin User can manage users belonging to all Profiles locally
Profiles List View
On the Profiles tab, you can see the following columns:
- ID (this column is hidden by default)
- Name
- Mailbox access type
- Synchronization status
- Actions
Click any column name and select to sort ascending or sort descending.

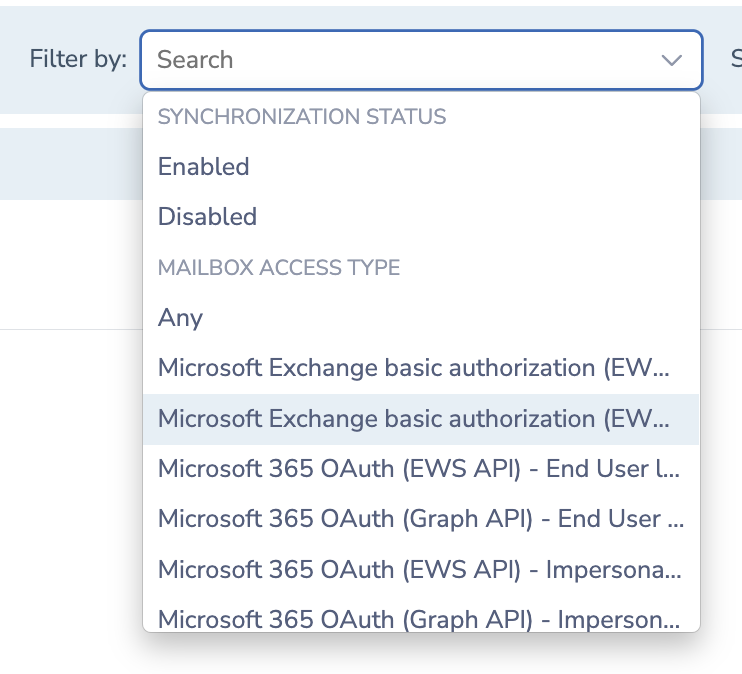 In the Filter by box, you can select what Profiles to display by their Synchronization Status and Mailbox Access Type. Click on the X icon to clear the filter.
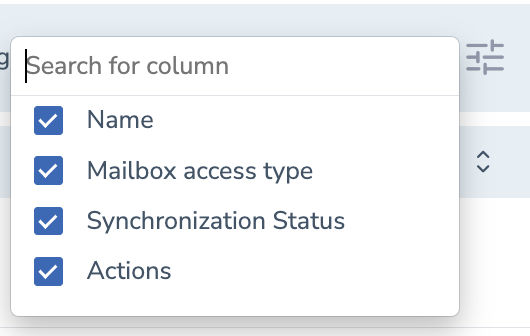 Click the
  icon on the right to add or remove columns displayed on the Profiles tab.
Note that no bulk actions can be performed on Profiles.
If synchronization is enabled and running, organization info on the list is displayed in black font color. If synchronization is not set up or is suspended for the whole Organization – it is displayed in red font color.
Via the Profiles tab you can perform the following tasks:
- Create Profiles
- View and edit Profiles’ details
- Delete Profiles
Creating Profiles
To create a profile:
1. Go to the Profiles tab
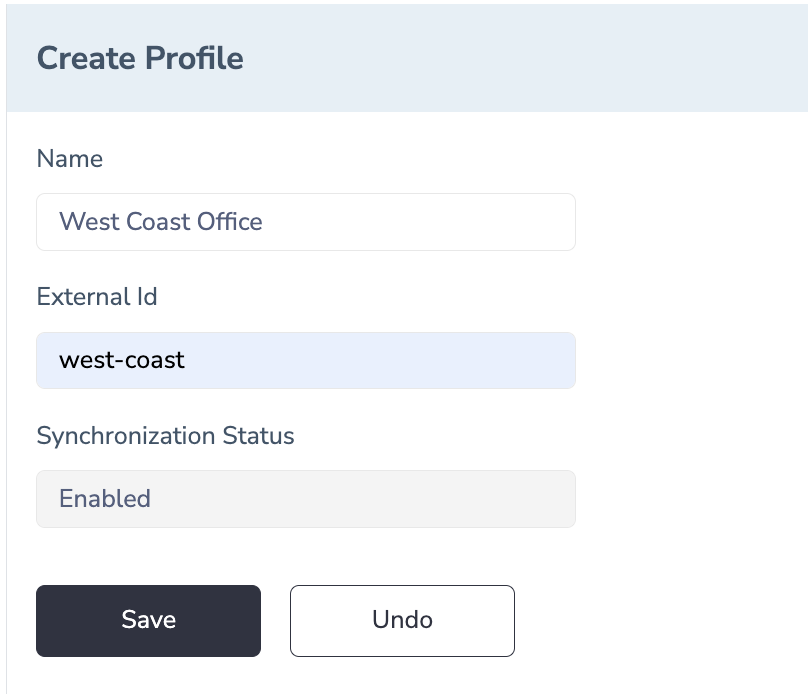
2. In the upper right corner of the page, click Create Profile in the upper right-hand corner of the interface
3. Fill in the Name field
4. Fill in the External Id field (the value becomes read-only and cannot be changed later)
5. Click Save to complete Profile creation
Editing Profiles
To modify a Profile:
1. Go to the Profiles tab
2. To edit or view a Profile, click on the necessary one on the list
3. Switch to the Details subtab
4. Edit the necessary Profile parameters
5. Click Save
Viewing Profile Subtabs
There are the following subtabs on the Profiles tab which contain relevant sets of actions.
Note
The columns on the subtabs can be added or removed via the columns actions picklist summoned by clicking the (Menu) icon
General – the subtab for configuring general Profile settings
The General subtab contains settings that are common for all users belonging to this Profile. Users can change majority of these settings on their Sync Settings page, Sidebar Customization page. Once you change any settings on this page and save them, users won’t be able to edit them on their Sync Settings page, Sidebar Customization page. However, you as an admin can change them anytime on this page.
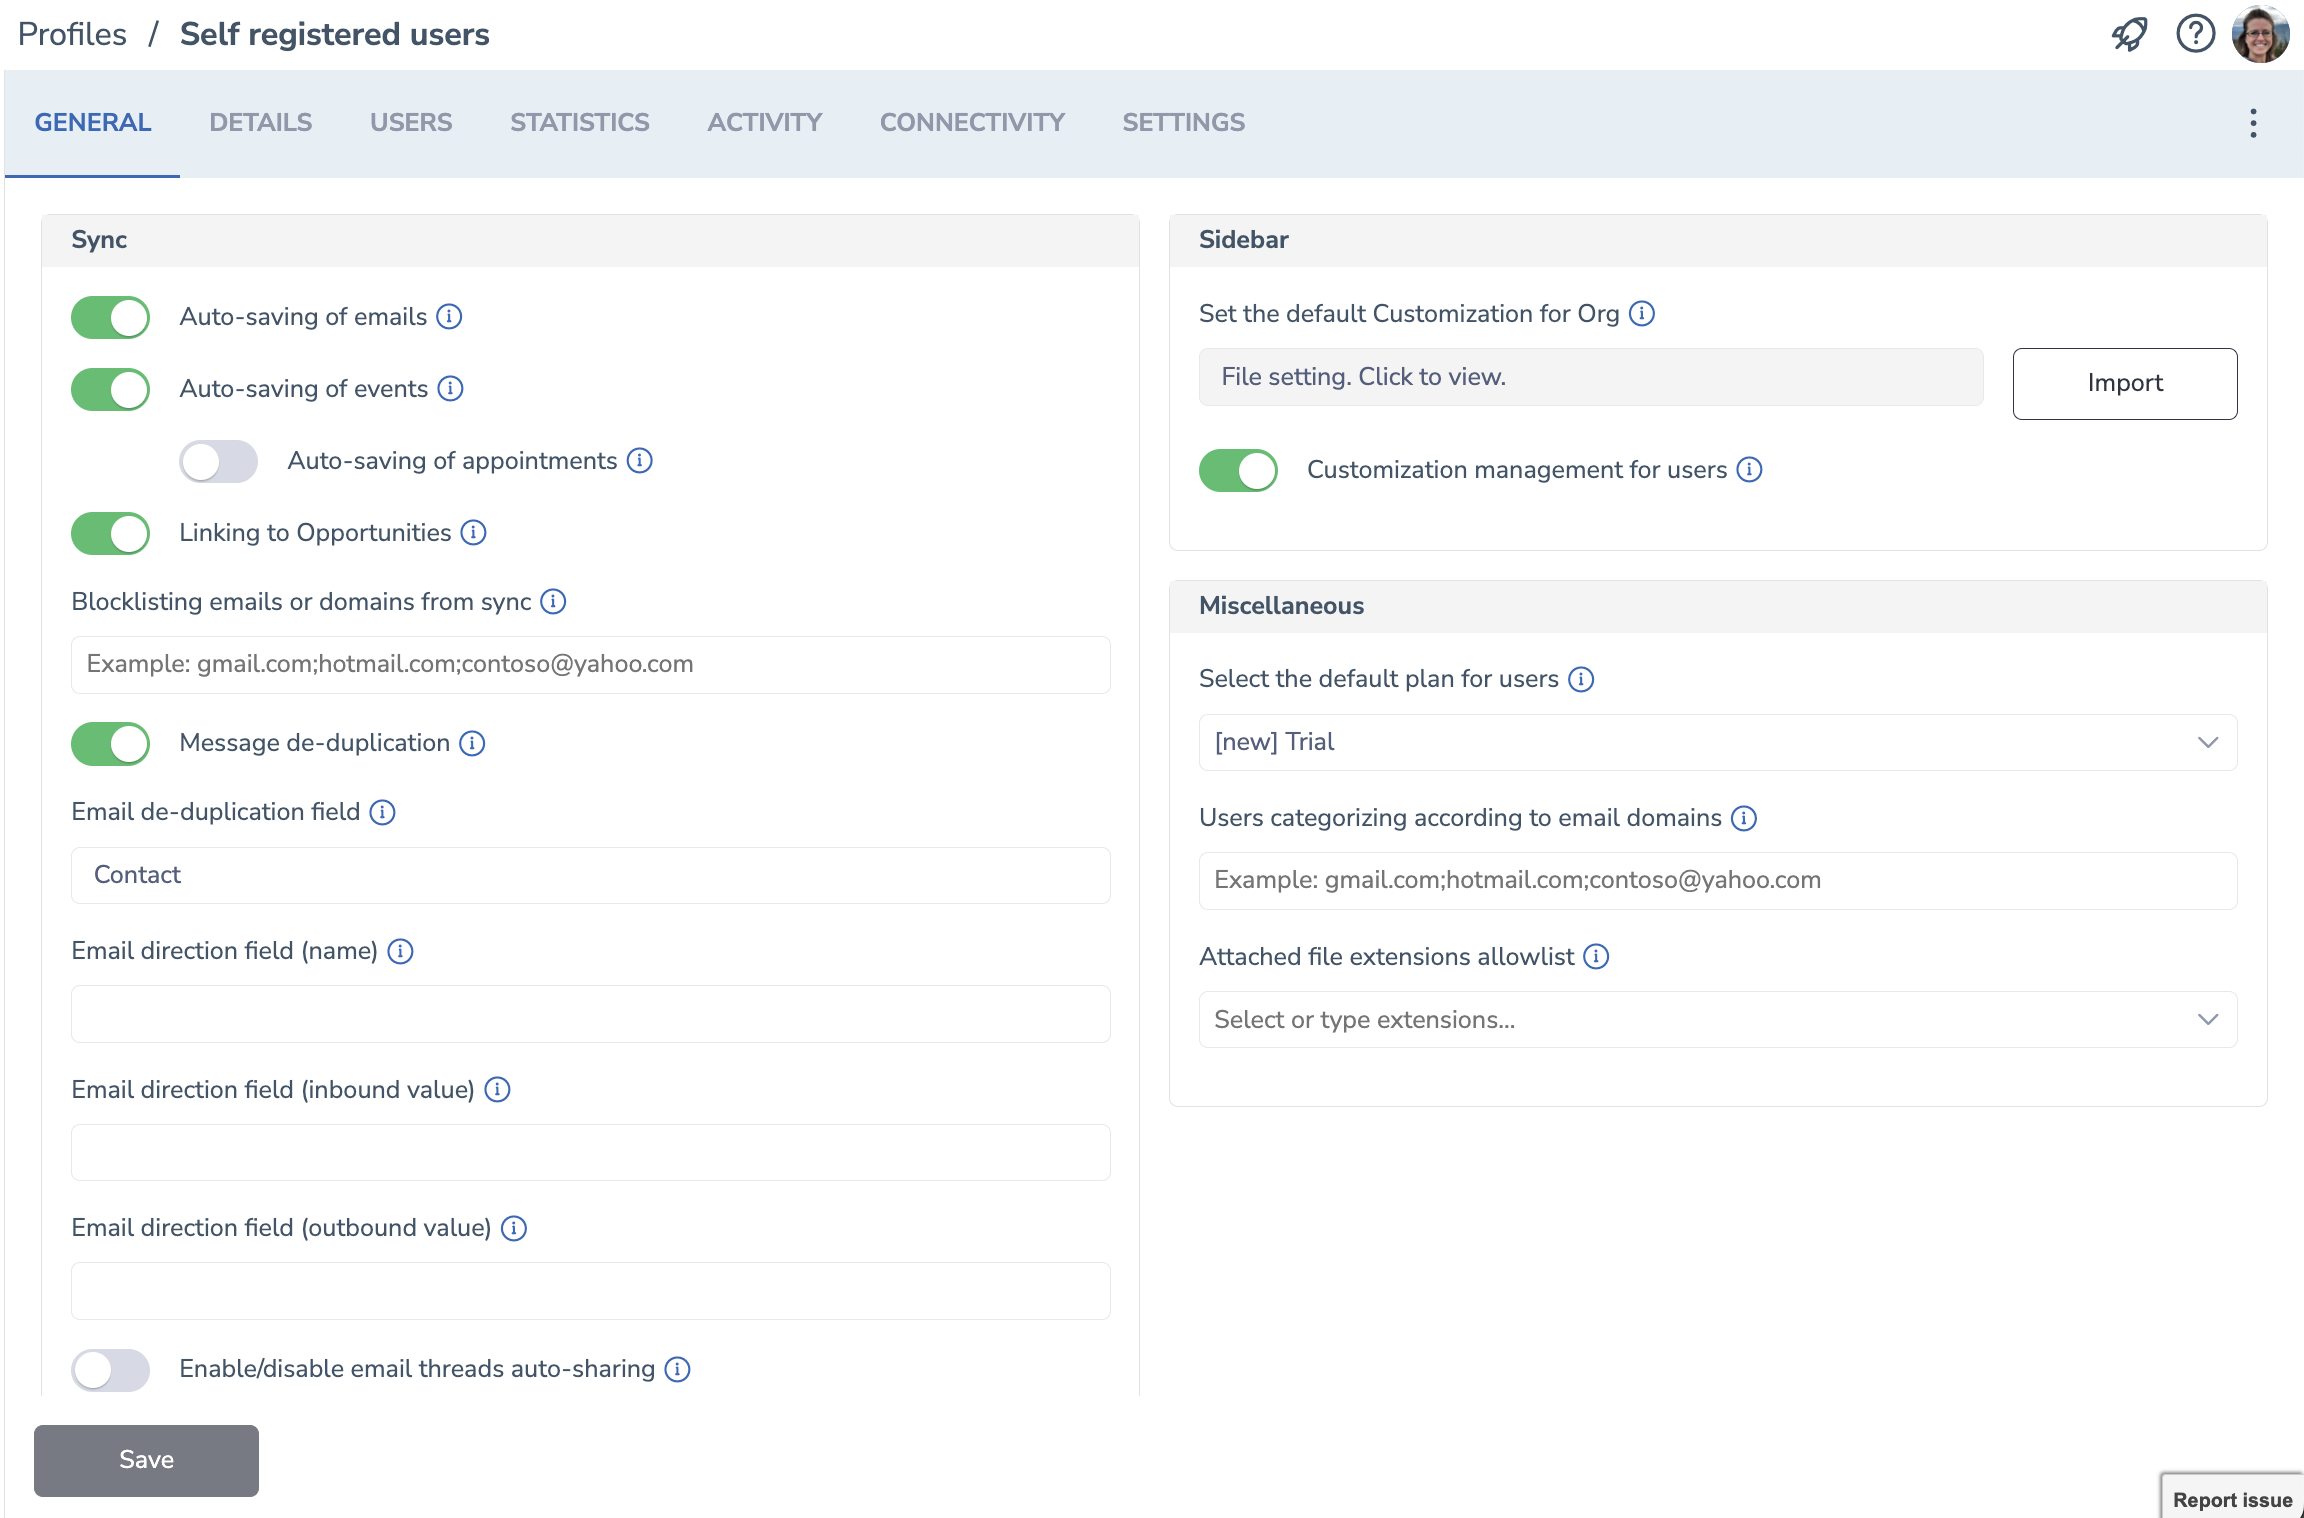
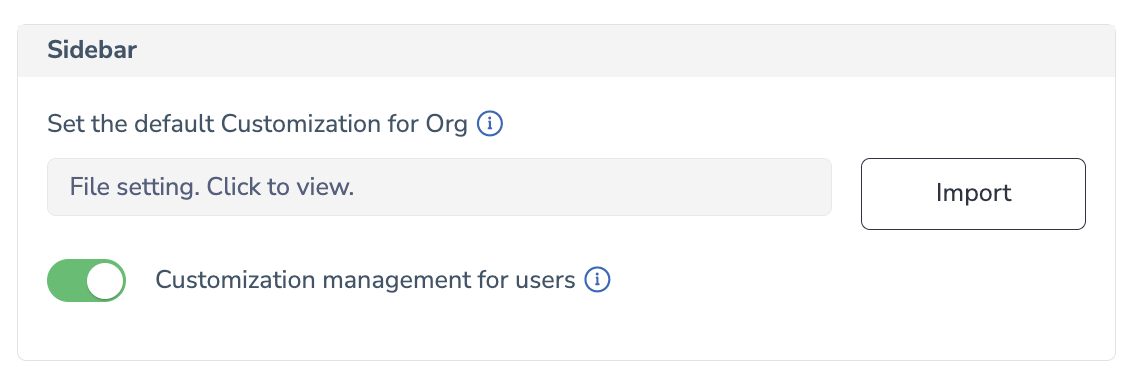
Sync Settings
Sync section contains settings for fine-tuning and standardizing synchronization for users. These settings will apply to all users in the Profile and they won’t be able to change them on their level.
In the Sync section, it is possible to push specific synchronization settings to all users belonging to a Profile, or to groups of users and individual users within a Profile; the users can be allowed or disallowed to adjust these settings. If you need to preset individual sync settings to different users in the Profile, send us a corresponding request to our Support team.
Auto-saving of emails
With this setting enabled users can get all relevant (see point 5 in this article) incoming and outgoing email messages (Inbox and Sent folders) automatically saved in Salesforce. With automatic saving enabled, users’ email messages will be automatically saved as Salesforce Tasks or Email messages linked to related Contacts, Leads, and other Salesforce objects retrieved according to these principles. Emails autosaving is performed not immediately but on the following synchronization session.
Auto-saving of events
Users can have all their incoming and outgoing Calendar items automatically synced in Salesforce, with specific exceptions listed in this article. Note that Revenue Grid will also auto-create new Salesforce records to sync meetings which involve new business contact, see this article to learn the details.
With automatic meetings syncing enabled, the meetings will be automatically synced up to user’s Salesforce calendar and also to the calendars of their colleagues who use Revenue Grid, if they were invited.
Auto-saving of appointments
With automatic syncing of appointments enabled, users’ appointments will be automatically synced with their Salesforce calendar. To enable automatic saving of appointments, toggle the Auto-save appointments switch button.
Linking to Opportunities
Users can have their emails associated not only with Contacts and Leads, but also with related Opportunities, saved to Salesforce. These related Opportunities must satisfy all of the following requirements:
- User is the owner of the Opportunity
- The email address specified in an email’s From, To, or CC fields is associated with a Contact that has a Contact Role in the Opportunity
- Opportunity has a status other than Closed
If several Opportunities satisfy these requirements, the email will be saved to the most recent one. If such an Opportunity was not found, the email will be saved to the Account that is associated with the related Contact. However, if neither an Opportunity nor an associated Account were found, the email will not be saved at all. This setting applies only to automatic email/event saving, not to manual saving of events/emails.
Blocklisting emails and domains from syncing
Revenue Grid offers the possibility to blocklist email messages and calendar items from/to certain addresses or domains from being saved with Salesforce (e.g., private contacts or in-org ones).
Note that a special global setting blocklists all free email services (e.g., gmail.com, outlook.com, etc.) from syncing by default, so you don’t need to add all of them to the Blocklist. To change or customize this setting, contact our support team.
See this article for more information on Blocklisting Email Addresses and Domains with RG Email Sidebar.
Message deduplication
With this switch button enabled, RG Sync Engine will prevent users from saving an email message which has already been saved by another user. This mechanism ensures that no excessive duplicates are created in Salesforce.
Email deduplication field
This field is related to the Message deduplication setting described above, it is automatically prefilled with the “REVGRD__InternetMessageId__c” value, the name of the custom field added by Revenue Grid Salesforce managed package (if it’s installed). However, admins can specify here another custom field name which will be used for emails deduplication.
Email direction field (name)
In this field admins can specify custom field for storing Email directions (whether an email message is inbound or outbound). For example, “Direction_c”
Enable/disable email threads auto-sharing
Enable/disable automatic saving of all emails which belong to a correspondence thread in Salesforce. There is the corresponding synchronization setting on the user-level.
Thread Id field
This field is related to the Enable/disable email threads auto-sharing setting described above; it is used for automatic saving of emails by the conversation identifier. To enable this feature, specify the name of the custom Salesforce field which contains the conversation identifier in this field.
This setting is required if email messages are saved as Task. If emails are saved as EmailMessage, leave this field empty (EmailMessage will contain a ThreadIdentifier field by default).
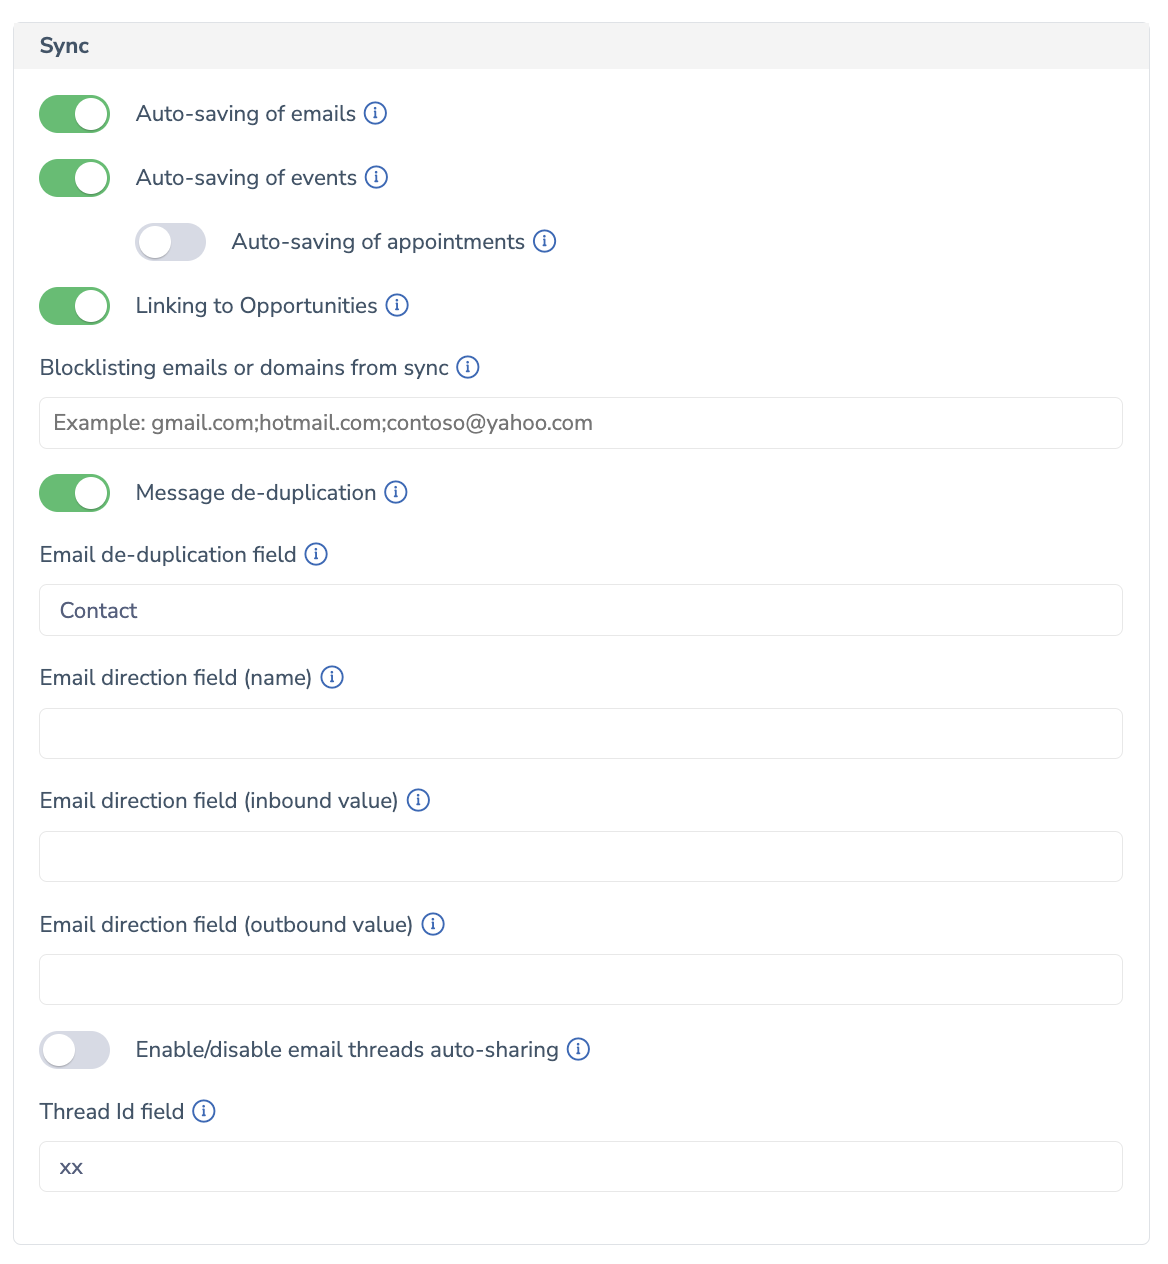
Sidebar
RG Email Sidebar Customization page which allows the individual users to adjust various aspects of interaction between Salesforce and RGES Outlook Add-In / Chrome Extension. This includes viewing, processing, and search patterns for different types of objects and their fields, see the left and central panes of the page.
In the Sidebar section, admins can specify the default Customization for a Profile and customization management rules for users.
Set the default Customization for Org
Select the default Sidebar Customization which will be automatically applied for all new users whose Customization settings got reset to default.
Customization management for users
Enable this switch button to allow users in the Profile to change, apply or push the Add-In Customization settings.
Miscellaneous
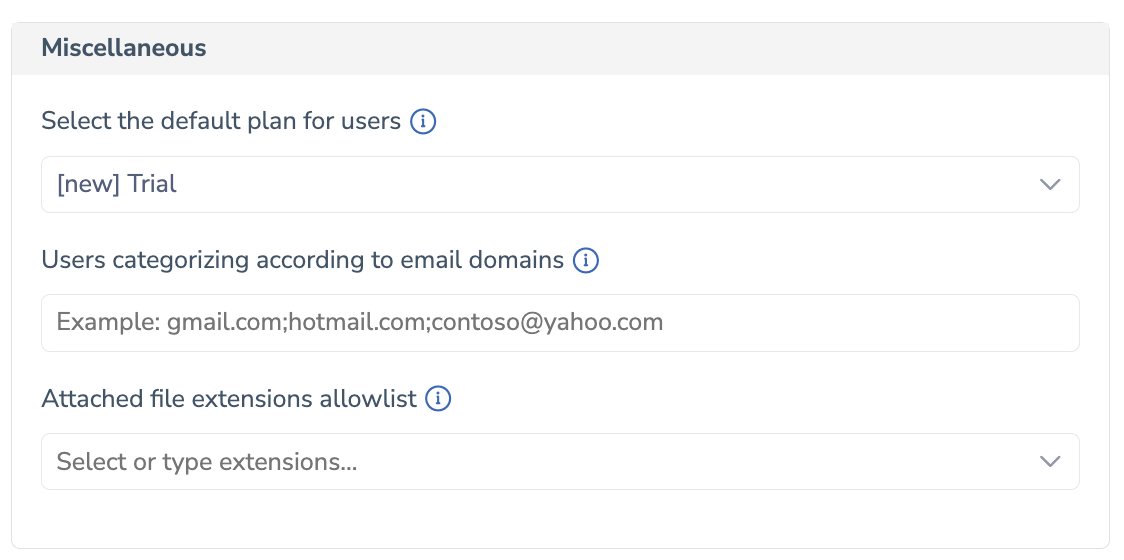
In the Miscellaneous section, you can specify Profile-wide settings for users.
Select the default plan for users
Here, admins can specify what plan should be assigned to the users belonging to this Profile. This is useful for managing different teams which use different Revenue Grid product packages or need specific sets of settings.
Users categorizing according to email domains
Admins can ensure that new users with specific email domains are automatically assigned to this Profile.
Attached file extensions allowlist
Specify what attached file types should be allowed to be saved in Salesforce.
Users – the subtab displays the list of users which belong to the Profile
The subtab includes a number of columns (these can be added or removed via the menu summoned by clicking the (Menu) icon).
- Name
- Profile
- License
- Mailbox access type
- User ID
- Issues
- Last synchronization session
- Synchronization status
- Disabled due to an error
- Mailbox Status
- Created On
- Updated On
- Delegates
- SMS #
- Voice #
- Sequence role
- Created On
- Actions
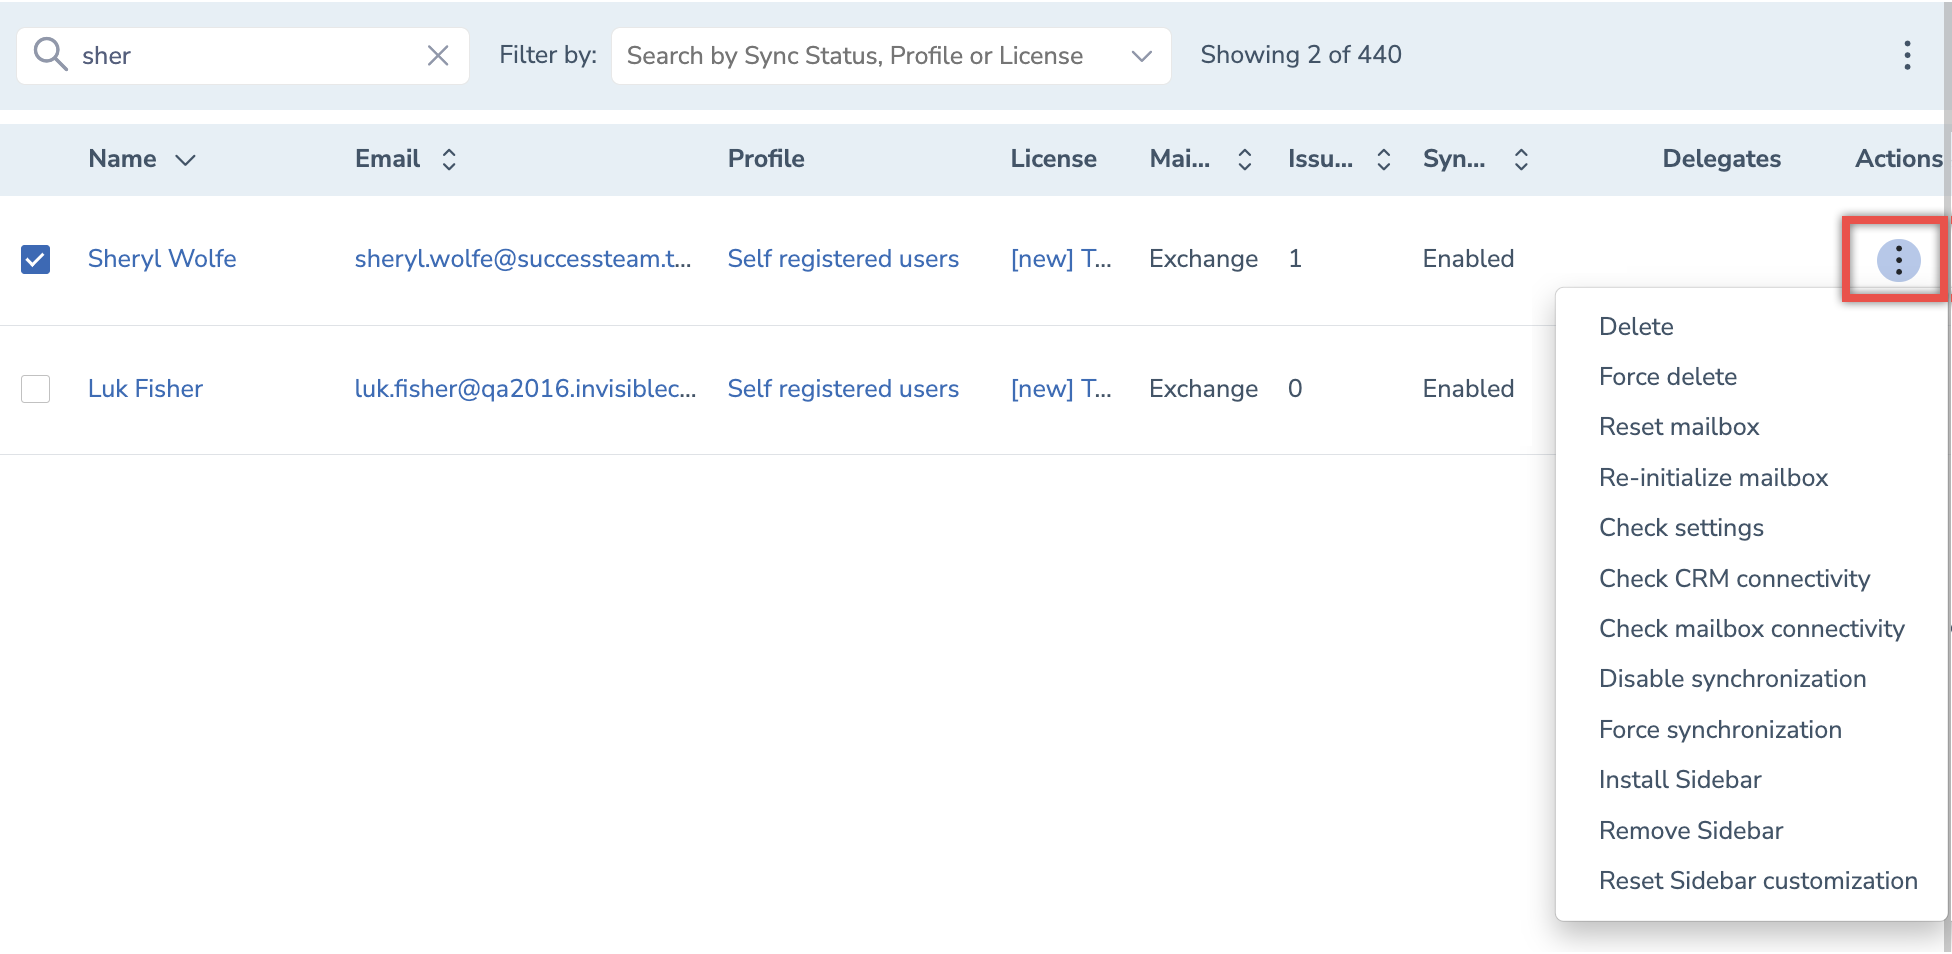
Actions available on the Users subtab
To open the Actions menu, select any user and click on the three dots menu on the left.
Note
If you don’t see the Actions column, try scrolling the page to the right and check whether this column is selected for display.
Delete. Delete a user. Please note that Users with initialized mailbox cannot be deleted
Force delete. Delete a user, users with initialized mailbox can be deleted this way
Reset mailbox. Request RG Email Sidebar to remove user customization and keep synchronization disabled. Once synchronization is enabled again, the first synchronization attempt will apply the customization to the user’s mailbox
Re-initialize mailbox. Request RG Email Sidebar to refresh mailbox data access for the user. Re-initializing is performed to resolve errors which affected data parsing consistency in the mailbox
Check settings. Use this action allows to verify if the Sync Engine is properly set up and to jump start it after fixing errors
Check CRM connectivity. the connection to Salesforce tenant under these user credentials can be established
Check mailbox connectivity. the connection to Exchange under this user credentials can be established
Enable synchronization. Enable synchronization for a User, if it was disabled
Disable synchronization. Suspend synchronization for a user. If synchronization is suspended for an ordinary User, it can be resumed from the Sync Dashboard
Force synchronization. Standard synchronization interval is set to 30 minutes. A user can manually trigger synchronization outside of the standard sync schedule by clicking the Force Synchronization action, but no sooner than 1 minute after the last attempt to trigger it. This is done to avoid service overload in case of multiple consecutive “Force Synchronization” requests
Install Sidebar. Run this action to easily install RGES Add-In for MS Outlook for the user’s account. That is only viable if the Sync Engine was authorized to work with the user’s mail server data
Remove Sidebar. Run this action to uninstall RGES Add-In for MS Outlook from this user account
Reset Sidebar customization. Resets the user’s Customization settings to the default state configured by the Admin or RGES Support Team
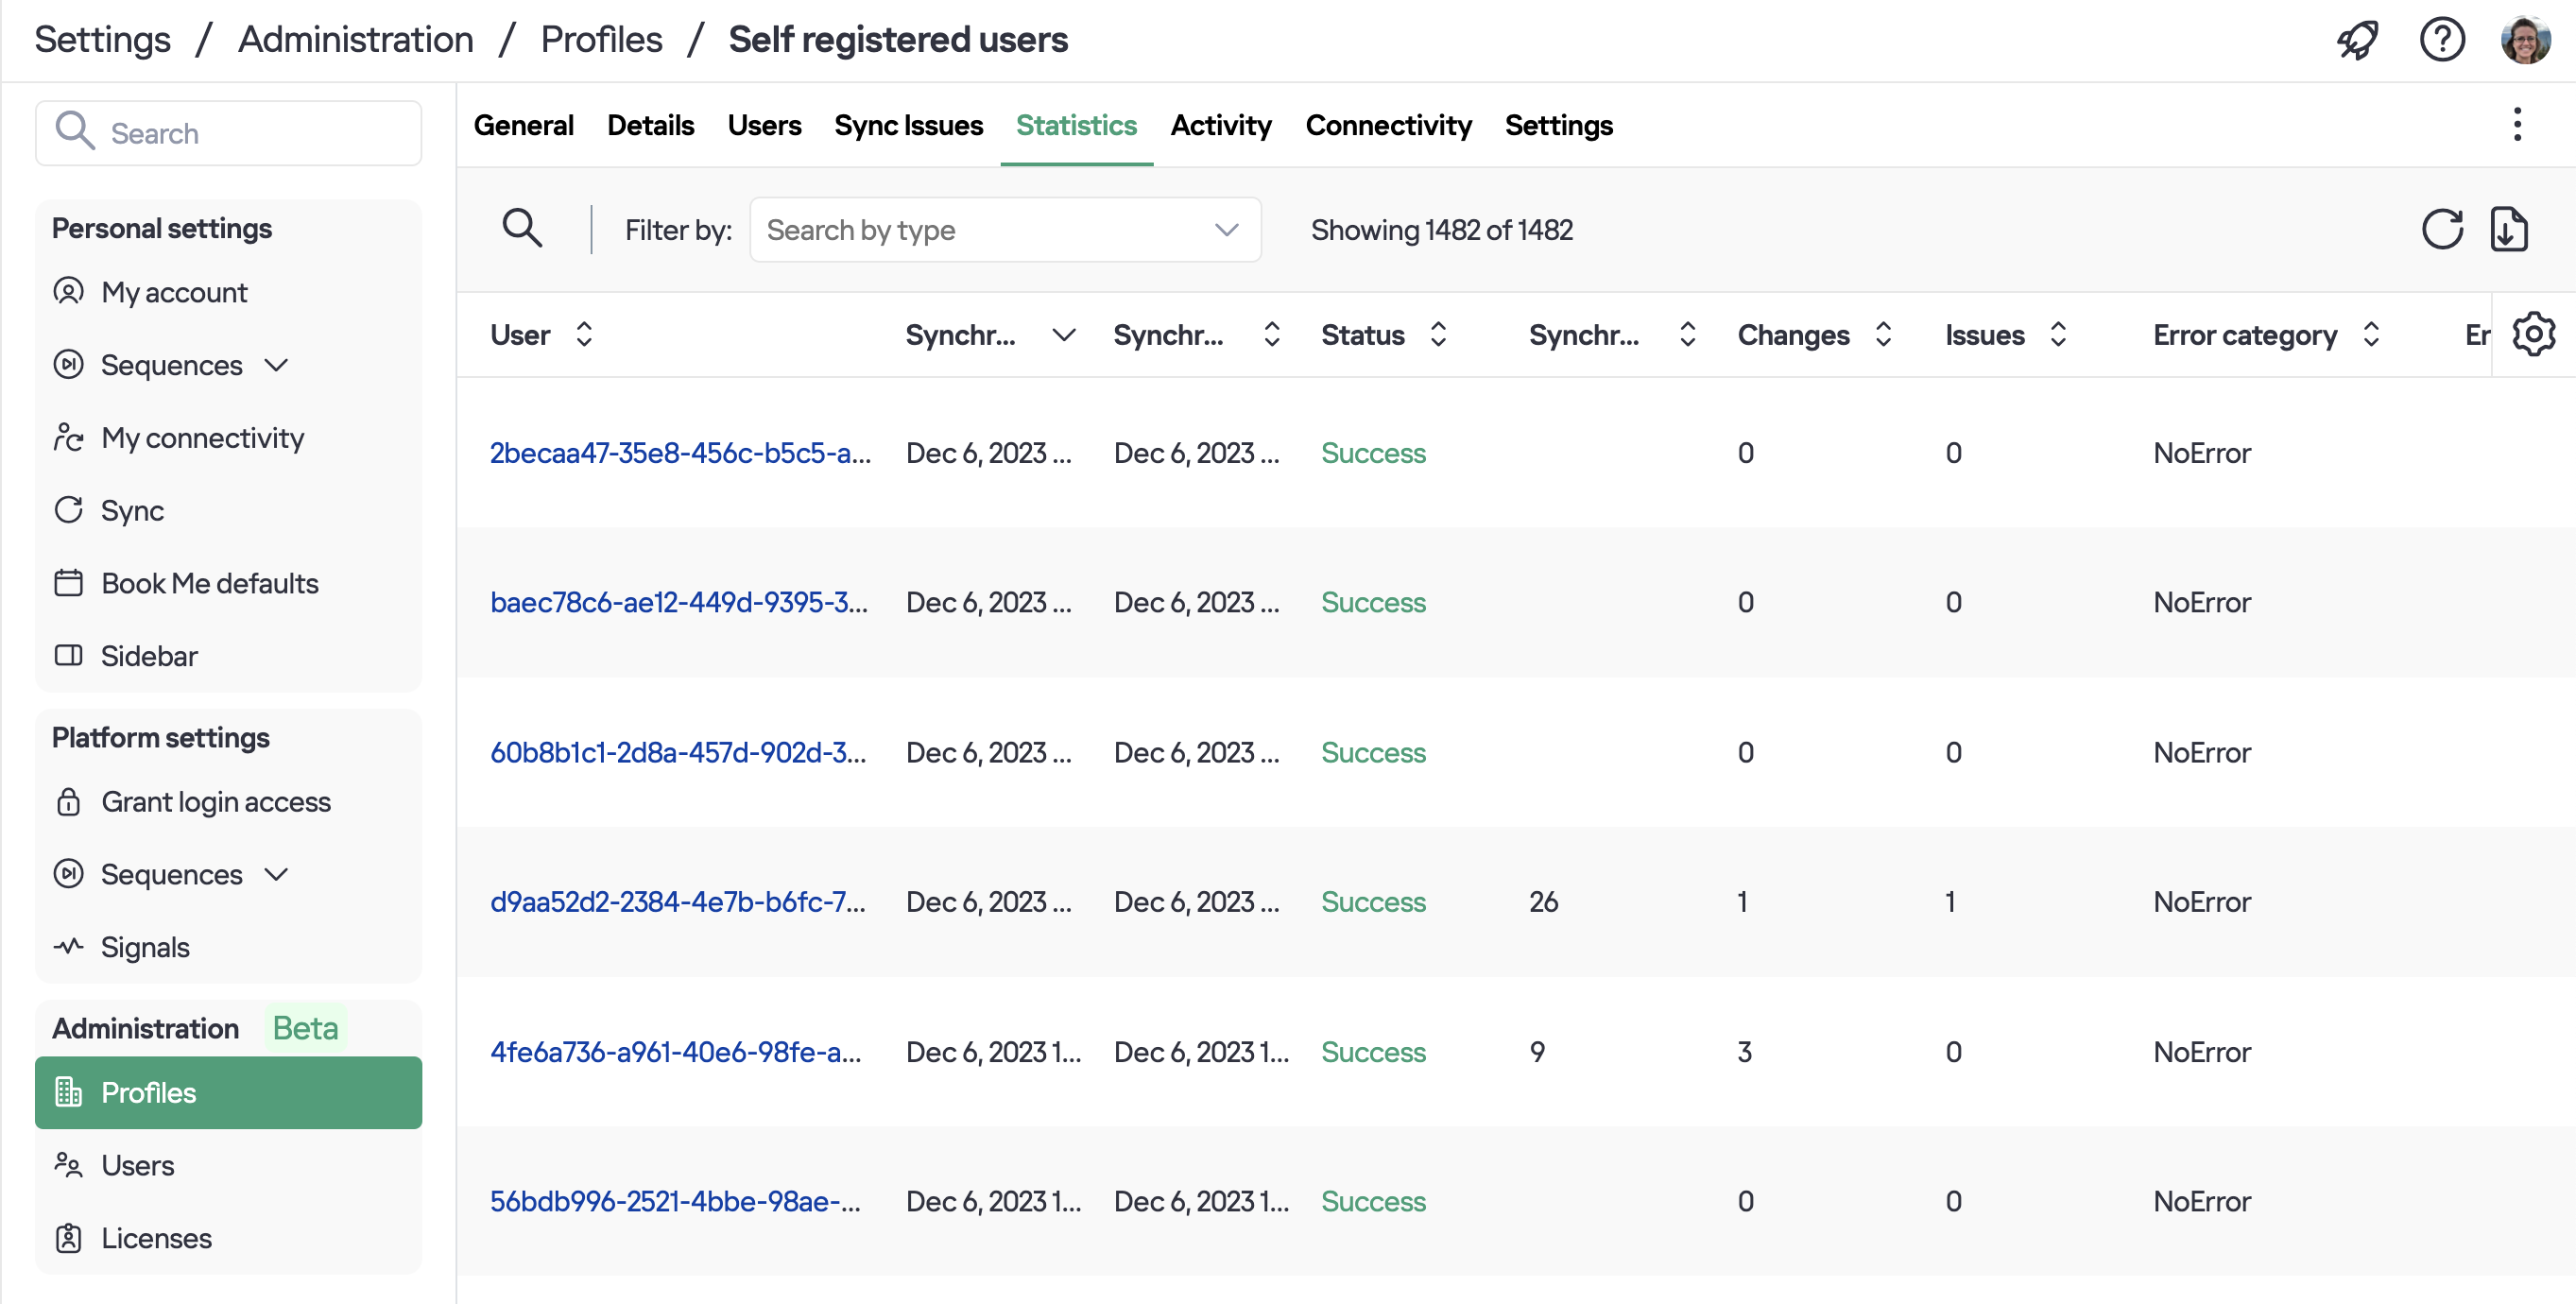
Statistics – the subtab displays statistics about the last synchronization session for each User in the Profile
You can check all the details about the item you need by clicking it.
The subtab has the following columns that can be added or removed via the menu summoned by clicking the Gear ⚙ icon:
-
Job ID (hidden by default)
-
User
-
Synchronization start date
-
Synchronization end date
-
Status
-
Synchronization Scope
-
Changes
-
Issues
-
Error Category
-
Error Source
-
Message
-
Exception (hidden by default)
-
Actions. Click on the
 icon to download the log.
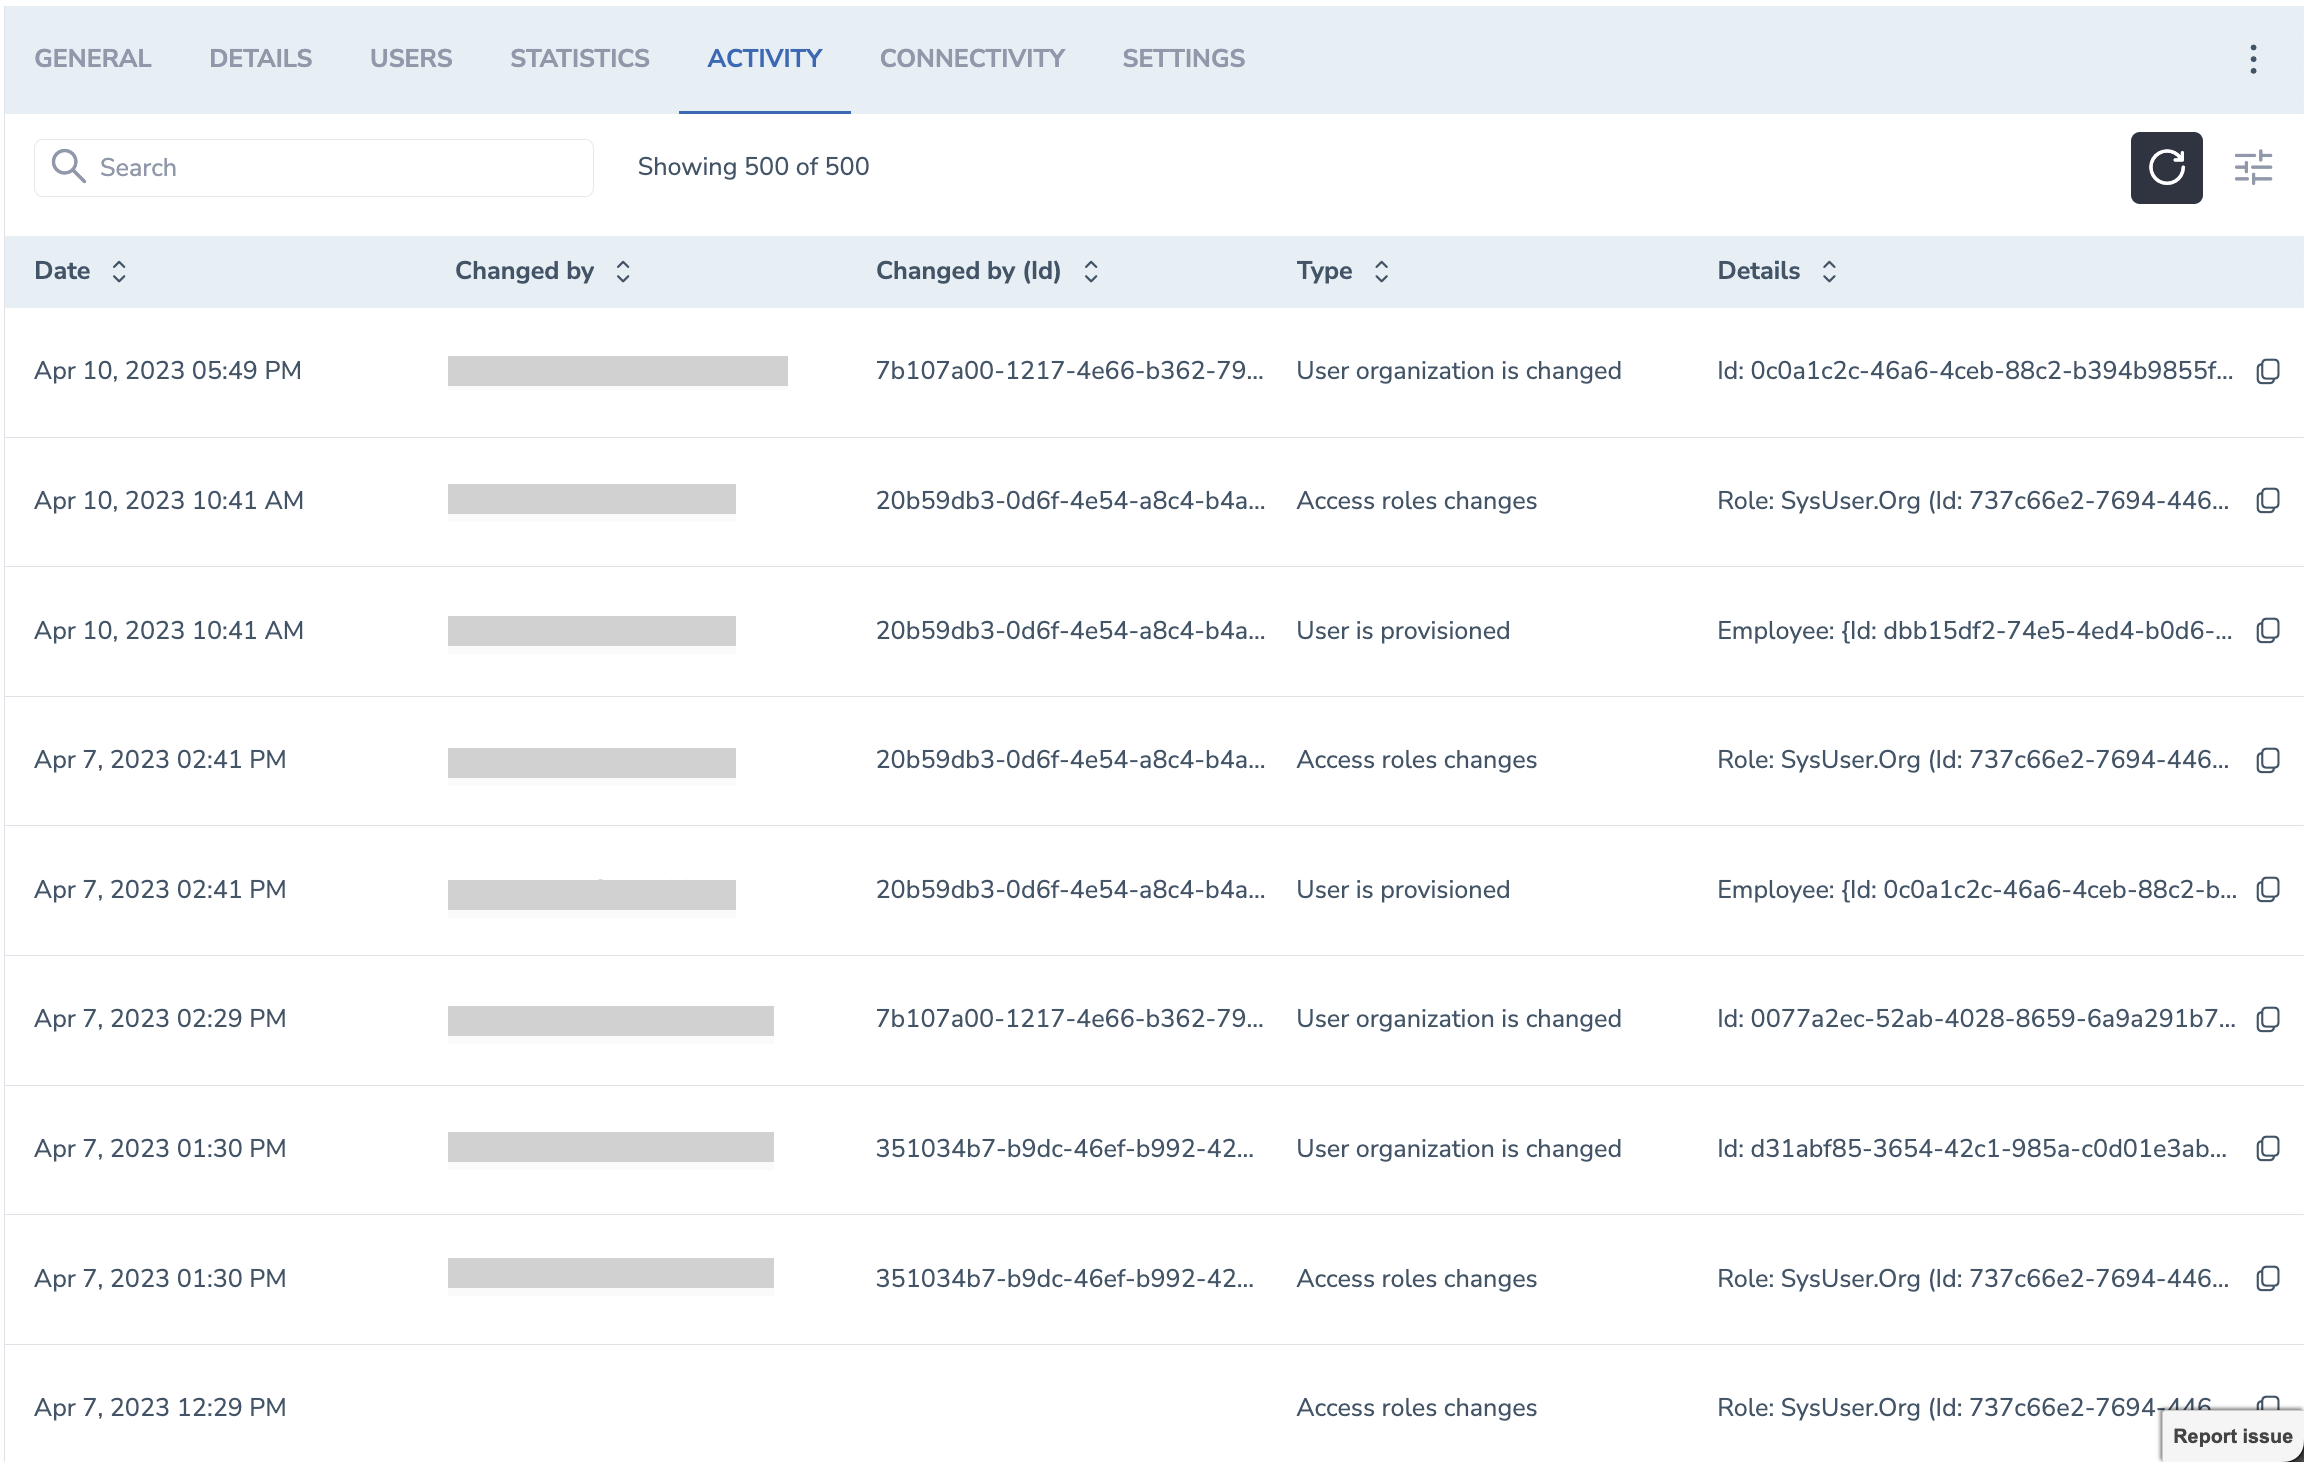
Activity – this subtab displays system activities for the current Profile
The subtab has the following columns that can be added or removed via the menu summoned by clicking the Menu icon:
-
Date
-
Changed by
-
Changed by (Id)
-
Type
-
Details. Click on the
 Copy icon to copy the activity details to the clipboard.
Connectivity – displays the type of users’ access to mailboxes and CRM.
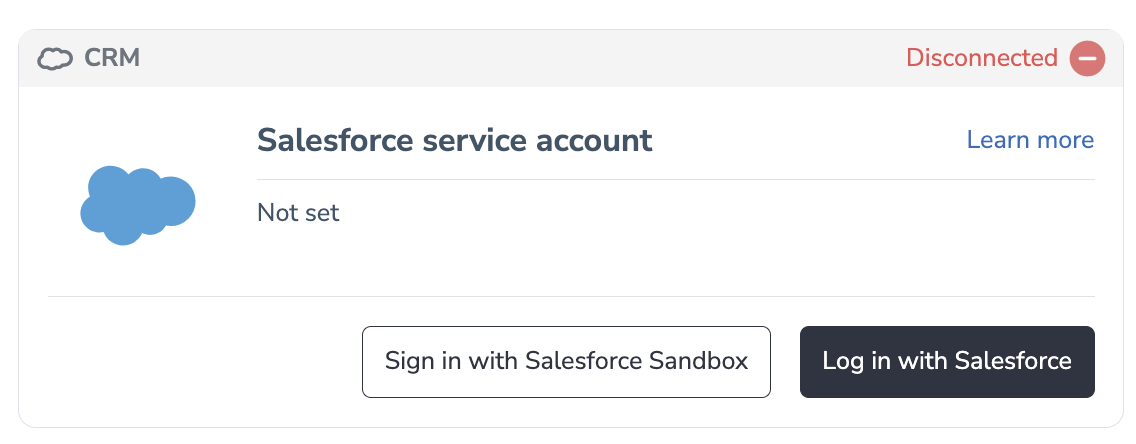
CRM In the CRM block, admins can add a Salesforce service account or Salesforce Sandbox to be used for this Profile. Refer to this article to learn how to authorize using a Salesforce service account.
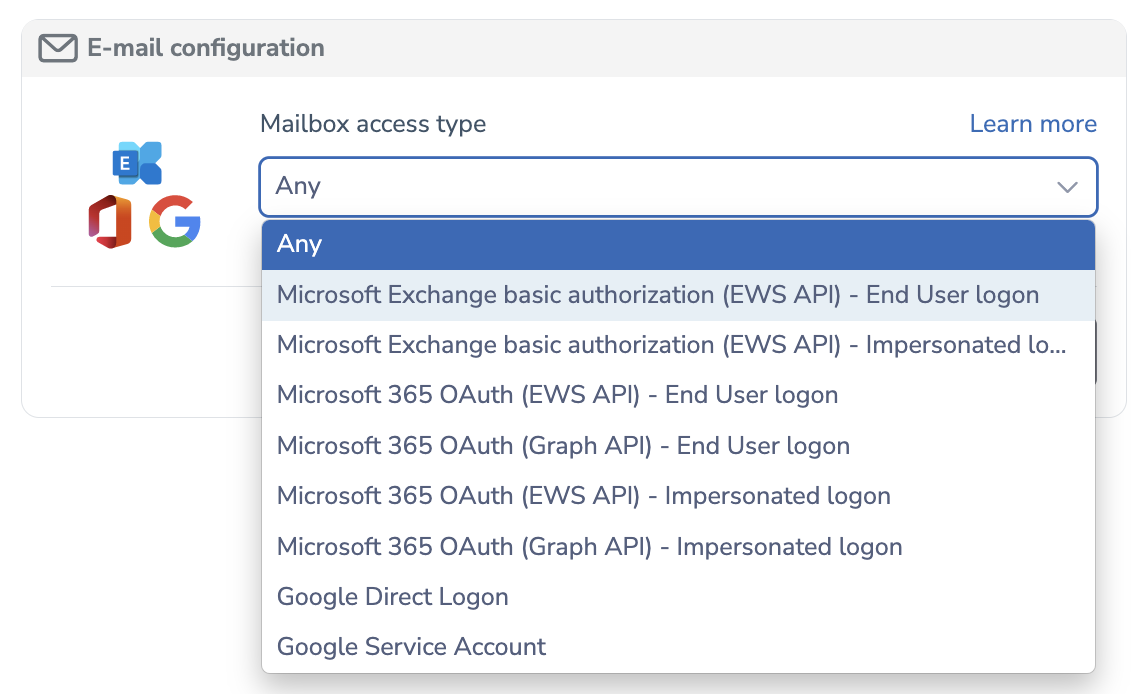
Email configuration
When a new organization is created, admins can specify the type of mailbox access to be used for its users. When the access type is selected and configured, it is applied to all users in the organization. The users can only use the defined type to access their mailboxes.
When a new Organization is created, specify the type of mailbox access to be used for the Organization’s Users. When the access type is selected and configured, it is applied to all Users in the Organization. The Users can access their mailboxes only using the chosen access type.
You can edit the user’s name and mailbox settings which were specified during the provisioning process or defined by the organization which the user belongs to.
Configuring Connection Type for a Profile
Tip
Also see this article for information on all available RG Email Sidebar full deployment scenarios
As new mailbox compatibilities and deployment scenarios are implemented, more options are added to available Mailbox Access Type options:
- Microsoft Exchange basic authorization (EWS API) - End User logon
- Microsoft Exchange basic authorization (EWS API) - Impersonated logon
- Microsoft 365 OAuth (EWS API) - End User logon
- Microsoft 365 OAuth (Graph API) - End User logon
- Microsoft 365 OAuth (EWS API) - Impersonated logon
- Microsoft 365 OAuth (Graph API) - App-only logon
- Microsoft 365 OAuth (EWS API) - App-only logon
- Google Direct Logon
- Google Service Account
Microsoft Exchange basic authorization (EWS API) - End User logon
The typical scenario where the end users enter their Exchange logon credentials in RG Email Sidebar to activate the Sync engine.
Microsoft Exchange basic authorization (EWS API) - Impersonated logon
Microsoft Exchange Impersonation is used to mass-authorize in RG Email Sidebar end users with MS Exchange mail accounts via an impersonating service account. Before setting the this access type, you must obtain the Exchange EWS URL and a configured Impersonating account’s login and password. See this article for detailed steps how to configure everything for this access type.
Important
Due to the retirement of RBAC Application Impersonation in Exchange Online, logging in via delegated authentication to accounts with impersonation permissions will soon be deprecated. To ensure a smooth transition from classic EWS Impersonation to Application Access and Graph for profiles currently using EWS Impersonation, we recommend using the Microsoft 365 OAuth (EWS API) App-only login type.
Microsoft 365 OAuth (EWS API) - End User logon
This option is used to authorize in RG Email Sidebar end users with Office 365 mail accounts over Office 365 OAuth. See this article for more information. In the latest product updates it is the default option for bulk O365 users authorization using a Service account.
Microsoft 365 OAuth (Graph API) - End User logon
This option is used to authorize in RG Email Sidebar end users with Office 365 mail accounts over MS Graph. See this article for more information. Also see this article to learn about limitations presently associated with this connection type.
Microsoft 365 OAuth (EWS API) - Impersonated logon
This option is used to mass-authorize in RG Email Sidebar end users with Office 365 mail accounts via an impersonating account. To use this access type, you must have mail server and RG Email Sidebar Admin account credentials. See this article for detailed steps how to configure everything for this access type.
Important
Due to the retirement of RBAC Application Impersonation in Exchange Online, logging in via delegated authentication to accounts with impersonation permissions will soon be deprecated. To ensure a smooth transition from classic EWS Impersonation to Application Access and Graph for profiles currently using EWS Impersonation, we recommend using the Microsoft 365 OAuth (EWS API) App-only login type.
Microsoft 365 OAuth (Graph API) - App-only access logon
This option is used to mass-authorize in RG Email Sidebar end users with Office 365 mail accounts via app-only acccess with MS Graph API. To use this access type, you must have mail server and RG Email Sidebar Admin account credentials. See this article for detailed steps how to configure everything for this access type. Also see this article to learn about limitations presently associated with this connection type.
Microsoft 365 OAuth (EWS API) - App-only logon
This option is used to mass-authorize in RG Email Sidebar end users with Office 365 mail accounts via app-only acccess with EWS API. To use this access type, you mneed to have mail server and RG Email Sidebar Admin account credentials.
Note
The Microsoft 365 OAuth (EWS API) - App-only logon access type has the same configuration steps and limitations as the Microsoft 365 OAuth (Graph API) - App-only access logon access type.
Google Direct Logon
This option is used to authorize in RG Email Sidebar end users with Gmail / Google Workspace accounts over Gmail OAuth. The users will need to authorize it individually. See this article for more information.
Google Service Account
This option is used to mass-authorize in RG Email Sidebar end users with Gmail / Google Workspace accounts. See this article for more information.
Revenue Grid Compatibility
Presently, due to data access authorization specifics, only connection types MS Exchange Direct Logon, Office 365 OAuth, Google Service Account (partial), and Google Direct Logon are supported by the full Revenue Grid solution. Via a custom workaround Revenue Grid is also compatible with MS Graph; in this scenario, Revenue Grid is configured to run over EWS tokens and Revenue Grid works over MS Graph.
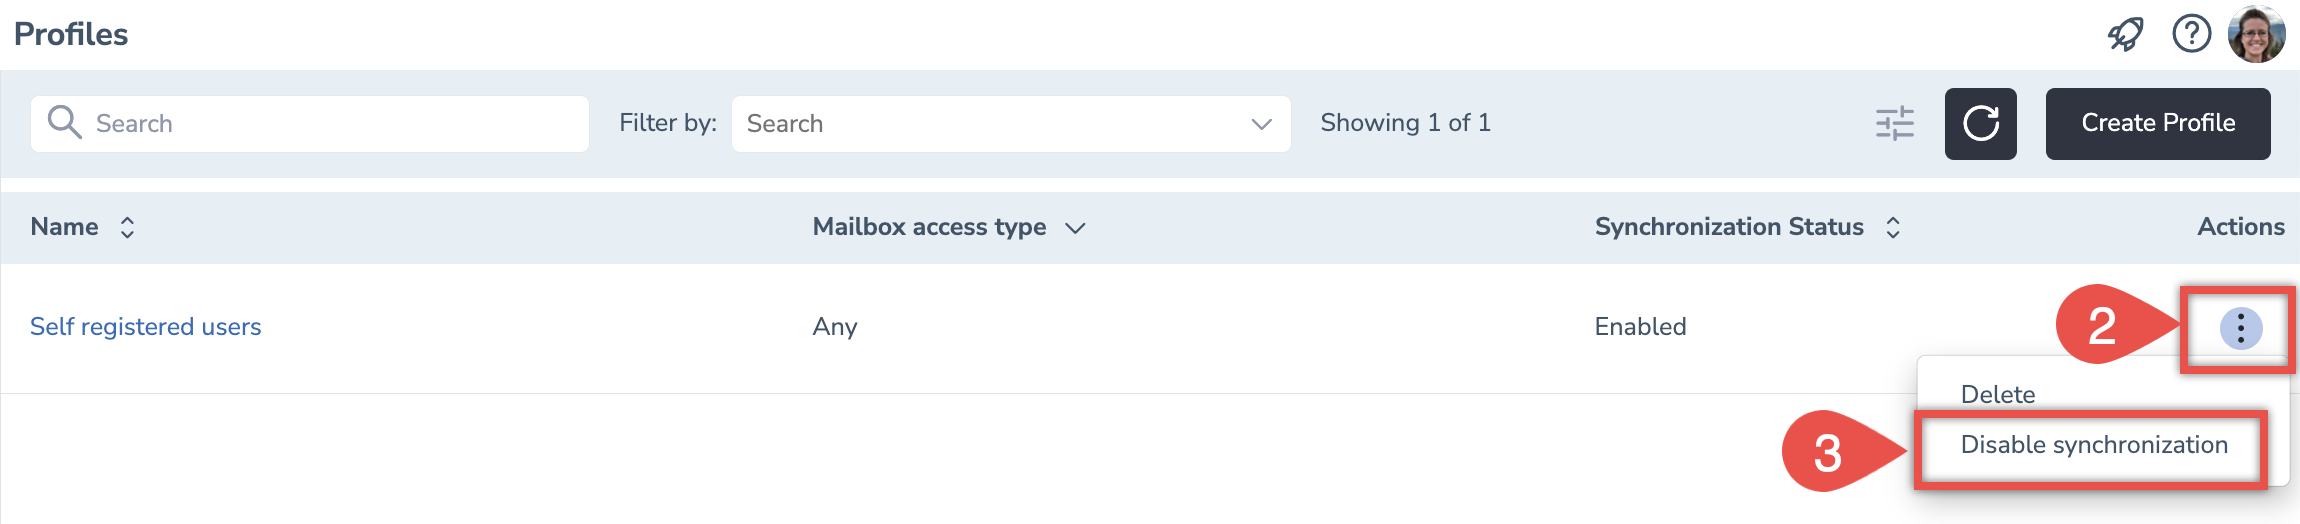
Disabling synchronization for a Profile
To disable synchronization for all users belonging to a Profile:
1. Go to the Profiles tab
2. From the list of Profiles, select the Profile you want to delete, and then click on the three dots icon in the Actions column
3. Select Disable synchronization from the list of available actions
Deleting Profiles
Please note that you can delete a Profile only if it has no users with initialized Exchange Storage. If at least one user is initialized, you must delete the user first, and then the Profile. After you delete a Profile, all users that belong to it will be irrecoverably deleted.
Also note that you cannot delete a default Profile.
To delete an existing Profile:
1. Go to the Profiles tab
2. From the list of Profiles, find the Profile you want to delete, and then click on the three dots icon in the Actions column
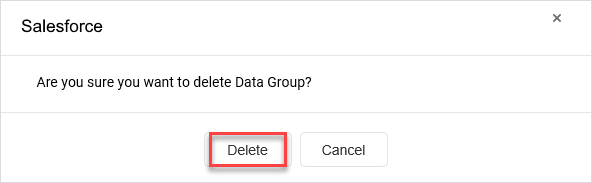
3. Select Delete from the list of available actions
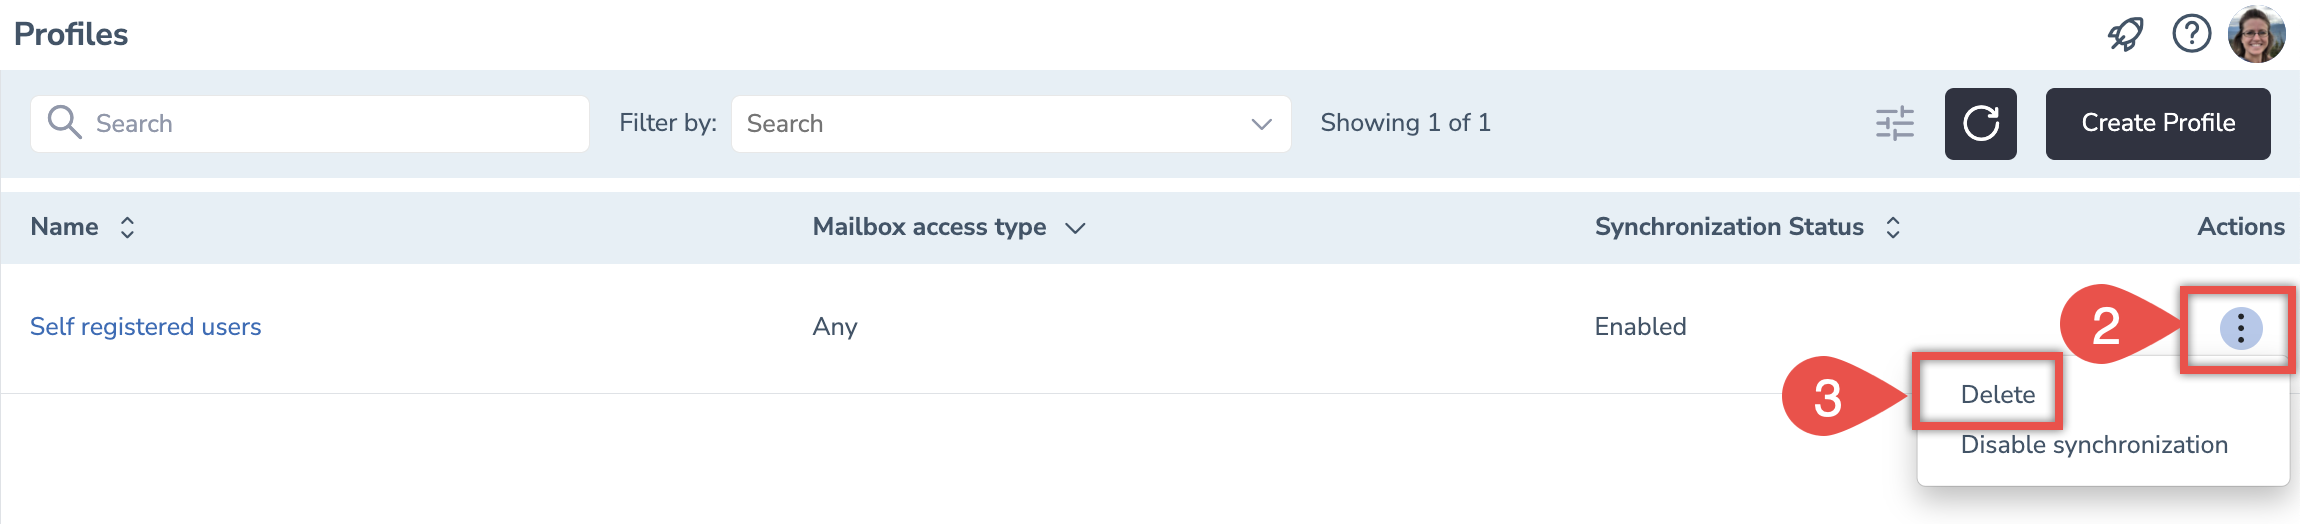
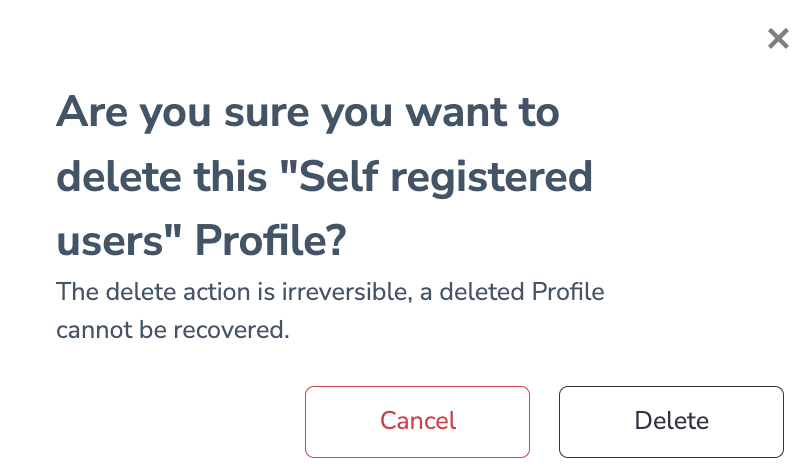
4. In the confirmation message that appears, click Delete
Managing Organizations in the lagacy Admin Panel
Important
In March 2023 release, the new Admin Panel was introduced. The support of the old Admin Panel will be ceased soon, thus we strongly encourage that our customers switch to the new Admin Panel.
To use RG Email Sidebar Admin panel, special access permissions are required. To request the permissions for your organization, contact Revenue Grid support team by email. Admin panel provides tools for managing end users and some of its key settings it includes duplicate RG Email Sidebar Customization and Sync settings on Admin level
In RG Email Sidebar Administration Panel context, an Organization is a group of Users with shared basic settings which cooperate in a shared Salesforce space.
The Organizations tab of Administration Panel provides mechanisms for defining synchronization configuration for a Profile.
Note
In the current implementation there is no way to limit the access rights for Admin Users, so an assigned Admin User can manage users belonging to all Profiles locally
Organizations List View
On the Organizations tab, you can see the following columns:
- ID (this column is hidden by default)
- Name
- Mailbox Access Type
- Synchronization Status
- Actions
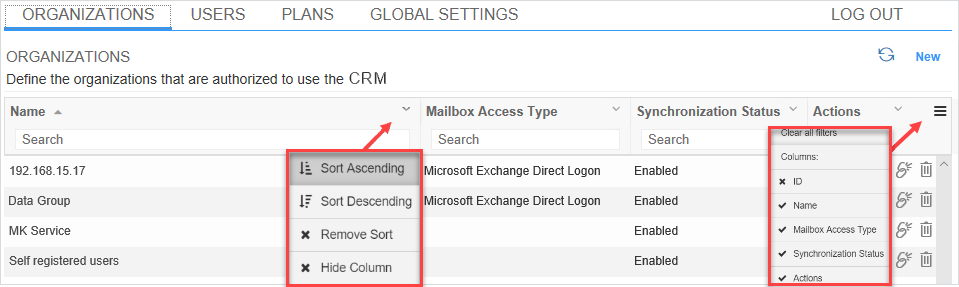
A filter by each column can be applied to the list. To do that, click the Expand more icon next to a column name and select the action you need:
- Sort Ascending
- Sort Descending
- Remove Sort
- Hide Column
Click the ☰ (Menu) icon on the right to add or remove columns; you can also clear all filters by selecting the Clear All Filters item in this menu.
Note that no bulk actions can be performed on Organizations.
If synchronization is enabled and running, organization info on the list is displayed in black font color. If synchronization is not set up or is suspended for the whole Organization – it is displayed in red font color.
Via the Organizations tab you can perform the following tasks:
- Create Organizations
- View and edit Organizations’ details
- Delete Organizations
Creating Organizations
To create an organization:
1. Go to the Organizations tab
2. In the upper right corner of the page, click New
3. Do the following:
3.1. Fill in the Name field
3.2. Fill in the External Id field (the value becomes read-only and cannot be changed later)
3.3. From the Mail Access Type picklist, select the access type used for the organization:

4. Click Save in the upper right corner to complete Org creation
Editing Organizations
To modify an organization:
1. Go to the Organizations tab
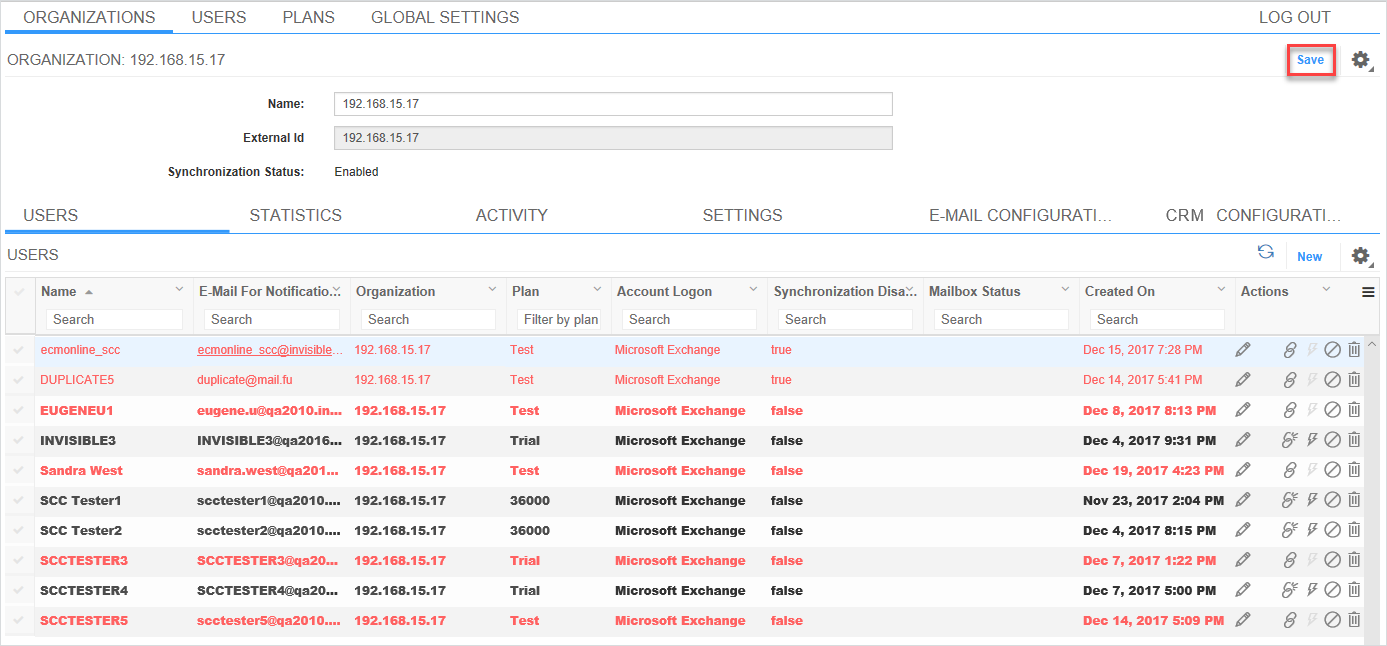
2. To edit or view an Organization, select one from the list; the following detailed information will appear:
3. Edit the necessary Org parameters
4. Click Save
Viewing Organization Subtabs
There are the following subtabs on the Organizations tab which contain relevant sets of actions.
Note
The columns in the subtabs can be added or removed via the columns actions picklist summoned by clicking the ☰ (Menu) icon
Users – the subtab displays the list of users which belong to the organization
The subtab includes a number of columns (these can be added or removed via the menu summoned by clicking the ☰ (Menu) icon).
- Name
- E-Mail for Notifications
- Organization
- Plan
- Account Logon
- Synchronization Disabled
- Mailbox Status
- Created On
- Actions. The following actions are available:
|
|
Edit User. Access and edit the User. |
|
|
Delete. Delete the User. Please note that Users with initialized mailbox cannot be deleted. |
|
|
Enable Synchronization. Enable synchronization for a User. |
|
|
Disable Synchronization. Suspend synchronization for the user. If the synchronization is suspended for an ordinary User, it can be resumed from the User Dashboard. |
|
|
Force Synchronization. Standard synchronization interval is set to 30 minutes. The user can manually trigger synchronization outside of the standard sync schedule by selecting the Force Synchronization action, but no sooner than 1 minute after the last attempt to trigger a sync. This is done to avoid service overload in case of multiple consecutive “Force sync” requests. |
|
|
Reset Mailbox. Request RG Email Sidebar to remove user customization and keep synchronization disabled. Once synchronization is enabled again, the first synchronization attempt will apply customization to the user’s mailbox. |
|
|
Check User's Exchange Impersonated Access. Appears if Exchange Impersonation is set up for a user; initiates a check of impersonated mailbox access. |


- Disabled Due To An Error (hidden by default)
- Updated On (hidden by default)
Defining Special Synchronization Settings for an Org
In the latest RG Email Sidebar updates it is possible to push specific synchronization settings to all users of an Org, or to groups of users and individual users within an Org; the users can be allowed or disallowed to adjust these settings. If you need to preset individual sync settings to different users in your Org, send us a corresponding request to our Support team.
Statistics – the subtab displays statistics about the last synchronization session for each User in the Organization
You can check all the details about the item you need by clicking it or the Open Job icon under the Actions column. The subtab has the following columns that can be added or removed via the menu summoned by clicking the ☰ (Menu) icon:
-
Job ID (hidden by default)
-
User
-
Synchronization Start Date
-
Synchronization End Date
-
Status
-
Synchronization Scope
-
Changes
-
Issues
-
Error Category (E Category)
-
Error Source (E Source)
-
Message
-
Exception (hidden by default)
-
Actions. The following actions are available:
|
|
Download Logs. Click this icon to download the session-related log (in a .zip archive). |
|
|
Open Job. Select this icon to open a session’s description and details. Read [this article]he corresponding topic for details. |


Activity – this subtab displays system activities for the current organization
To export the data with detailed activities information to a CSV file, click the Export to CSV button above the second column. Wait until the file downloads and then you may open it in Microsoft Excel.
Possible activity types are:
- Organization is created
- Organization’s synchronization is enabled
- Organization’s synchronization is disabled
The subtab has the following columns that can be added or removed via the menu summoned by clicking the ☰ Menu icon:
-
Date
-
Changed By
-
Type
-
Actions. The following action is available:
|
|
Download Logs. Click this icon to download the session-related log (in a .zip archive). |
- Changed By (ID) (hidden by default)
The Activity subtab has the number of rows to show box above the Actions column. The possible values scope is from 0 to 2000. Entering ‘0’ will display all existing rows for selected Organization; ‘60’ is the default value. After setting a value click the blue Refresh button next the box to apply the change.
Email Configuration – displays the type of users’ access to mailboxes.
When a new organization is created, specify the type of mailbox access to be used for its users. When the access type is selected and configured, it is applied to all users in the organization. The users can only use the defined type to access their mailboxes.
When a new Organization is created, specify the type of mailbox access to be used for the Organization’s Users. When the access type is selected and configured, it is applied to all Users in the Organization. The Users can access their mailboxes only using the chosen access type.
You can edit the user’s name and mailbox settings which were specified during the provisioning process or defined by the organization which the user belongs to.
Configuring Connection Type for an Organization
Tip
Also see this article for information on all available RG Email Sidebar full deployment scenarios
As new mailbox compatibilities and deployment scenarios are implemented, more options are added to available Mailbox Access Type options:
- Microsoft Exchange basic authorization (EWS API) - End User logon
- Microsoft Exchange basic authorization (EWS API) - Impersonated logon
- Microsoft 365 OAuth (EWS API) - End User logon
- Microsoft 365 OAuth (Graph API) - End User logon
- Microsoft 365 OAuth (EWS API) - Impersonated logon
- Microsoft 365 OAuth (Graph API) - App-only access logon
- Google Direct Logon
- Google Service Account

Microsoft Exchange basic authorization (EWS API) - End User logon
The typical scenario where the end users enter their Exchange logon credentials in RG Email Sidebar to activate the Sync engine.
Microsoft Exchange basic authorization (EWS API) - Impersonated logon
Microsoft Exchange Impersonation is used to mass-authorize in RG Email Sidebar end users with MS Exchange mail accounts via an impersonating service account. Before setting the this access type, you must obtain the Exchange EWS URL and a configured Impersonating account’s login and password. See this article for detailed steps how to configure everything for this access type.
Microsoft 365 OAuth (EWS API) - End User logon
This option is used to authorize in RG Email Sidebar end users with Office 365 mail accounts over Office 365 OAuth. See this article for more information. In the latest product updates it is the default option for bulk O365 users authorization using a Service account.
Microsoft 365 OAuth (Graph API) - End User logon
This option is used to authorize in RG Email Sidebar end users with Office 365 mail accounts over MS Graph. See this article for more information. Also see this article to learn about limitations presently associated with this connection type.
Microsoft 365 OAuth (EWS API) - Impersonated logon
This option is used to mass-authorize in RG Email Sidebar end users with Office 365 mail accounts via an impersonating account. To use this access type, you must have mail server and RG Email Sidebar Admin account credentials. See this article for detailed steps how to configure everything for this access type.
Microsoft 365 OAuth (Graph API) - Impersonated logon
This option is used to mass-authorize in RG Email Sidebar end users with Office 365 mail accounts via app-only access with MS Graph API. To use this access type, you must have mail server and RG Email Sidebar Admin account credentials. See this article for detailed steps how to configure everything for this access type. Also see this article to learn about limitations presently associated with this connection type.
Google Direct Logon
This option is used to authorize in RG Email Sidebar end users with Gmail / Google Workspace accounts over Gmail OAuth. The users will need to authorize it individually. See this article for more information.
Google Service Account
This option is used to mass-authorize in RG Email Sidebar end users with Gmail / Google Workspace accounts. See this article for more information.
Revenue Grid Compatibility
Presently, due to data access authorization specifics, only connection types MS Exchange Direct Logon, Office 365 OAuth, Google Service Account (partial), and Google Direct Logon are supported by the full Revenue Grid solution. Via a custom workaround Revenue Grid is also compatible with MS Graph; in this scenario, Revenue Grid is configured to run over EWS tokens and Revenue Grid works over MS Graph.
Deleting Organizations
Please note that you can delete an Organization only if it has no users with initialized Exchange Storage. If at least one user is initialized, you must delete the user first, and then the Organization. After you delete an Organization, all users that belong to it will be irrecoverably deleted.
Also note that you cannot delete a default Organization.
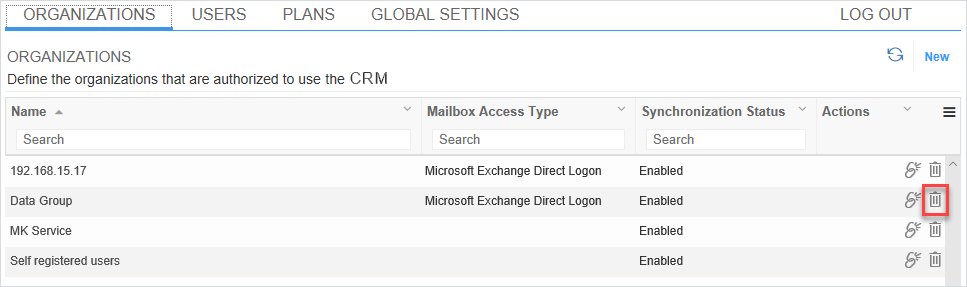
To delete an existing organization:
1. Go to the Organizations tab
2. From the list of organizations, select the organization you want to delete, and then click the Delete icon
3. In the confirmation message that appears, click Delete