Instant events sync from Salesforce to mailbox


Additional feature
Want to expand your capabilities? You can add this feature to your current license on request. An additional fee may be required. Contact Revenue Grid support to learn more.
Introduction
One of the features included in the Revenue Grid Salesforce managed package is the instant down-sync of calendar items from Salesforce to Microsoft Outlook.
This feature enables Revenue Grid Email Sidebar end users to automatically sync newly created Salesforce events with the email client’s calendar in real time. Note that instant syncing is triggered only when Salesforce events are created.
After creation, the calendar item is down-synced to the user’s Outlook calendar within several minutes—usually within 5 minutes. However, this interval can be adjusted to match your organization’s needs by submitting a request to the Revenue Grid support team.
This feature works for Microsoft Exchange or Microsoft 365 mailboxes connected over Exchange Web Services (EWS) or Microsoft Graph, as well as for Gmail mailboxes.
After installing the Revenue Grid managed package in an organization, the admin must configure the instant calendar events down-sync from Salesforce to the email client separately, as described in this article.
Note
By default, the refresh token for this feature expires 30 days after the connection. The connection refresh procedure should be performed every 30 days. If required, the expiration period can be extended by sending a request to the Revenue Grid support team.
Prerequisites
To configure the instant sync of events, you need to request the following information from the Revenue Grid support team:
- ClientID
- ServerSyncTenantUrl
This information is required for the configuration steps described below.
Tip
You can also retrieve your ServerSyncTenantUrl by following the instructions on How to generate tenant URLs.
Instant sync configuration
Install the Revenue Grid Salesforce managed package
To enable instant sync of events, you must install the latest Revenue Grid package in your Salesforce organization. The package publisher, InvisibleCRM, is a legacy Revenue Grid brand.
-
The latest version of the managed package:
For installation and setup instructions, see Revenue Grid managed package & Salesforce visual components setup.
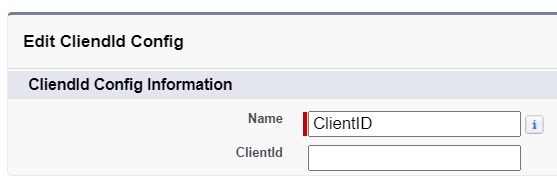
Add the custom setting “ClientID”
-
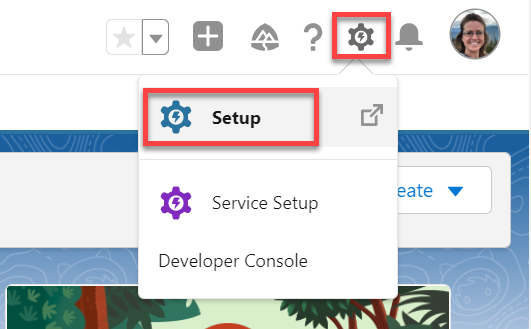
Click the gear icon, and select Setup.
-
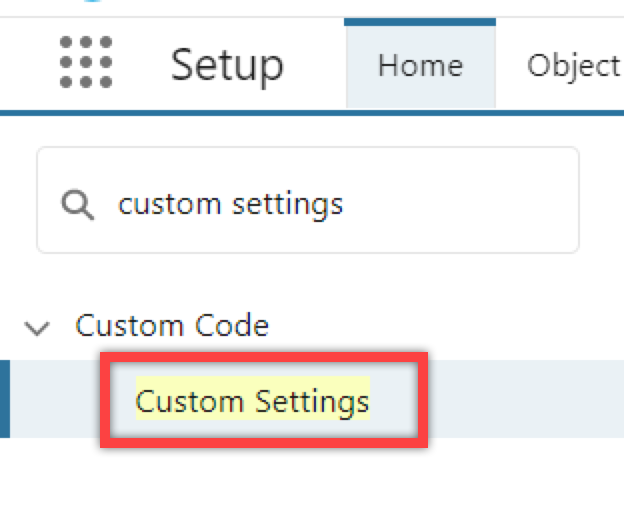
In the Quick Find box, enter Custom Settings.
-
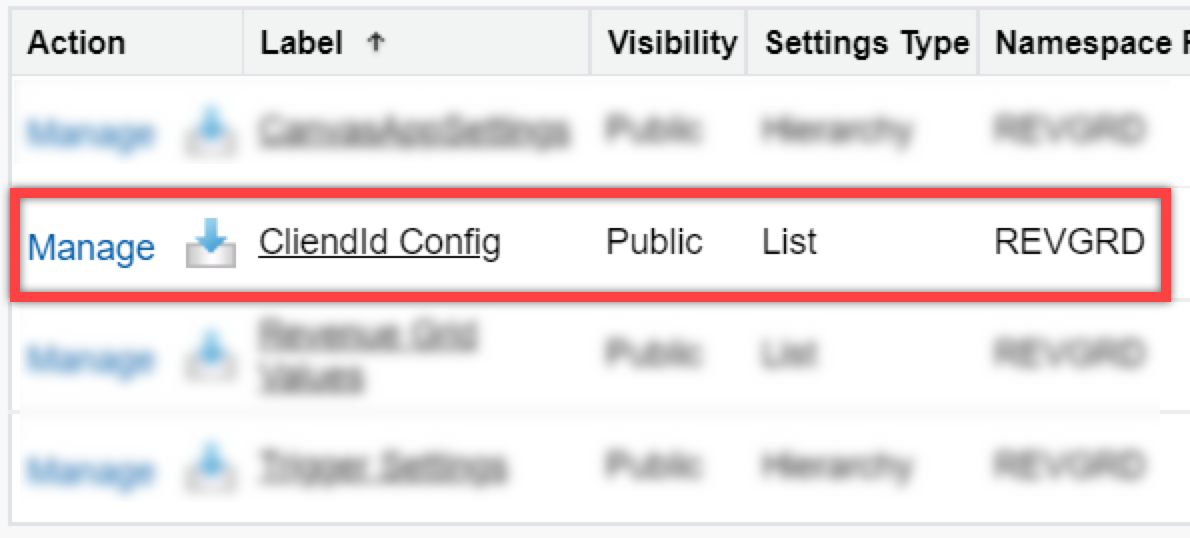
In the list, locate the CliendId Config setting and click Manage next to it.
-
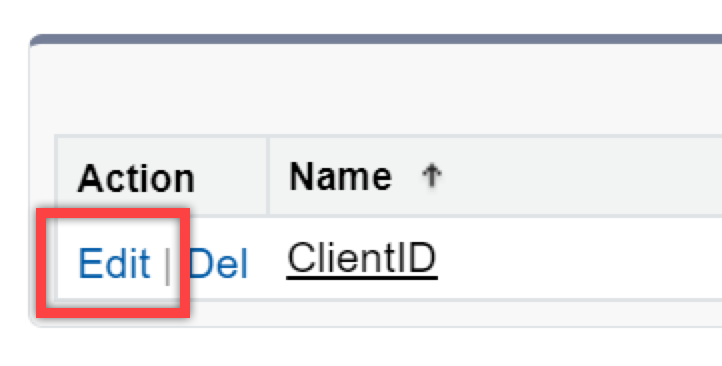
On the CliendId Config page, click Edit.
-
Paste the ClientID value provided by the Revenue Grid support team into the corresponding field.
-
Click Save.
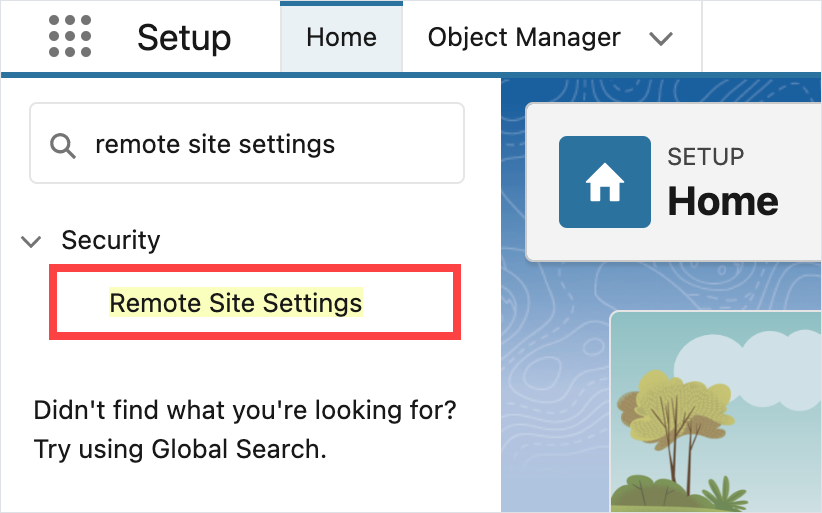
Add a new remote site
-
In the Quick Find box, enter Remote Site Settings.
-
Click Remote Site Settings in the search results.
-
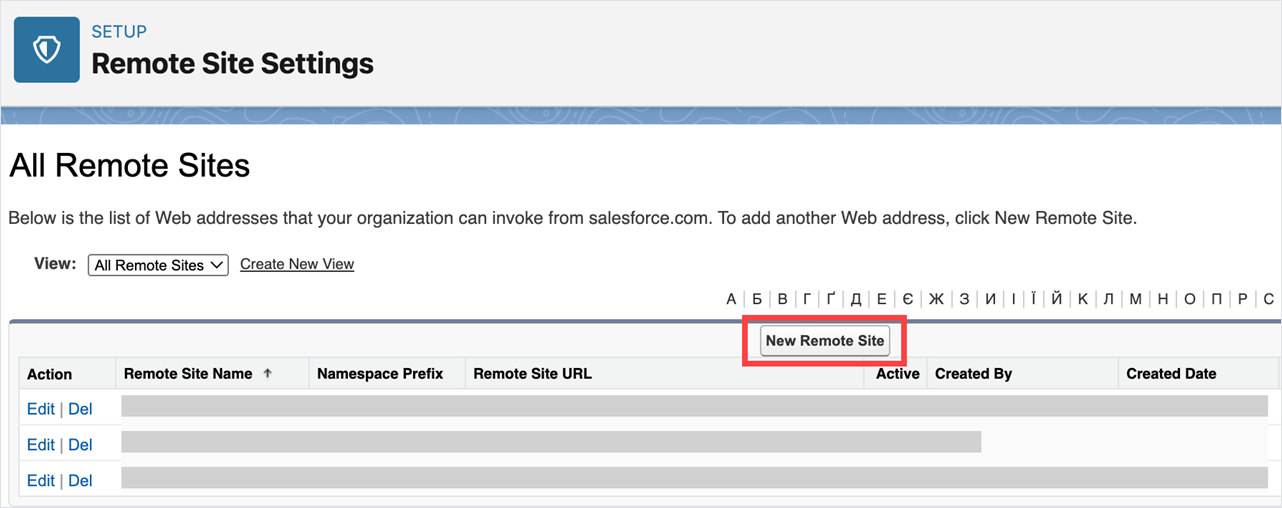
Click New Remote Site.
-
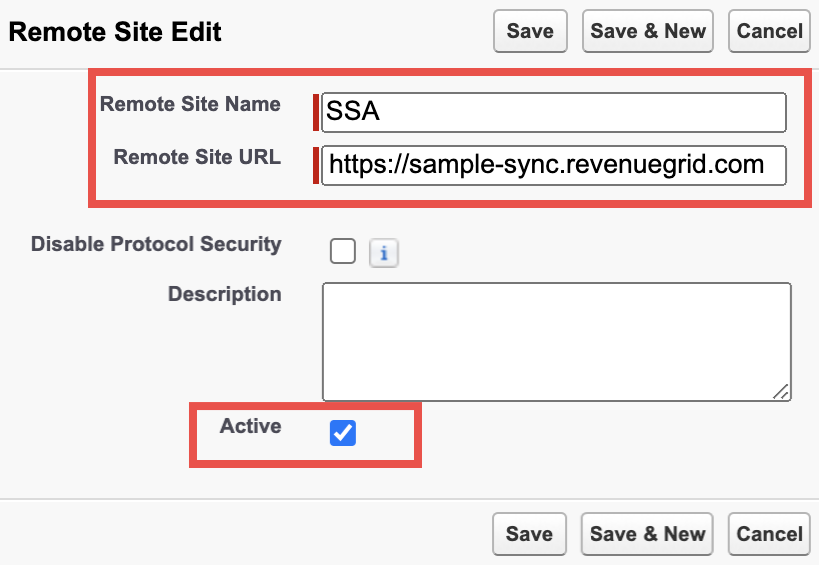
Fill in the required fields:
- Remote Site Name: SSA
- Remote Site URL: Enter the ServerSyncTenantUrl provided by the Revenue Grid support team (e.g.,
https://sample-sync.revenuegrid.com). - Select the Active checkbox.
-
Click Save.
Connect Revenue Grid to your Salesforce configuration
-
Open the App Launcher.
-
In the search field, enter Connect RG.
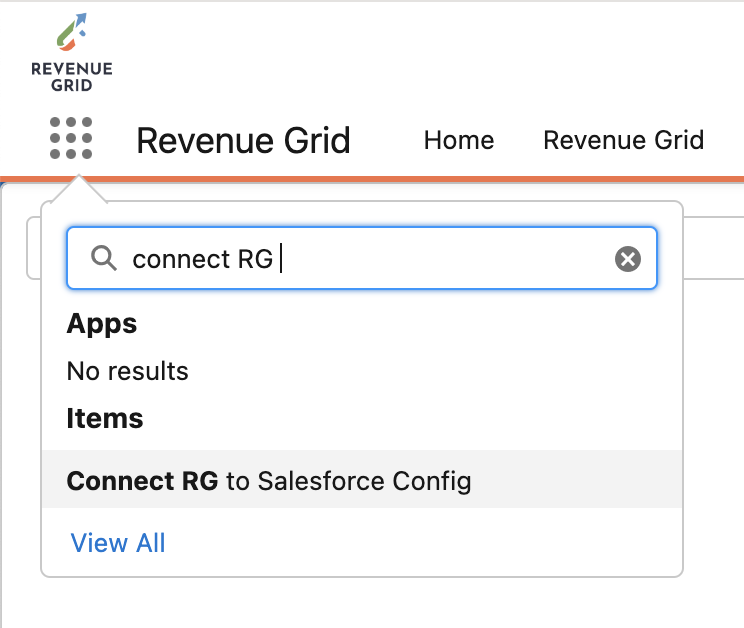
-
In the Enter your tenant URL here… field, enter the ServerSyncTenantUrl provided by the support team and click Connect.

-
In the Salesforce OAuth window that appears, log in with Salesforce credentials to authorize data access.
Once connected, the instant sync of calendar items from Salesforce to Outlook should function as expected.
Refresh RG to Salesforce Config connection
In the default configuration, the refresh token expires 30 days after the connection. Admins must re-connect RG to the Salesforce configuration every 30 days.
Tip
If required, the refresh token expiration period can be extended. To learn more, send a request to the Revenue Grid support team.
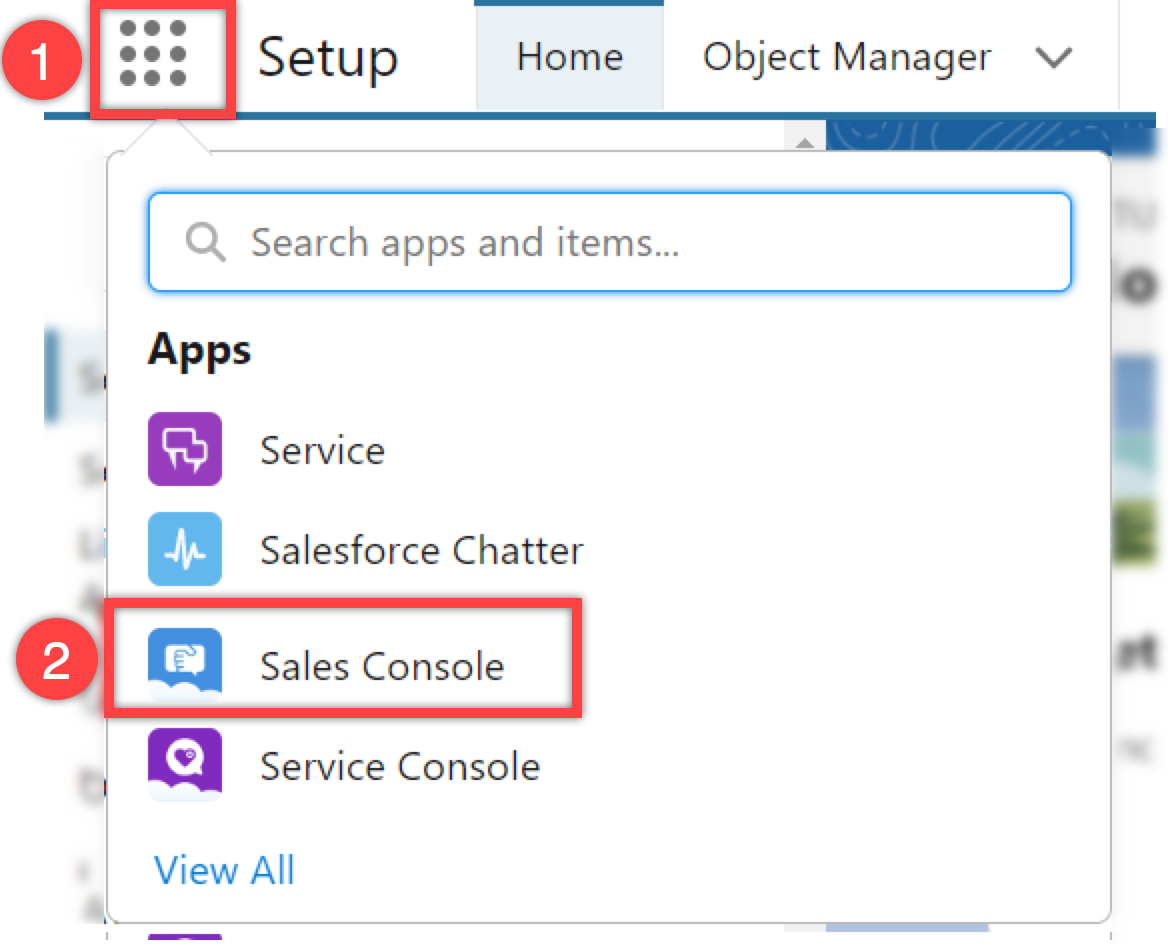
- Open the App Launcher.
-
Select Sales Console.
-
Open the navigation menu and select Connect RG to Salesforce Config.
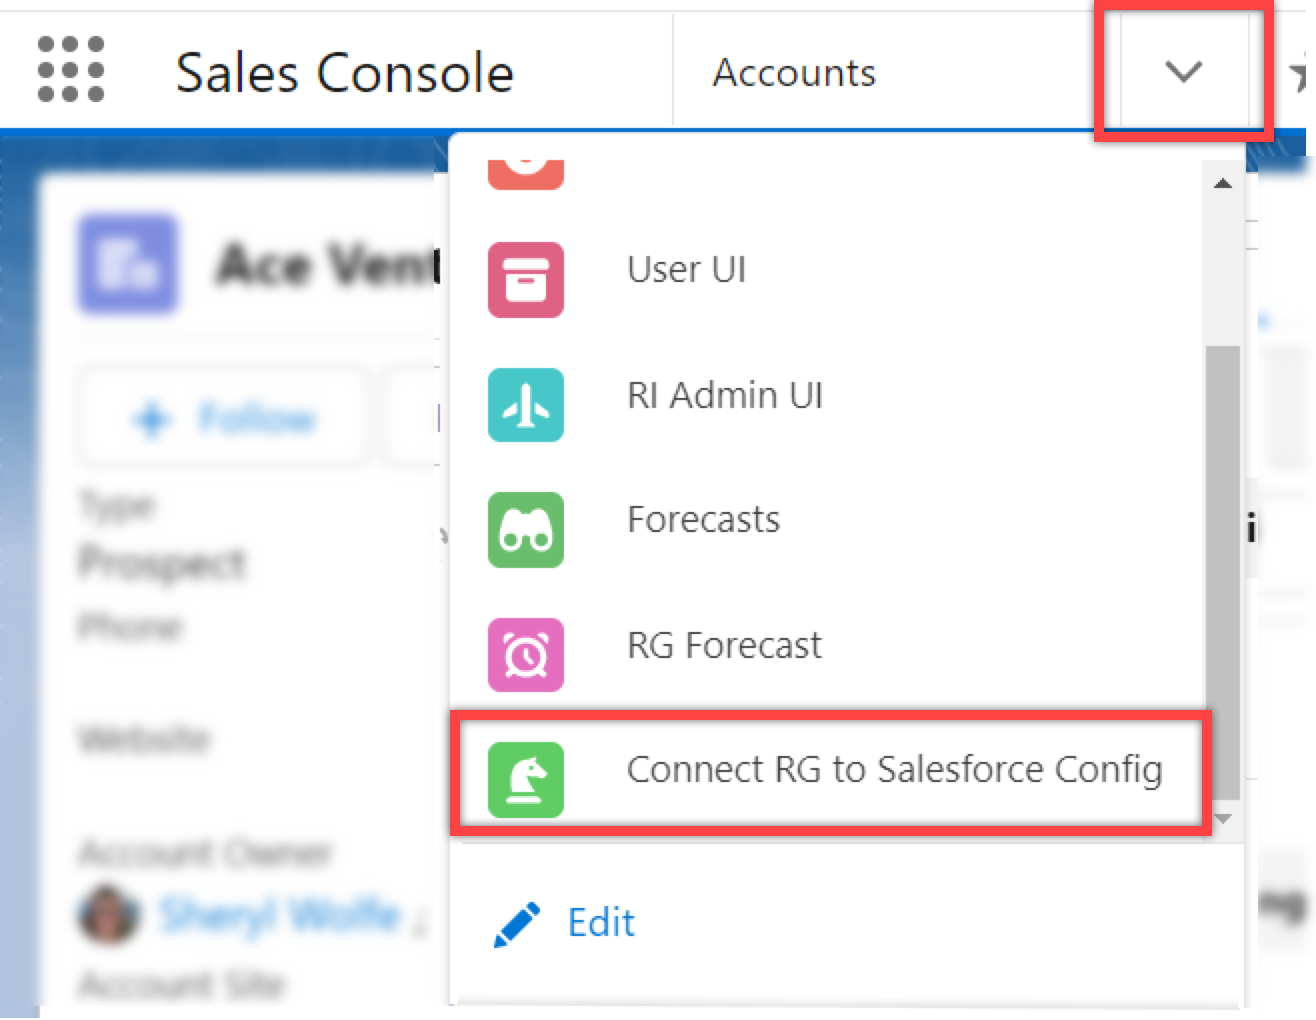
- If the option is not visible, follow the instructions in Troubleshooting issues with instant events sync.
-
In the window that opens, click Disconnect. A green Disconnected status will appear.

-
In the Enter your tenant URL here… field, enter the ServerSyncTenantUrl and click Connect.
-
In the Salesforce OAuth window, log in with Salesforce credentials to authorize access.
Important
Due to the technical behavior of the Salesforce API, multiple login attempts may be required. You might see the following error:
OAuth Error: We can’t authorize you … OAUTH_APPROVAL_ERROR_GENERIC
Please ignore the error and continue login attempts until you see the green confirmation message “Connected.”
In some cases, you may successfully log in but not see the “Connected” message. If this happens, click Connect again and repeat the login attempts until the green confirmation appears.
After the connection is restored, instant sync should resume as expected.
Note: It may take up to 1 hour for the system to begin detecting changes. Events created, updated, or deleted during this time may not be synced instantly.
Instant sync fine-tuning
By default, instant sync is triggered when an event is created, updated, or deleted. You can fine-tune the behavior and choose to disable sync for specific actions, such as event creation or deletion.
For more information, see Fine-tuning instant sync from Salesforce to mailbox.