How To Add Revenue Grid Widgets in Salesforce
8 min read
In the context of Salesforce user interface, a Revenue Grid / RG Email Sidebar widget is a visual representation of your CRM and business communication data rendered via Salesforce Canvas app pane. Sales management widgets normally include detailed Salesforce information on Lead, Contact, or Opportunity engagement status, sales reports, conversion/win rate, average deal size, revenue, etc. A Sales management widget allows Sales Managers to monitor the performance of their sales teams with the help of accurate metrics. What is more, sales widgets can help sales reps analyze their progress and see what else they should do to meet their quota.
There are several types of sales widgets: sales representative widgets, sales manager widgets, deal performance widgets, and more.
Revenue Grid’s Sales Widgets allow you to instantly view how well your team is engaging with important deals or Opportunities that need a fast reply, and make sure you act right on opportunities with no planned activities or old Opportunities with no recent activities.
The configurable widgets offered by Revenue Grid are based on Salesforce native Canvas App technology. Refer to this Salesforce article for the list of web browsers officially compatible with Salesforce Canvas widgets.
Specific RG Email Sidebar widgets that can be added to Salesforce interface:
- RGES user Sidebar
- Opportunity records
- Contact records
- Lead records
- Sync settings and Sync config
- RGES Admin panel for Admin users
Refer to this Revenue Grid Docs article to get a notion of what each of these widgets looks like.
Also see this dedicated article to learn how to configure personalized widgets sets for different users or set up the widgets for a Salesforce Admin user.
In addition to that, you may add to your Salesforce the widgets Engagement and Signals specific for the full Revenue Grid revenue intelligence package. See this article for complete information.
How To Configure RG Email Sidebar Widgets in Salesforce
Stage 1: Configuration Prerequisites
RG Email Sidebar Widgets setup is based on several essential Salesforce configuration prerequisites. Omitting either one of these prerequisites will result in errors. See this article for information on troubleshooting different widgets configuration errors.
Note
All configuration actions are performed via a local Salesforce Admin account. All these adjustments are guaranteed to be secure under Revenue Grid Privacy and Security policies
1.1. First and foremost, submit a request that you intend to configure RGES Salesforce widgets to our support team. In the request, make sure to specify what widgets are going to use: RG Email Sidebar ones and/or Revenue Grid ones. This way you’ll get the ServerSyncTenantUrl and RevenueGridTenantUrl parameters required for the setup. Alternatively, you can generate the tenant URLs following the step-by-step instruction in this article
1.2. Next, you should enable My domain for your Salesforce Org, as described in this article
1.3. Install Revenue Grid managed package for your Org. See this article to learn how to do that
1.4. As soon as the prerequisites are configured, proceed to setup Stages 2 and 3 described below
Stage 2: Setup Steps
Tip
Please perform Stage 2 steps most accurately, since a mistake here is likely to result in misconfiguration issues
2.1. Set up tenant URLs
Before setting up tenant URls, you need to generate the URLs. To do this, follow the steps described in this article.
2.1.1. Switch to Lightning Experience as described in this Salesforce article
2.1.2. Click the Gear (Setup Menu) icon in the upper right corner of the page to open Salesforce Setup menu
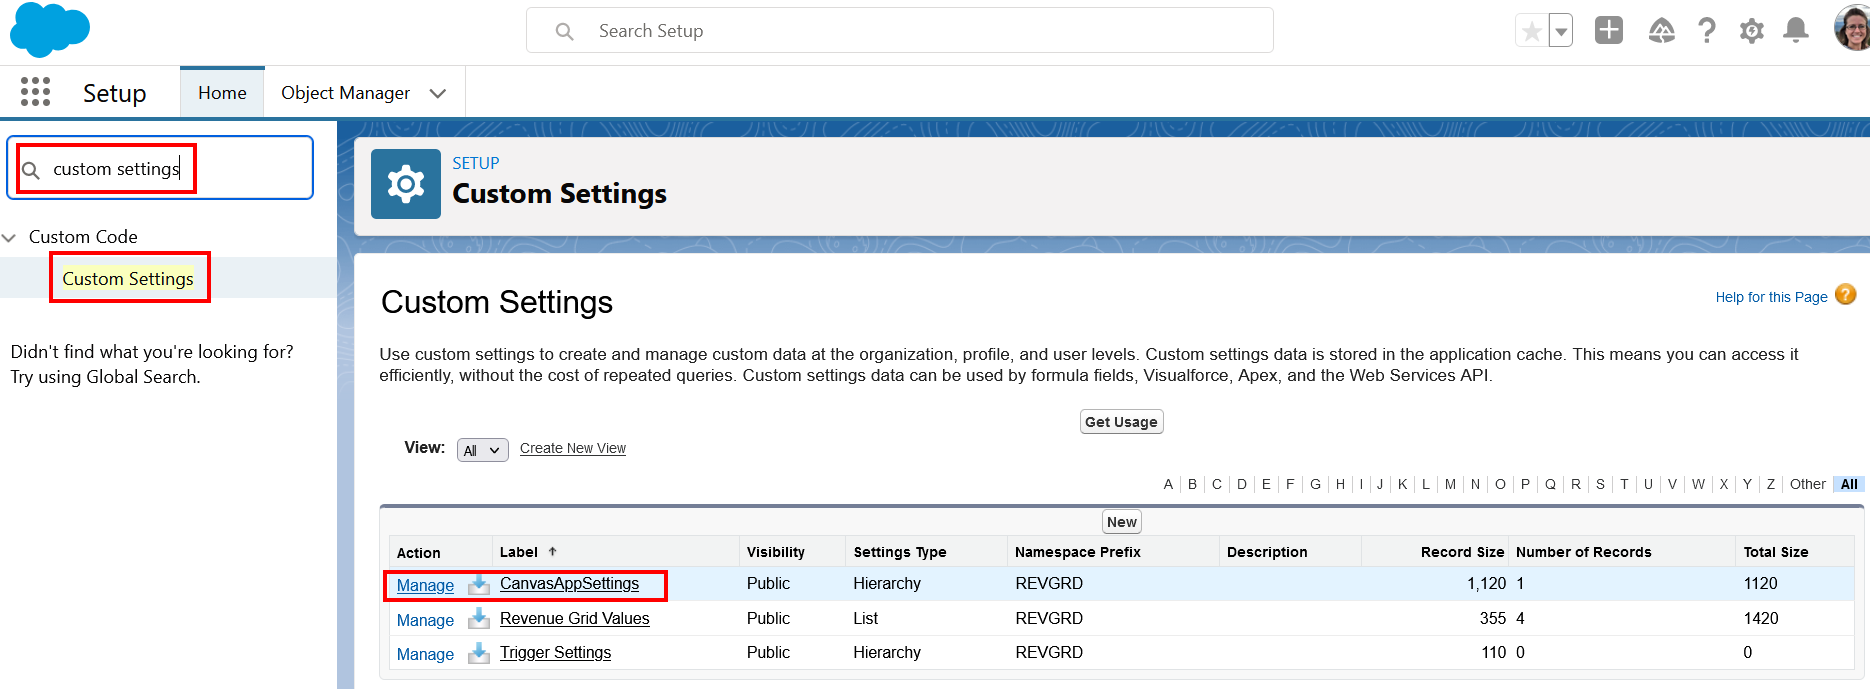
2.1.3. In the Quick Search field in the upper left corner, type “custom settings” to quickly find the necessary settings category and click on it
2.1.4. In the “Custom Settings” pane on the right, click Manage next to CanvasAppSettings
The other two REVGRD Custom settings items Revenue Grid Values and Trigger Settings should be left intact.
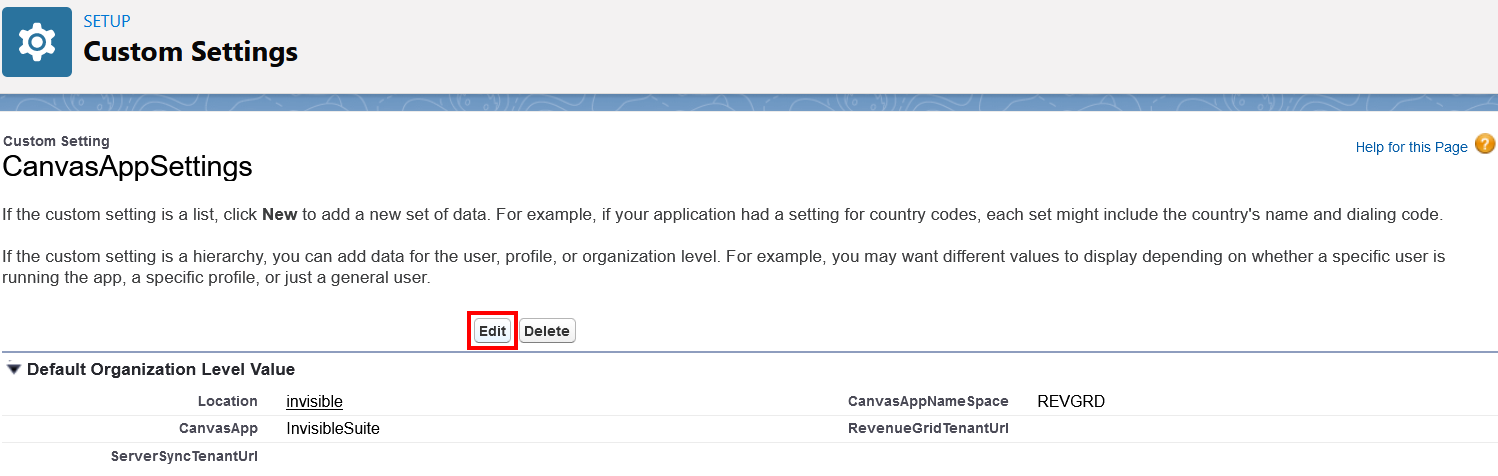
2.1.5. Next, click Edit for CanvasAppSettings
>>> Click to see a screenshot <<<
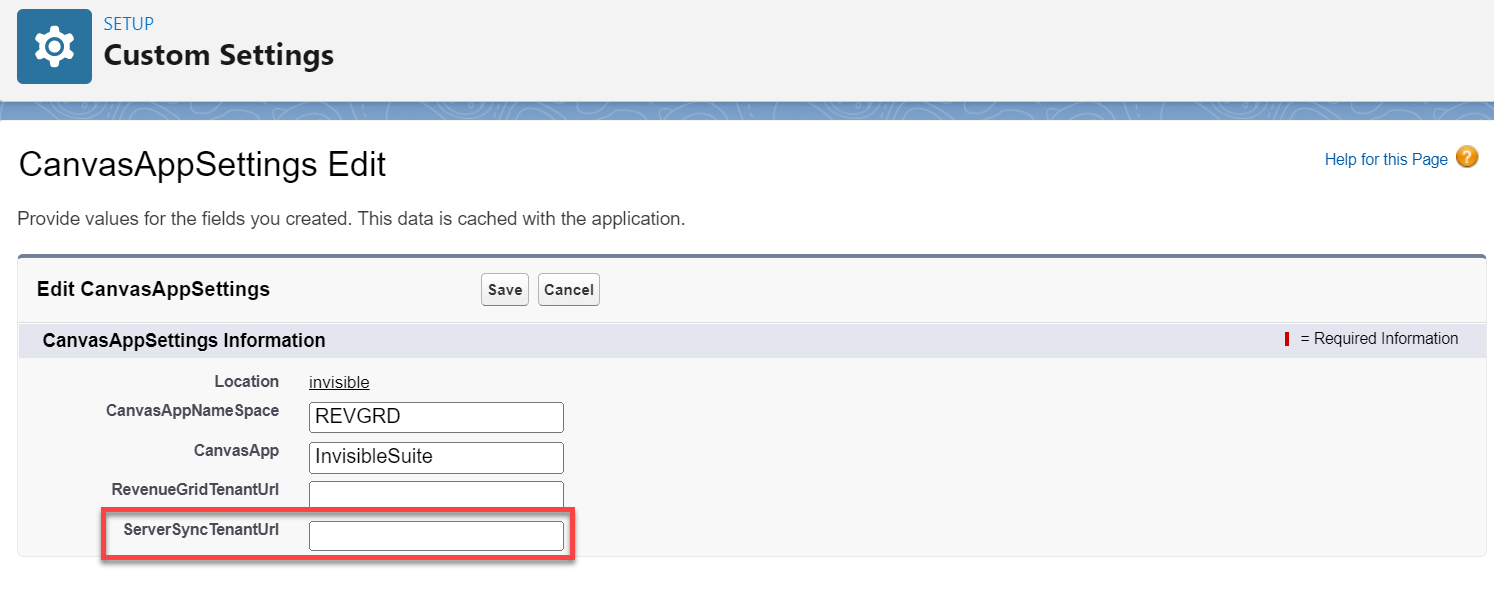
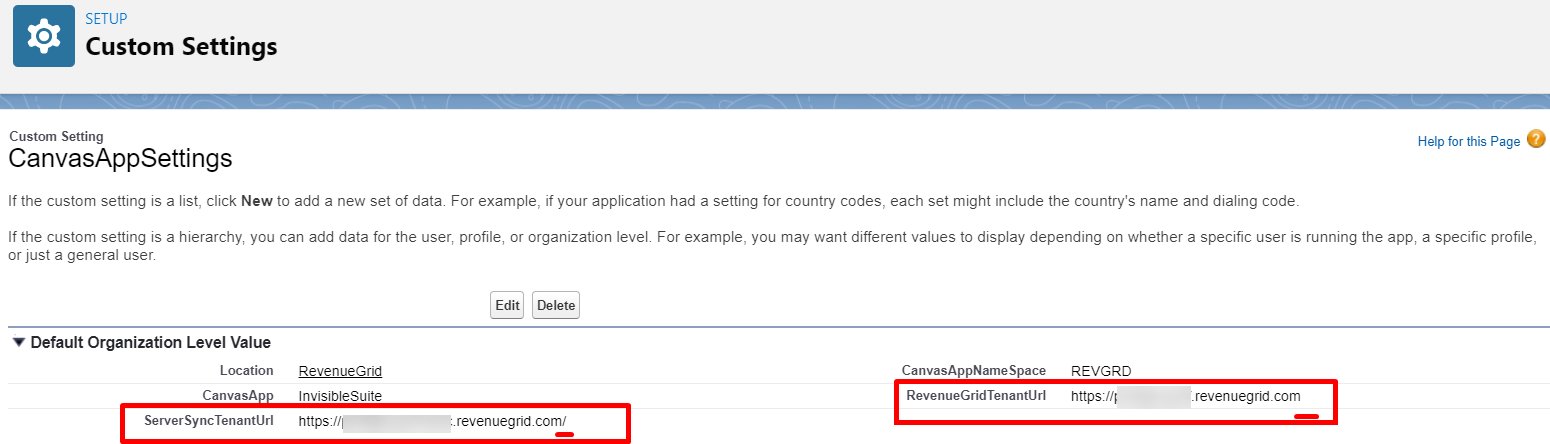
2.1.6. Edit the value of the field ServerSyncTenantUrl used for RG Email Sidebar widgets rendering
2.1.7. Insert the corresponding URL you generated or received from RG Email Sidebar Support team at Stage 1 into the field
Important
Make sure there is a slash / character at the end of the ServerSyncTenantUrl value. Otherwise, the users won’t get RGES Widget content with no issue cause indication
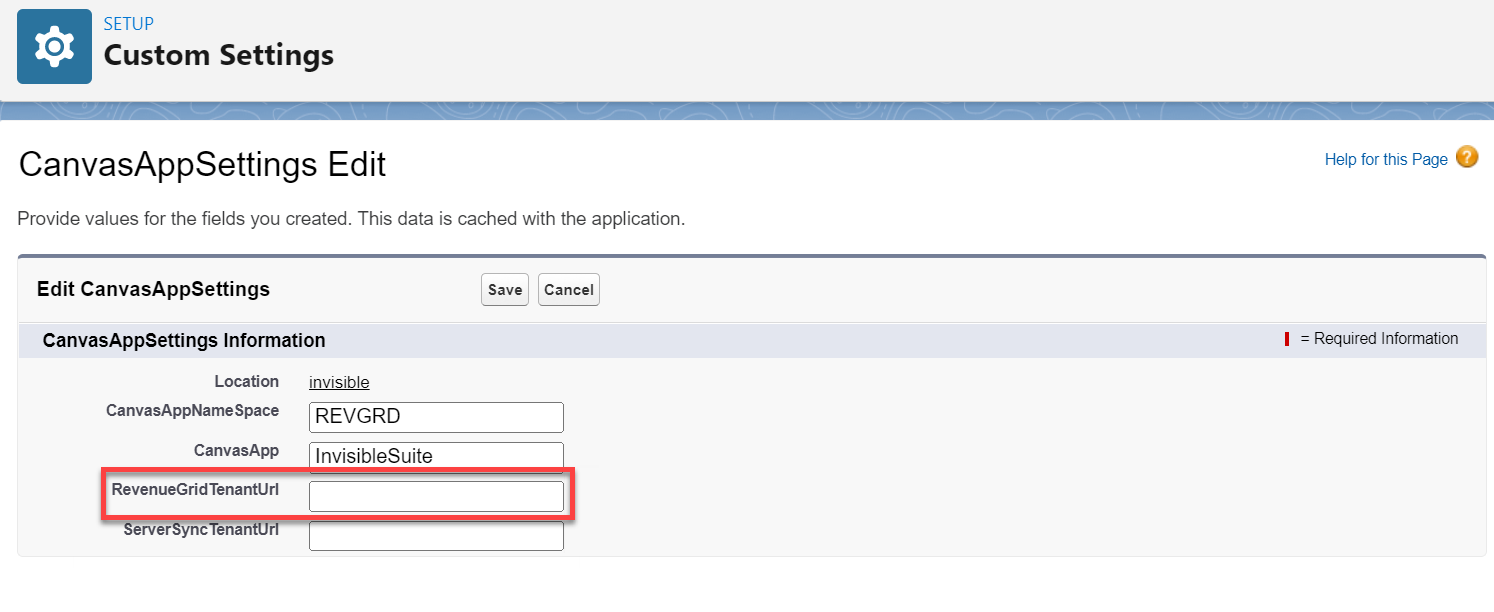
2.1.8. Edit the value of the field RevenueGridTenantUrl used for Revenue Grid widgets rendering
2.1.9. Insert the corresponding URL you generated or received from RG Email Sidebar Support team at Stage 1 into the field
Important
Make sure there is no slash / character at the end of the RevenueGridTenantUrl value. Otherwise, the users won’t get Revenue Grid Widget content with no issue cause indication
2.1.10. Click Save at the top of the page to apply the changes
>>> Click to see a screenshot <<<

The resulting setup should look as follows:
2.2. Set up users authorization
2.2.1. Switch to Lightning Experience as described in this Salesforce article
2.2.2. Click the Gear (Setup Menu) icon in the upper right corner of the page to open Salesforce Setup menu
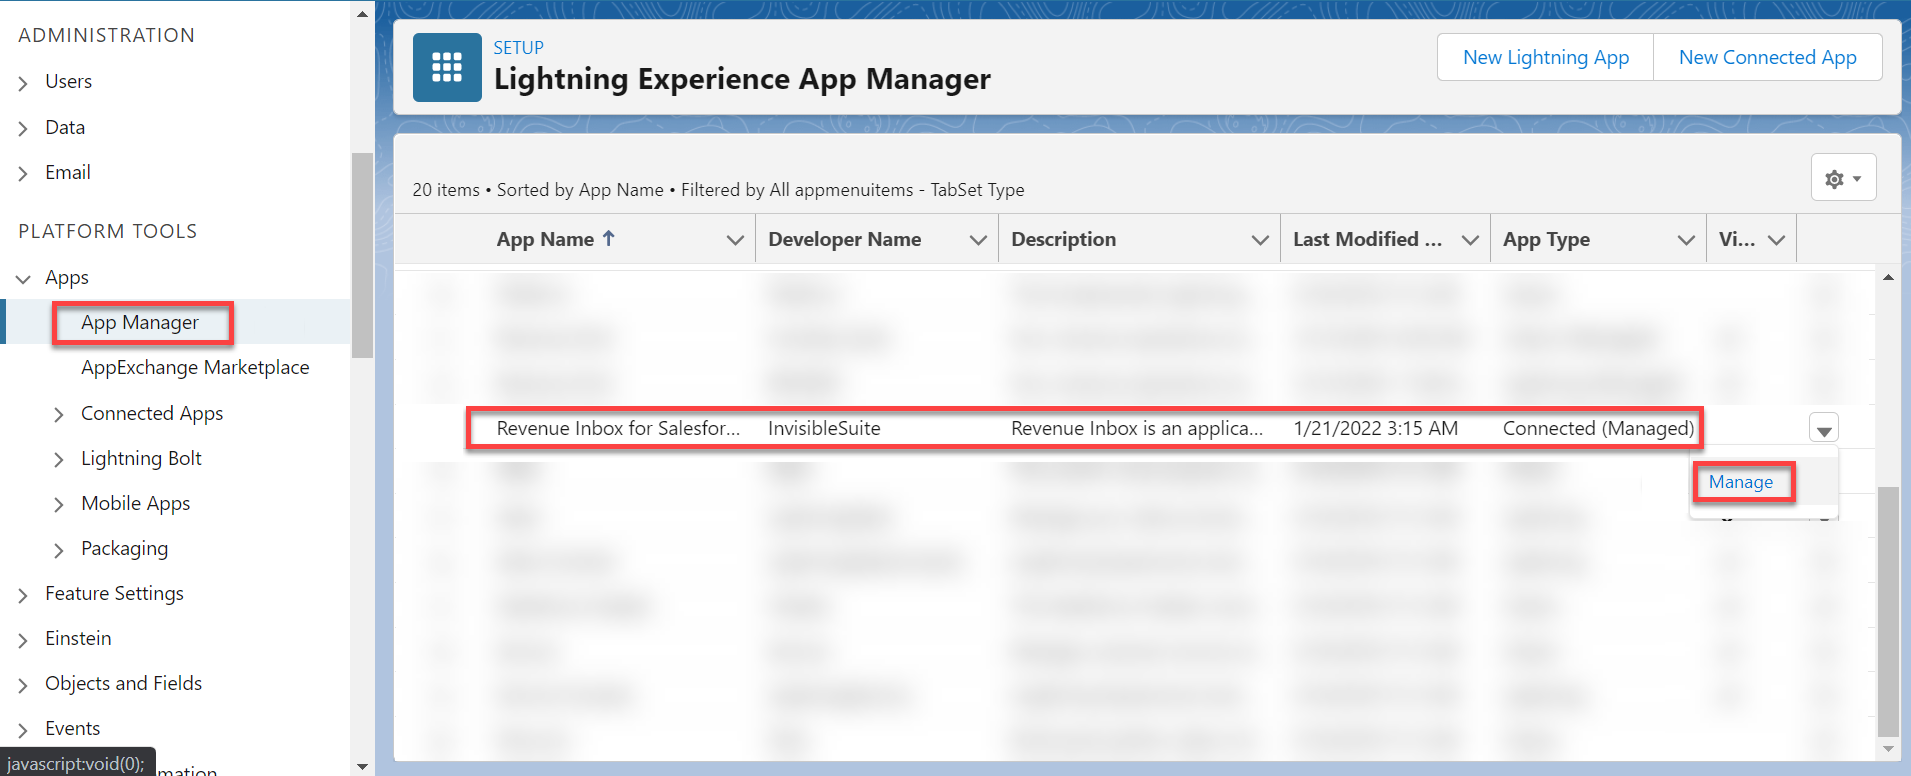
2.2.3.In the Quick Search field in the upper left corner, type “App Manager” to quickly find the necessary setting
2.2.4. Click Manage next to InvisibleSuite App that has a Type Connected (Managed)
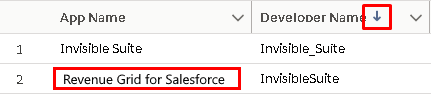
Tip
In case you cannot find the needed item on the list, sort the list by Developer Name and look for Revenue Grid for Salesforce
2.2.5. On the App’s page, click Edit Policies
2.2.6. Set the value Admin approved users are pre-authorized in the picklist Permitted Users
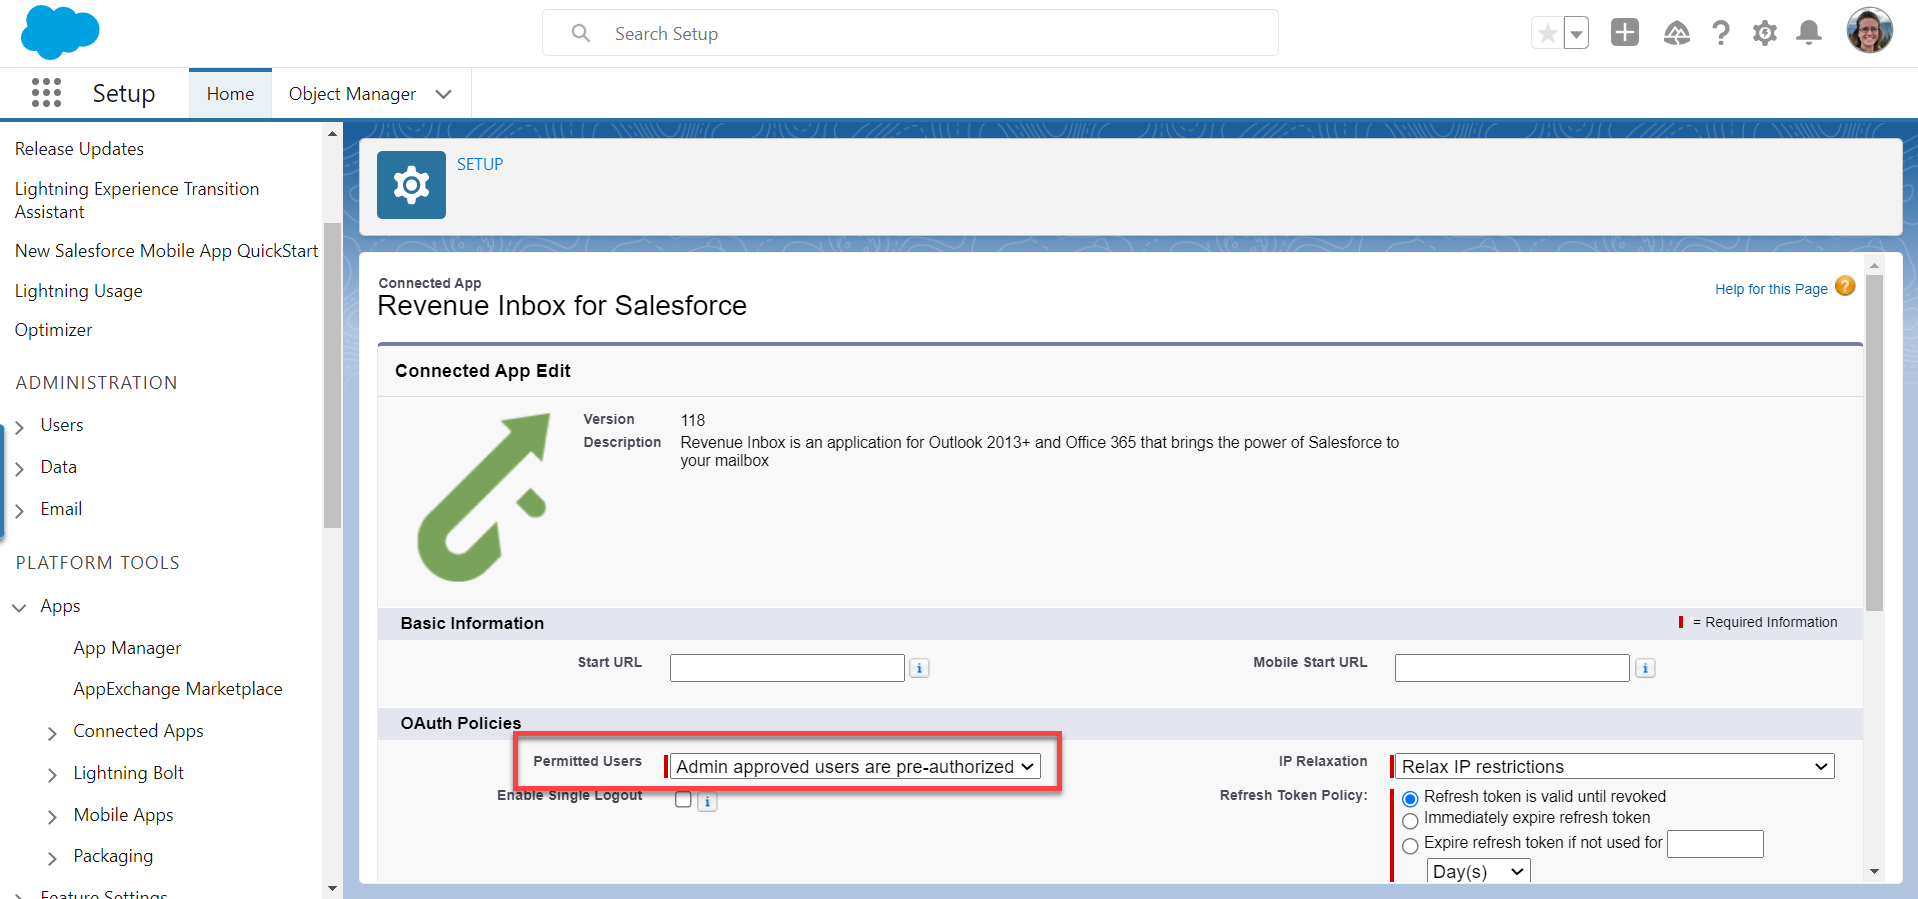
2.2.7. Click Save to apply the changes
2.3. Set up User profiles
2.3.1. Switch to Lightning Experience as described in this Salesforce article
2.3.2. Click the Gear (Setup Menu) icon in the upper right corner of the page to open Salesforce Setup menu
2.3.3. In the Quick Search field in the upper left corner, type “App Manager” to quickly find the necessary setting
2.3.3. Click Manage next to InvisibleSuite App that has a Type Connected (Managed)
2.3.4. Click Manage Profiles on the App’s page
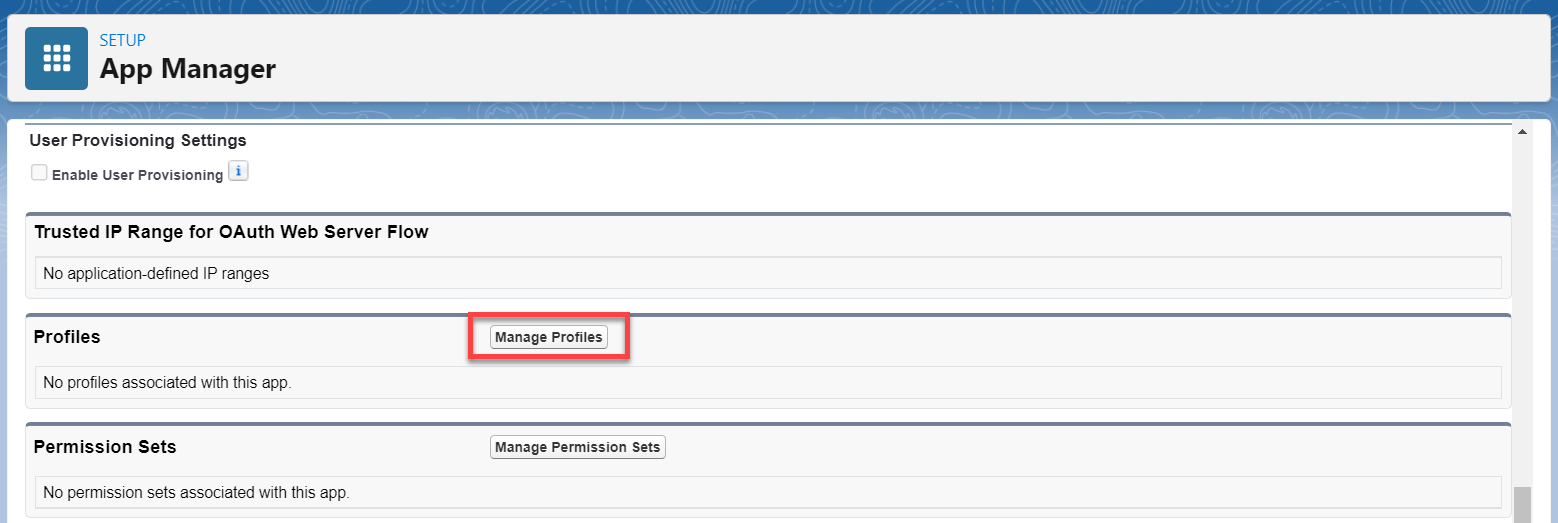
2.3.5. Then select the checkboxes of the User Profiles for which the application will be installed. Normally, Standard Users would be the targeted profiles among other profiles. It’s recommended to choose System Administrators as well
2.3.6. Click Save button to apply the changes
2.4. Finalizing setup in Salesforce User Interface
At this stage end users need to get RG Widgets mounted in their Salesforce user interface.
Admin Panel and RGES User Sidebar widgets
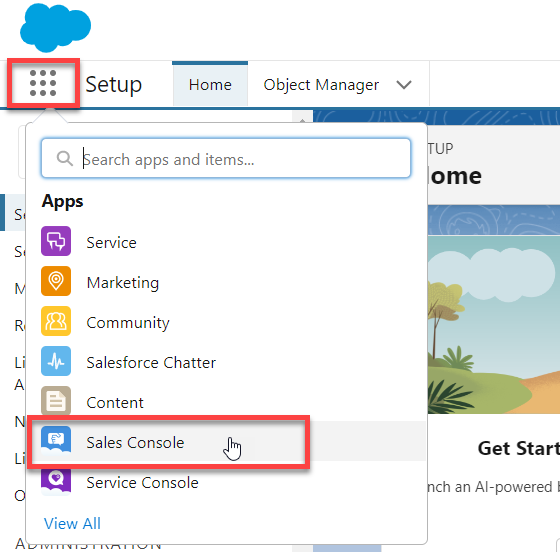
2.4.1. In the upper right-hand corner, open App Launcher, select Sales Console from the drop-down list that appears
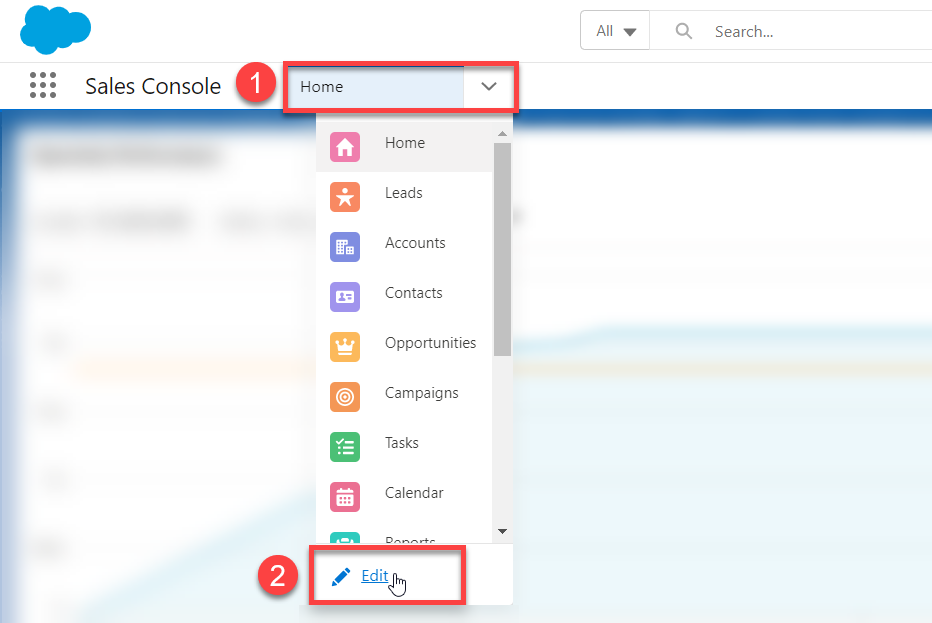
2.4.2. On the new Sales Console page that opens, find the Navigation panel. Click on the down arrow (1). On the drop-down menu, click the Edit button (2)
2.4.3. After that click Add More Items

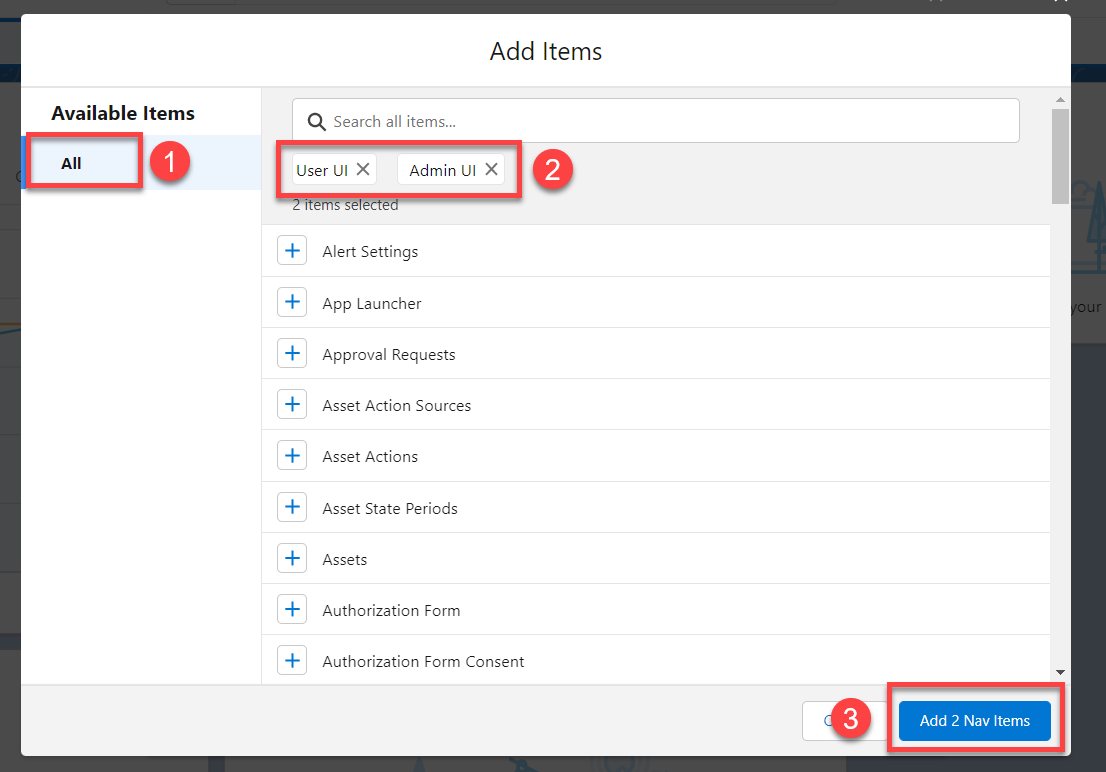
2.4.3. Click All (1) in Available Items
2.4.4. Select the checkboxes Admin UI and RGES User UI (2) in the list; they are added after Managed Package installation at an earlier step
2.4.5. Click the button Add 2 Nav Items (3) at the bottom
2.4.6. Apply the modifications by clicking Save
>>> Click to see a screenshot <<<
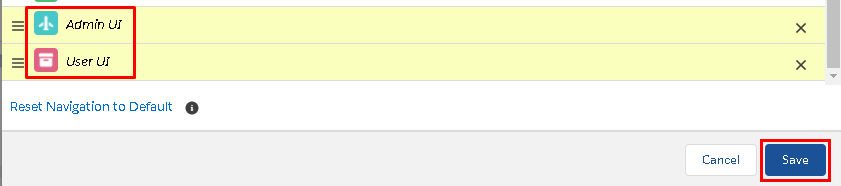
2.4.7. Both Admin UI (Admin Panel) and User UI (RGES User Sidebar) tabs are now available on the navigation bar
Contact, Lead, and Opportunity Widgets Setup
Note
The same procedure is used for Contact, Lead, or Opportunity records’ layout adding in Salesforce user interface. The steps are identical
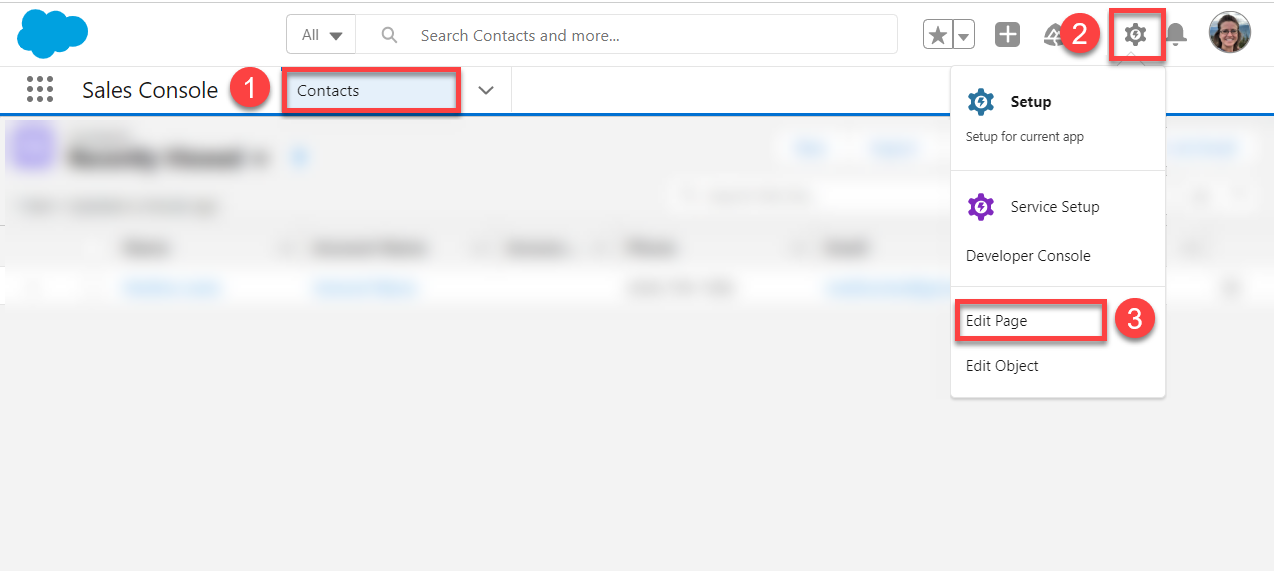
1. Switch to Lightning Experience, as described in this Salesforce article. Depending on the widgets you would like to add, go to Contact, Lead, or Opportunity tab in the navigation pane
2. Click the Gear (Setup Menu) icon in the upper right corner of the page to open Salesforce Setup menu
3. Select Edit Page in the menu
After you get to the Lightning App Builder page, you can modify the page’s layout to include Revenue Grid widgets.
4. Scroll to the bottom of the list in the pane on the left to get to Visualforce item
5. Click Visualforce and drag-and-drop this item to the central area:
>>> Click to see a screenshot <<<
6. Set the functionality for this particular frame emerging from Revenue Grid by selecting the necessary widget from the drop-down list “Visualforce Page Name” (1). The selected widget will appear in the Visualforce component on the page (2)
>>> Click to see a screenshot <<<
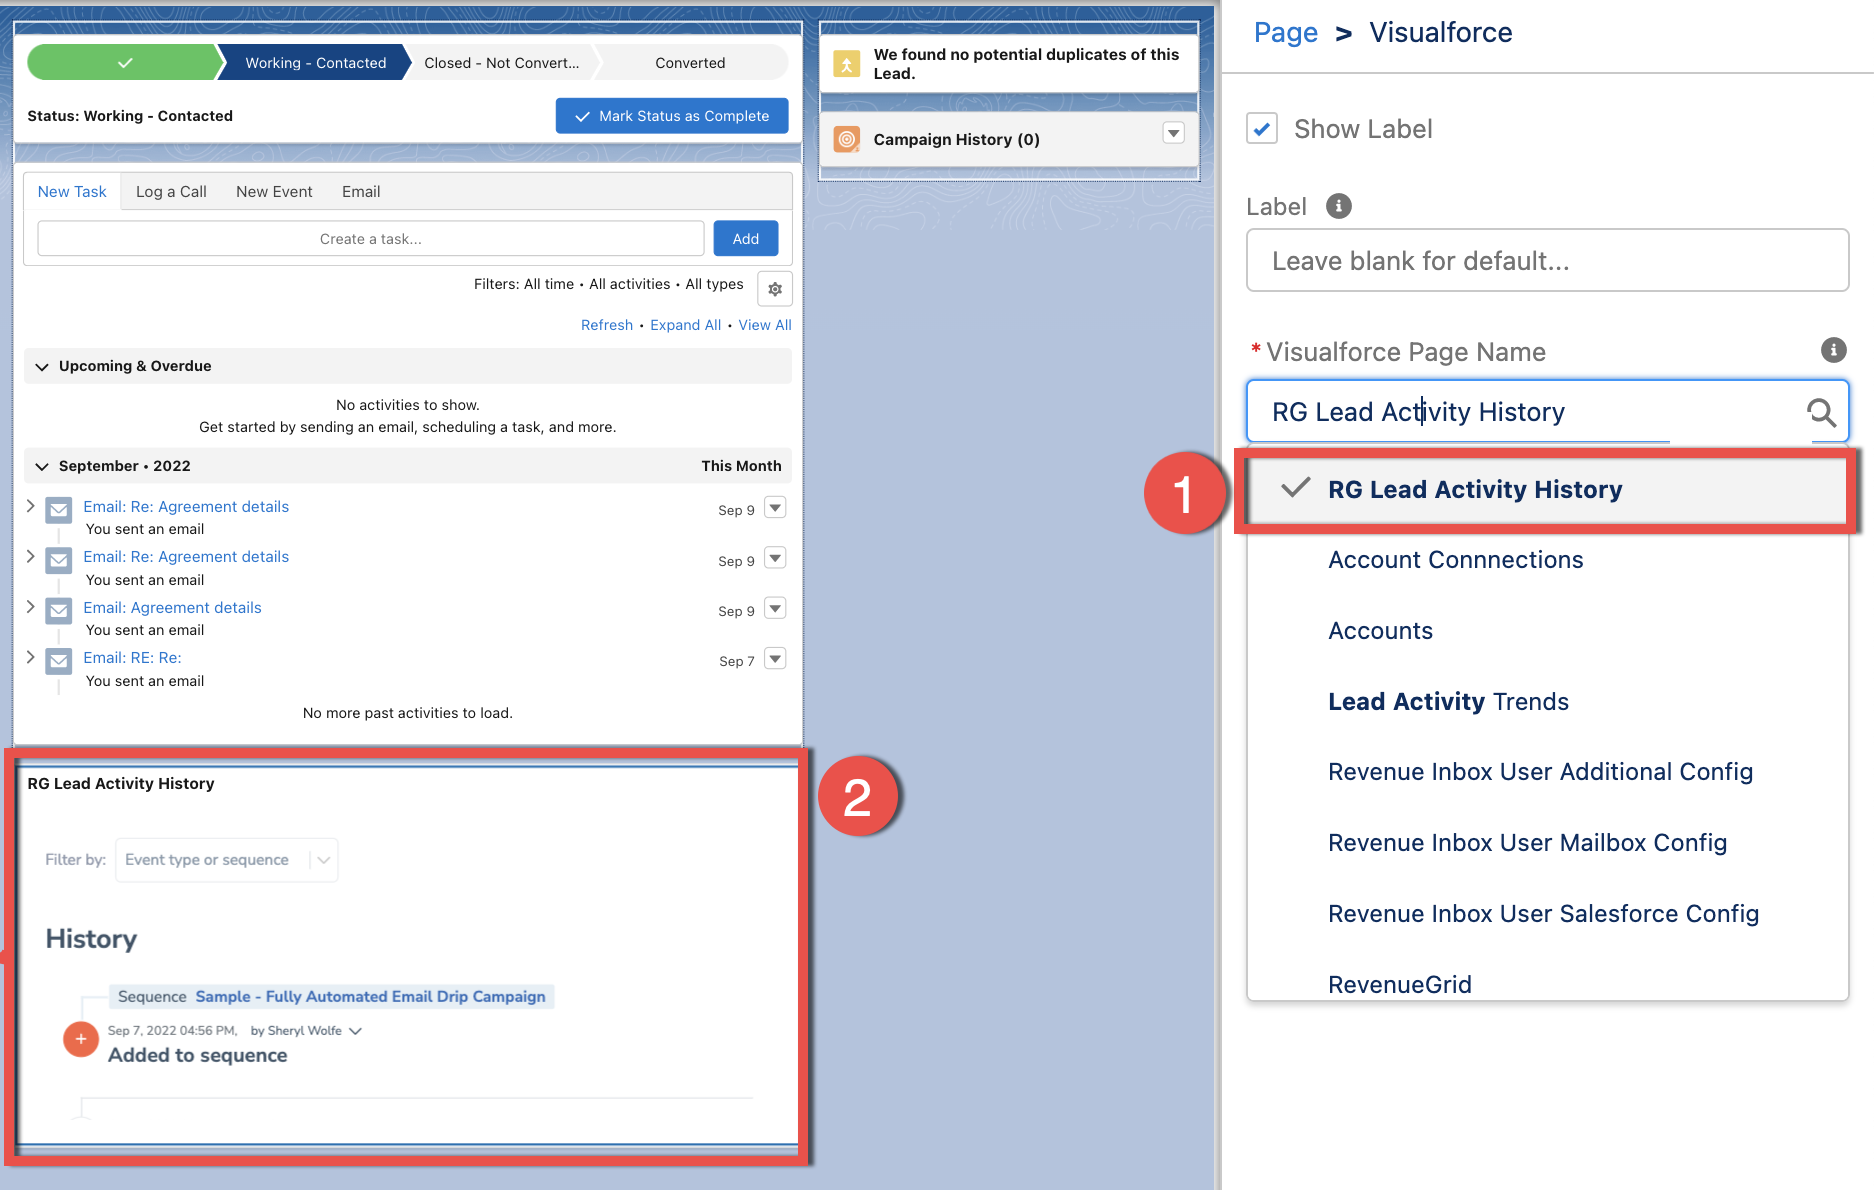
You may add as many Visualforce frames as you require, the limit is the number of Revenue Grid widget blocks available in the picklist above.
Specific Widget Blocks
Contact, Lead, and Opportunity widgets have slightly different sets of blocks. Refer to record-specific blocks detailing below:
Contact Widget blocks
Contact records’ layout can be equipped with the following widget blocks:
-
Revenue Engage-related
1. Contact_Overview
2. Contact_Activity
3. Contact_Sequences -
Revenue Signals-related
1. RG Signals
2. RG_Pipeline -
General use
1. Admin Panel
2. RGES User Sidebar
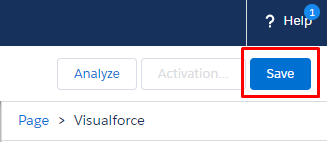
After adding the needed widget blocks, click Save in the upper right corner of the Lightning App Builder page to apply the changes
>>> Click to see a screenshot <<<
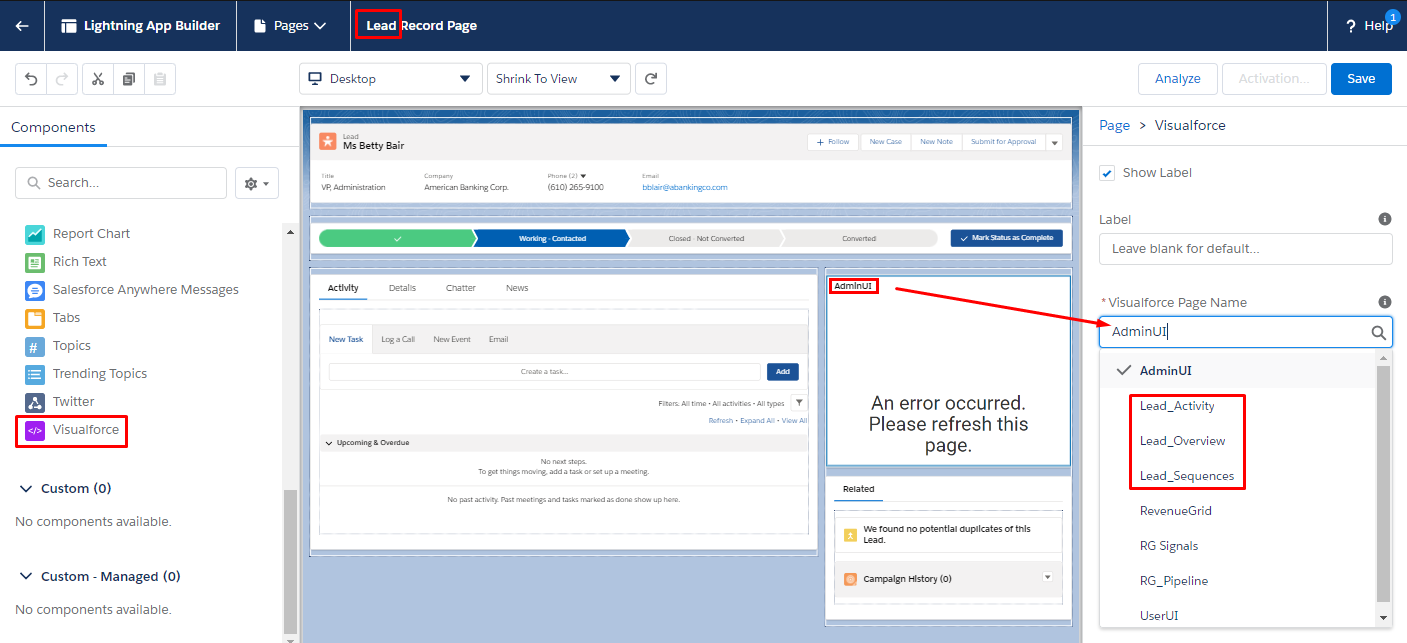
Lead Widget blocks
Lead layout can be equipped with the following widget blocks:
>>> Click to see a screenshot <<<
-
Revenue Engage-related
1. Lead_Activity
2. Lead_Overview
3. Lead_Sequences -
Revenue Signals-related
1. RG Signals
2. RG_Pipeline -
General use
1. Admin Panel
2. RGES User Sidebar
After adding the needed widget blocks, click Save in the upper right corner of the Lightning App Builder page to apply the changes
>>> Click to see a screenshot <<<
Opportunity Widget blocks
Opportunity layout can be equipped with the following widget blocks:
>>> Click to see a screenshot <<<

-
Revenue Engage-related widgets
1. Opty_RevenueGrid
2. Opty_RG_Activity
3. Opty_RG_Connections
4. Opty_RG_Engagement
5. Opty_RG_Signals -
Revenue Signals-related widgets
1. RG Signals
2. RG_Pipeline -
General use
1. Admin Panel
2. RGES User Sidebar
After adding the needed widget blocks, click Save in the upper right corner of the Lightning App Builder page to apply the changes
>>> Click to see a screenshot <<<