All User Actions in RG Email Sidebar


Tip
Please also refer to this article for an overview of all icons and buttons included in the updated RG Email Sidebar user interface.
RG Email Sidebar Add-In / Chrome Extension interface always evolves obtaining an even more streamlined and intuitive look and feel. The Sidebar is built upon the following principles:
- All key actions and useful information are available right at hand, no more than 2-3 mouse clicks away from the Sidebar’s home screen.
- Fast and convenient navigation among records and between levels of detail of a selected record.
- No interface cluttering with any items which have no relevance to the record that the user is currently working with; the user decides what records and record categories to expand.
- Single-click selection of individual records or of all records of a specific type directly from the Sidebar’s home screen.
Tip
You can “zoom in” the Sidebar the way you zoom in web pages. To do that, click on the Sidebar, press the Control (Ctrl) button and scroll up the mouse wheel. All Sidebar components will be expanded and slightly re-arranged.
Sidebar size adjustment
To accommodate the expanded controls in the Sidebar’s pane, you can also stretch the Sidebar sideways: hover the cursor over the left-hand edge of the Sidebar so it looks like this ⇼, then hold the left mouse button and stretch the Sidebar to the left.
1. Items categorizing
Tip
To have all needed category tabs (separators) available at all times in the Sidebar, make sure to pin them in RG Email Sidebar Customization settings.
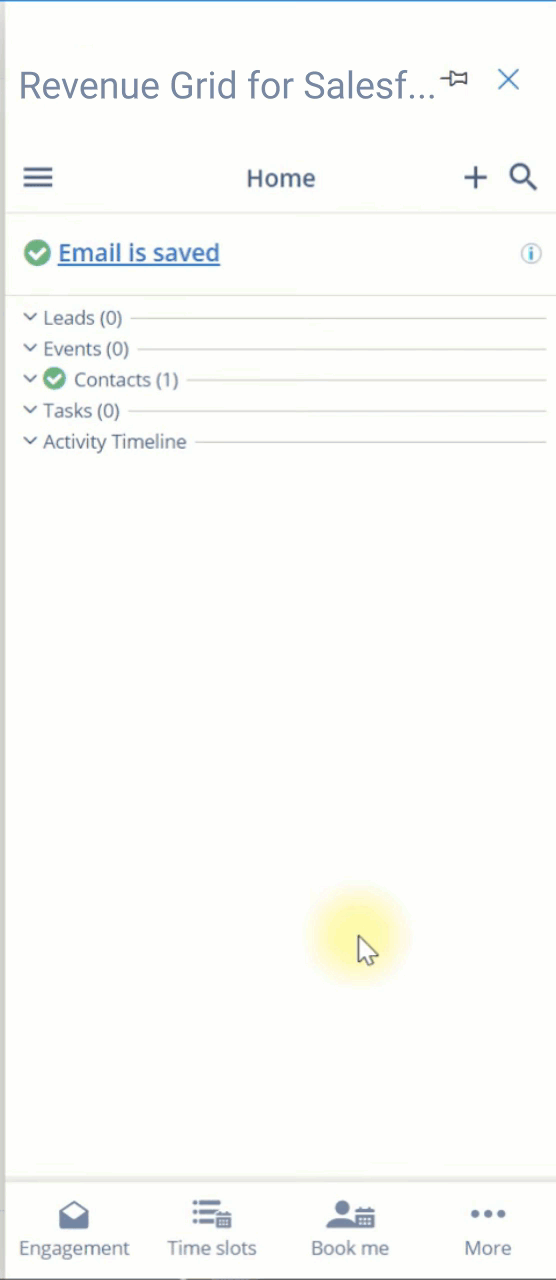
All records are sorted according to their object type and folded under corresponding tab categories (separators) in the Sidebar:
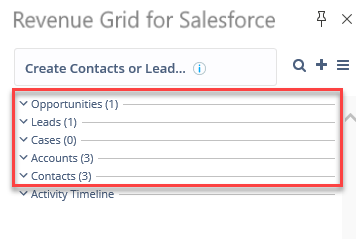
The Add-In / Chrome Extension keeps the set of Sidebar tabs (separators) and records you expanded when processing your emails or events, so after you close MS Outlook or the Add-In / Chrome Extension and then open it again, you will not have to expand the needed tabs again.
Below record categories tabs (separators), there are tabs containing special action icons:
- Suggest new records: the tab appears when there are unresolved (not yet saved in Salesforce and non-internal/blocklisted) messages in your MS Outlook. Refer to this article for more details.
- Activity Timeline: display and manage past and future activities, create Tasks and Events. Note that this tab is only displayed if there are associated Taks and Events registered in Salesforce or if the tab was pinned in RGES Customization settings.
Smart Actions
Smart Actions are implemented as an easy-to-reach from the key Sidebar screens bottom toolbar.
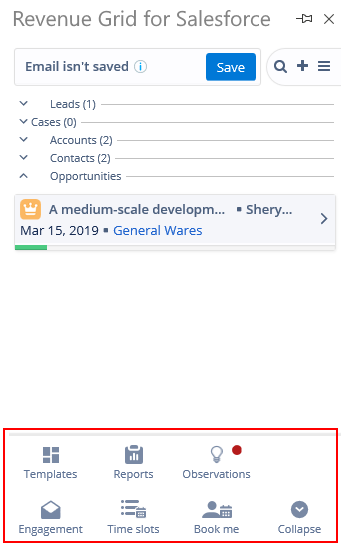
The set of Smart Actions displayed first without expanding the icon More… is defined in RGES Customization settings.
- Enagement panel
- Time slots
- Book me
- Templates
- Reports
- Observations panel: contains clues concerning required RG Email Sidebar setup actions and synchronization status along with information about actions and checks carried out by the Add-In / Chrome Extension, e.g. email addresses filtered as internal/blocklisted or records merging suggestions
- Revenue Grid Signals
Revenue Grid templates
RG Email Sidebar used in Revenue Engage context also includes a Smart Action icon Insert Revenue Grid Template.
This set of preconfigured templates used mostly in engagement Campaigns communication is available in the full Revenue Grid revenue intelligence package. Note that upon request your existing Salesforce templates can be merged into Revenue Grid templates pool.
After you click this icon, select a relevant template, and click Insert, the template gets inserted into the email you are composing in MS Outlook.
2. Creating new records on a couple of clicks
New records - standard Salesforce objects as well as custom added objects - can be instantly created by clicking the + (Add) icon in the Sidebar’s header or by clicking the ••• (More actions) button that appears when you hover the mouse over a record category tab:
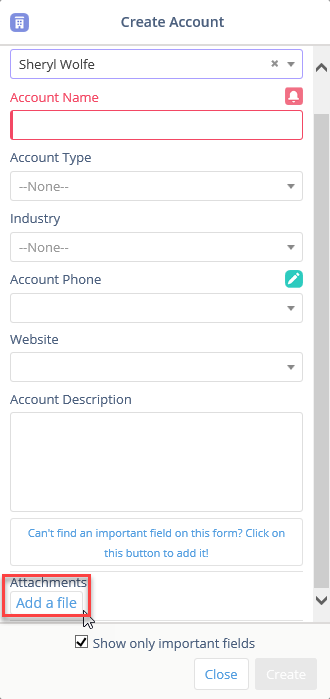
In addition, when you create a new record and there is no relevant Account or Contact registered in Salesforce to link it to (which is mandatory), you can create one directly from the account selection picklist, by clicking the Create new Account button and populating the fields of the Create Account dialog that appears.
When you need to find specific record(s) saved in Salesforce via RG Email Sidebar Add-In / Chrome Extension, in Adaptive view you simply click the Search icon located next to the Add icon in the Sidebar’s header and perform a search.
3. All key actions at hand
To further reduce the number of clicks required to perform an action with a record, a menu listing all applicable actions is available in each record’s header right on the Sidebar’s home screen, so it takes two clicks to perform any action with a record. It appears as soon as you hover the cursor over a record’s header:
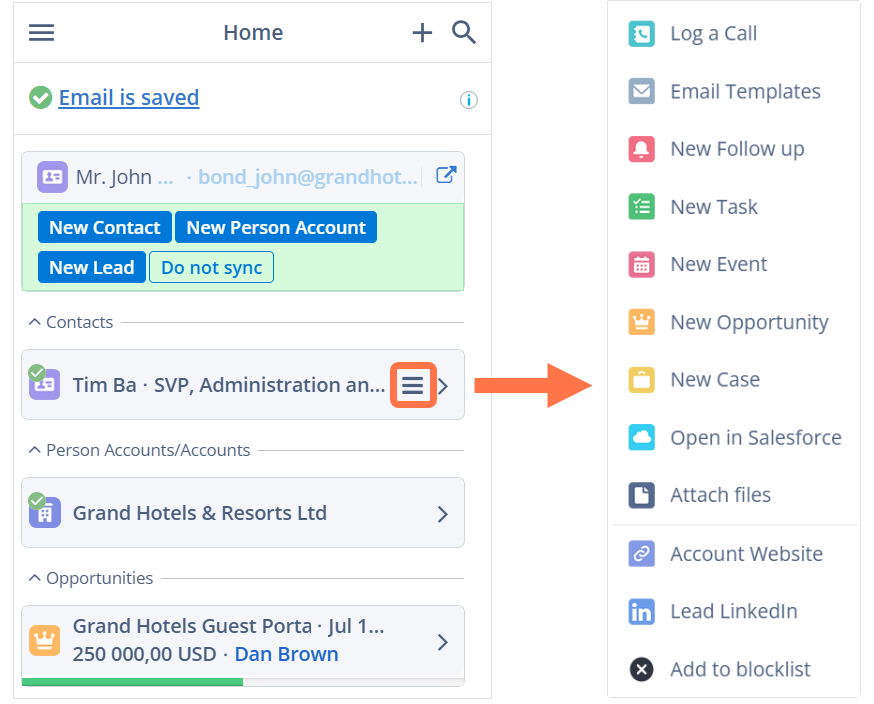
Note that the set of actions is specific to each record type and includes creating related records of other types.
Quick save to a record
In addition, there is a quick save button on records’ flashcards (headers) in the Sidebar that allows saving email with a specific record on a single click, without expanding a record’s card or searching for it in the Save dialog. The quick save button is accessed by hovering the cursor over the object’s icon in the header and clicking on the envelope or event icon that appears in its place.
![]()
If you use this icon in a record’s header to quick-save an email as a Salesforce Task (Enhanced Email not enabled), the resulting Task will be linked to this record only.
If you use this icon to save an email as a Salesforce EmailMessage (Enhanced Email enabled), the resulting EmailMessage will be linked to all eligible records associated with addresses included in the email’s To, From, CC fields.
Convert a Lead to a Contact
With RG Email Sidebar, it takes several clicks to convert a successfully engaged Lead to a Contact in Salesforce. To do that:
- Hover the cursor over the lead icon on the right-hand side of the Lead’s card in RG Email Sidebar.
- Click on the ☰ (Menu) icon that appears.
- Select Convert to Contact.
-
Populate the details in the dialog that appears:
- Select or create an Account to link the Contact to.
- Set the Status for the converted Lead, i.e. Closed - Converted.
- (Optional) create an associated Opportunity by entering its name in the field New Opportunity Name.
- (Optional) select the checkbox Send Notification Email to get a notification email from Salesforce upon successful conversion.
Note
If you see a pop up notification “Use one of these records?” at the bottom of the Sidebar, that means that a Contact based on the same email address already exists in Salesforce.
Convert a Lead to a Contact (alternative)
- Expand the Lead’s card in RG Email Sidebar.
- Select Show more > Convert to Contact.
-
Populate the details in the dialog that appears:
- Select or create an Account to link the Contact to.
- Set the Status for the converted Lead, i.e. Closed - Converted.
- (Optional) create an associated Opportunity by entering its name in the field New Opportunity Name.
- (Optional) select the checkbox Send Notification Email to get a notification email from Salesforce upon successful conversion.
4. Viewing the details instantly
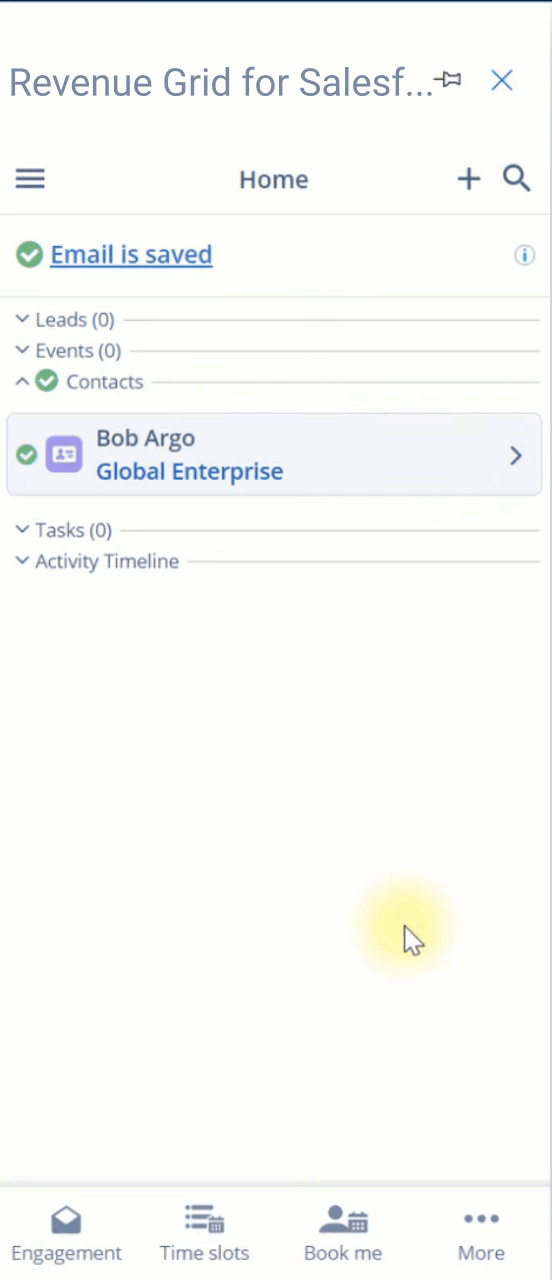
It takes one mouse click to see an animation/collapse a needed record’s header to view its full card, with all key details and actions available at hand:
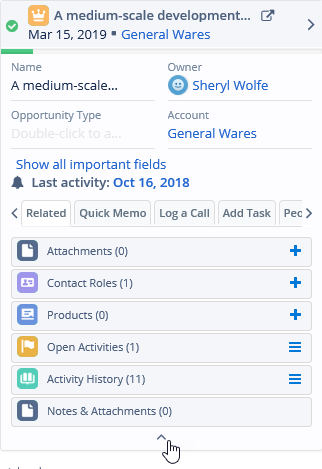
Every record card includes the following tabs:
-
Related tab listing related objects (linked records and items retrieved through initial search). On this tab you can view records, activities, and attachments associated with selected email or calendar event. This tab is available both in expanded card view and detailed record view.
Note
For records browsing convenience, if you switch to another item in MS Outlook with the Related tab opened in the Sidebar, the related items list will be updated with items found for the new email/event selected.
-
Quick memo: see feature description here.
- Log a Call: register in Salesforce notes summarizing the results of a phone or Internet call made to a contact.
- Add task: register in Salesforce a task associated with a contact that needs to be performed within specified time frame.
- People: (specific to Opportunity records) contacts involved in an Opportunity with their roles in it specified.
- Files: email’s/event’s file attachments saving in Salesforce.
5. Improved records creation, updating, browsing
In the Adaptive Sidebar view, records’ Detailed view is opened for each record individually, by clicking on the > (Expand) icon in a record’s header.
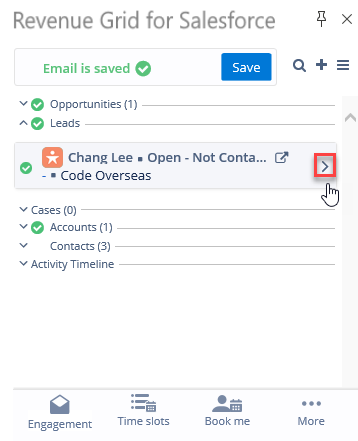
In the detailed view you can update any object field’s value, by clicking the  icon next to it.
Records headers’ layout was also improved, now the headers include information from the records’ 4 key fields (the required (important) fields defined in Customization settings), making records much easier to browse through within their category by their headers. In addition, you can open a related record included in the header instantly by clicking on its name.
Note that the fields included into record headers are not shown in their expanded cards (but are shown in detailed record view). Besides, pay attention that the list of fields shown on a card can be expanded by clicking the Show more fields button below; the Show only important fields button was removed from record cards along with the Important fields filling progress bar.
Create Contacts via signature drag-and-drop
Besides the standard Create Salesforce record feature, there is also a special way to instantly create new Contacts.
To create a new Contact:
- Open an email or meeting invite from/to a new business contact in MS Outlook.
- Open RG Email Sidebar.
- Select (highlight) the signature with the cursor.
- Drag-and-drop the selection into RG Email Sidebar.
Within several seconds you will see the Create Contact dialog with auto-filled key fields parsed from the signature.
Supported configurations for signature drag-and-drop
- MS Outlook Desktop for Windows or MacOS
- MS Outlook on the Web (outlook.com, office.com) opened in Mozilla Firefox browser
Unsupported configurations for signature drag-and-drop
- MS Outlook on the Web (outlook.com, office.com) opened in MS Edge
- MS Outlook on the Web (outlook.com, office.com) opened in Google Chrome or a Chromium-based browser
- MS Outlook on the Web (outlook.com, office.com) opened in MS Internet Explorer
- RGES Chrome Extension for Gmail
6. Quick interaction with search results
In Adaptive view records search results are listed on a dedicated search results screen. On this screen, it takes only a couple of clicks to select records which you want to link an email/event to and save it in Salesforce.
Note
To reduce RGES user interface cramming, in the latest product updates the checkboxes next to record headers were removed.
Records’ cards or the full detailed card view can also be opened from the search results screen besides the home screen.
A related improvement: now, when search results are opened in the Sidebar and you select another item in MS Outlook, the search results are replaced with the new selected item’s associated items retrieved by initial search.
7. Smart selection of records to be linked
Tip
Also see this article for detailed information on items linking.
After records have been associated (linked) with a saved email or event, they are marked with green checkmark circles, so you will see the actual associations straight away when selecting an email/event, plus you can navigate to associated Activity by clicking on the checkmark icon.
Two related customization settings were implemented in RG Email Sidebar Customization settings to allow advanced managing of records’ selection for emails and events: Pre-select records and Disallow linking, please refer to this article for more information.
Additionally, a minor use convenience setting was added in Adaptive view, Do not select “Auto-save in thread” by default, please find more information about this feature here.
8. Easy saving of email or calendar attachments
Tip
Please note that in the latest RG Email Sidebar updates there is also an extra file listed among files actually attached to the email - an exact copy of the email message in .eml format which you can also save in Salesforce (the “default attachment”).
To save attachments to Salesforce, you need to expand a relevant record’s card and then one of the following:
-
Open the Related tab (see the point 3), click the + (Add) button next to the Attachments category, then select the checkbox next to an attachment and click Attach at the bottom.
-
Open the Files tab (see the point 3) and click Attach next to the needed attachment.
-
Expand a record’s detailed view and select Show more > Attach files.

Additionally, the Add a file button for direct file attaching was added to record creation dialogs:
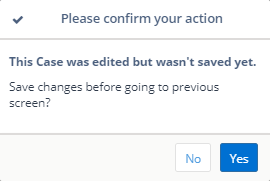
9. Entered data loss prevention
In updated Adaptive view, when you modified a record’s fields or created a new record and then switched to another item in MS Outlook, the following confirmation dialog it displayed, to prevent loss of the data you entered.
10. More actions at hand
Object type-specific action icons are also included in detailed record view so you do not need to navigate between the views to perform them:
![]()
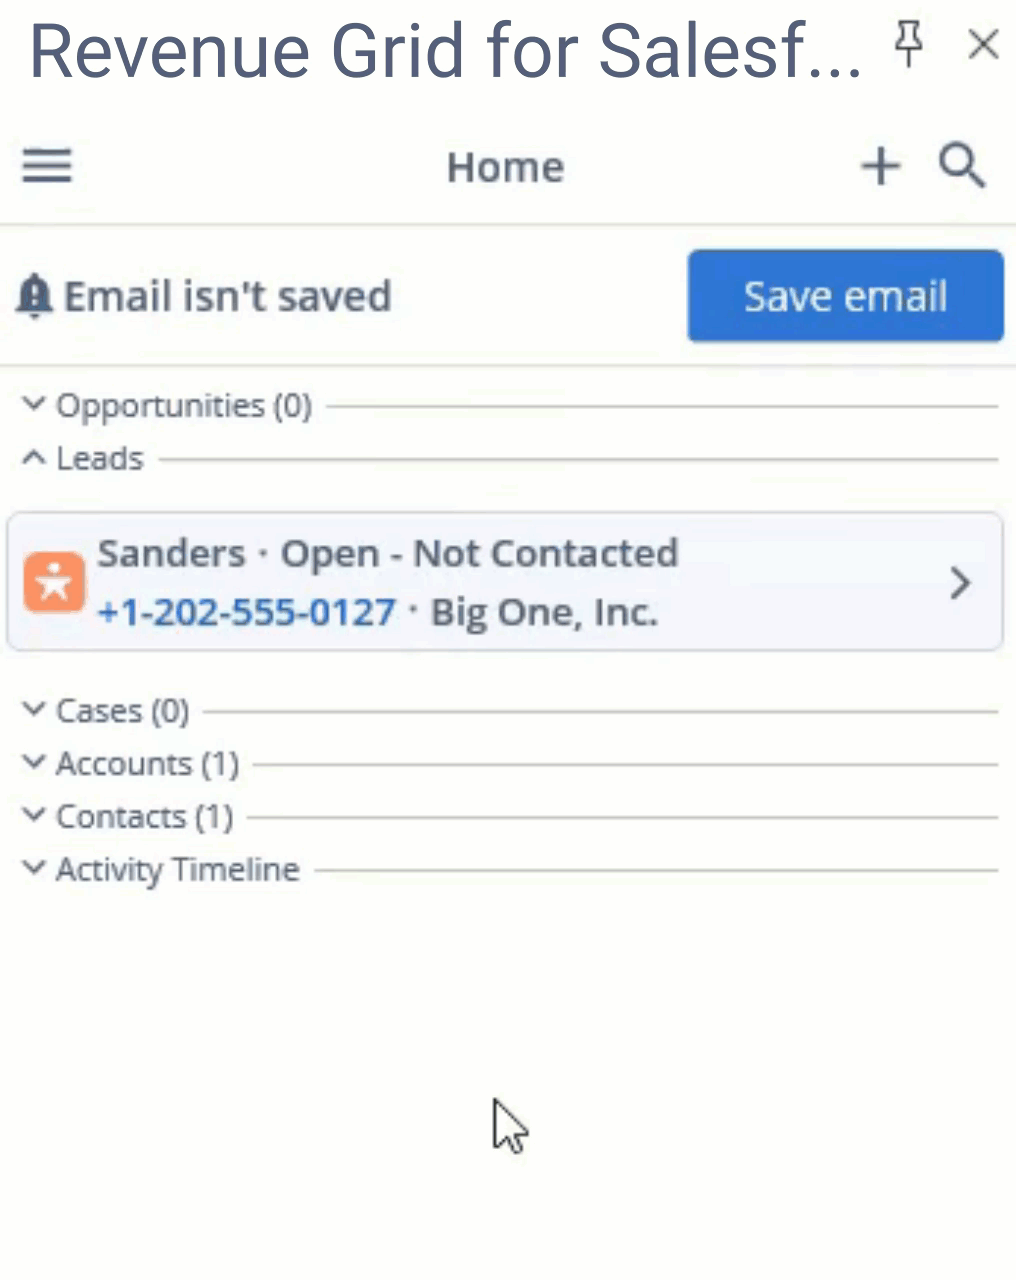
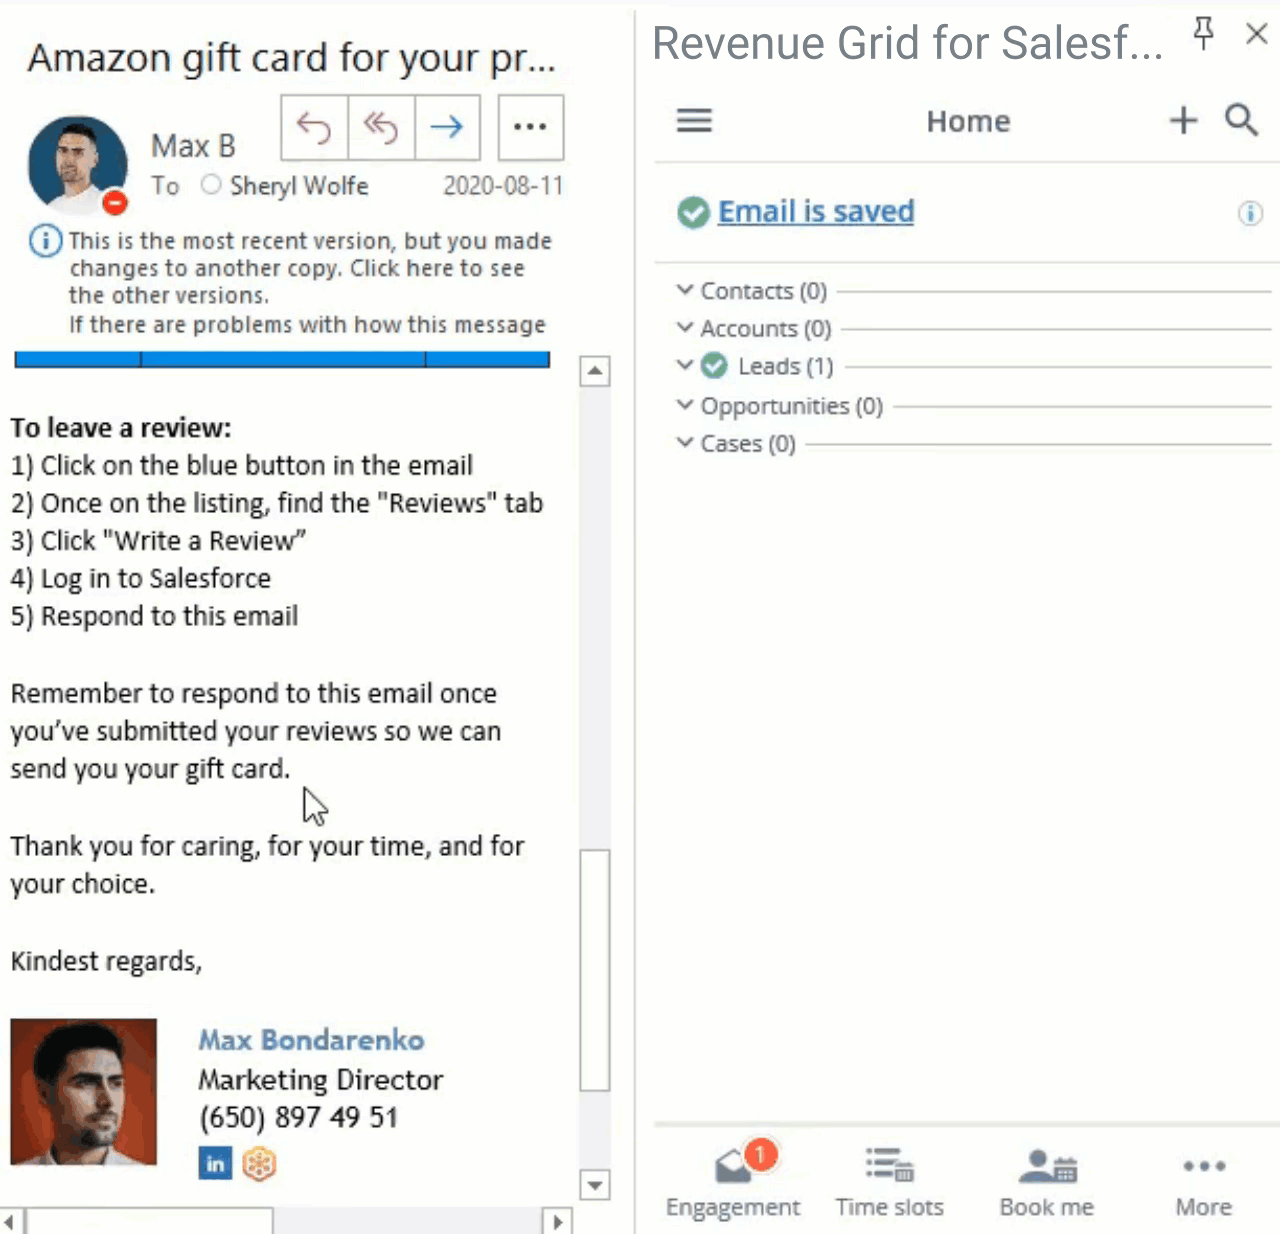
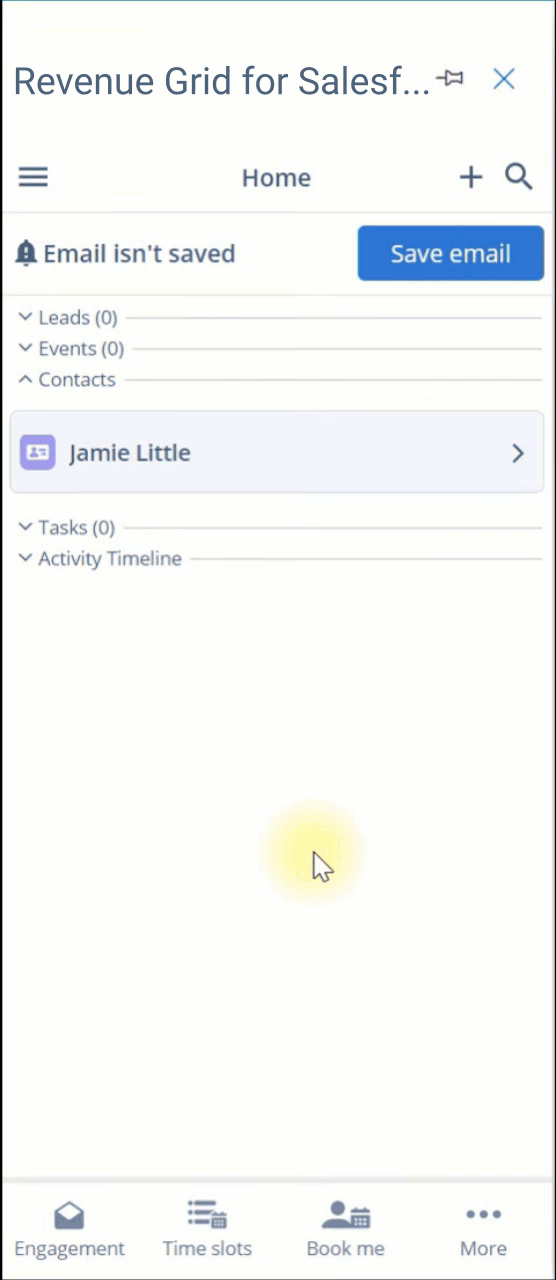
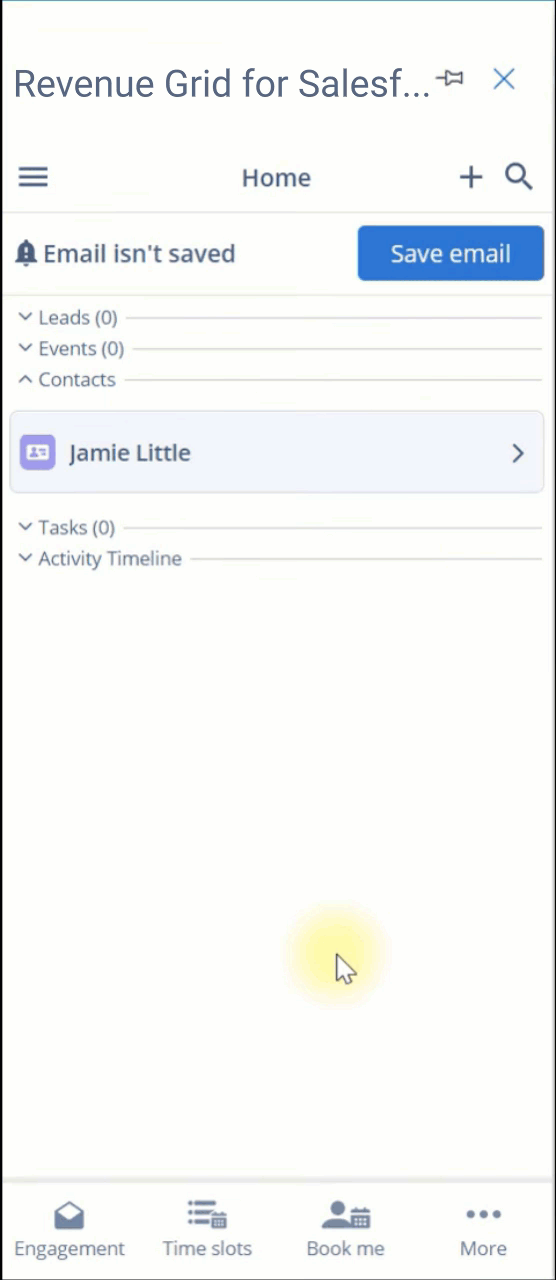
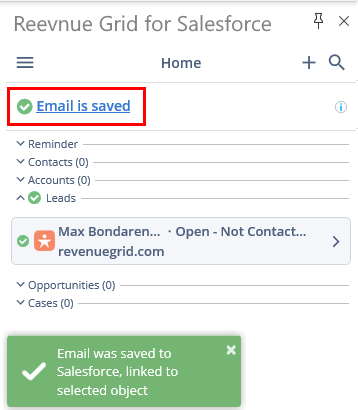
11. Email / Event saving status indication in Sidebar header
RG Email Sidebar’s header in Adaptive view includes a handy indicator of selected Email’s or Event’s saving status – whether the item is
- {Item type} is saved. Clicking on the text will open the saved item’s expanded card with all its details.
- {Item type} will be saved. The item is queued to be saved on the following sync session.
- {Item type} cannot be saved in Salesforce by RGES – see points (5) and (6) in this article for more information
12. “Continue Editing” function on record fields editing
“Continue editing” is another convenience of CRM data entry feature. It is used on records field values editing via the Sidebar’s Detailed card view.
Sometimes RGES users want to make updates to several fields before they apply all the changes to the record in Salesforce. To achieve that, they should click the button Continue editing instead of Save after editing individual fields:
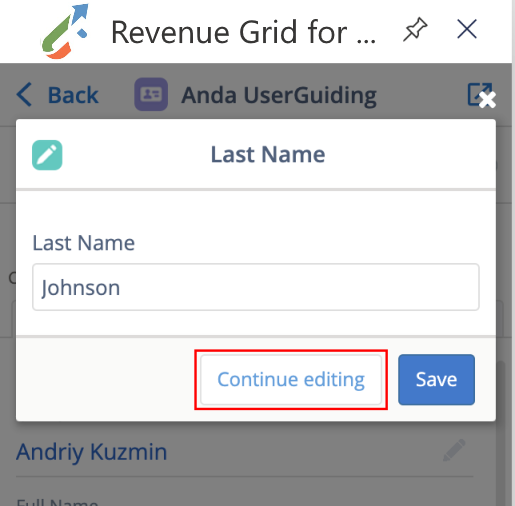
After that, proceed to editing other fields. Note the ⭯ (Revert) icon that appears next to fields which were updated; clicking on it allows to quickly recover the original field value. After the values have been finalized, click on the button Save changes for this {record type} in the Detailed view to apply the changes:

Clicking Save in an individual field editing dialog also applies all changes you have made.