How to configure Salesforce Scheduler integration with Revenue Grid (v1)


Introduction
This guide provides step-by-step instructions on how to set up the Salesforce Scheduler Adapter (SSA) integration with the RG Email Sidebar.
Important
This guide focuses on the version 1 integration scenario, which does not include Salesforce widgets. For guidance on configuring SSA integration version 2, see this article.
Before you start
Before you proceed, complete the following prerequisites:
- Configure Salesforce Scheduler as described in this Salesforce article.
-
Create a Salesforce Integration User with system administrator permissions as described in this article.
Important
To ensure smooth integration, use the Salesforce Integration User exclusively to connect the Revenue Grid Salesforce Scheduler Adapter. Do not use personal user credentials for this purpose.
-
Enable the Publish Appointments as Platform Events setting in the Salesforce Scheduler settings as described below.
Enable the Publish Appointments as Platform Events setting
- Switch to Lightning Experience.
- Open the Salesforce Setup menu.
- In the Quick Search field, enter Scheduler Settings.
- Click Salesforce Scheduler Settings in the search results.
-
Enable the Publish Appointments as Platform Events setting.

Configuration
The configuration process includes the next steps:
- Install the dedicated Salesforce managed package.
- Set the custom Apex class.
- Add a new remote site.
- Connect the Salesforce Scheduler Adapter.
- Check the connection status.
Step 1: Install the dedicated managed package
The Salesforce Scheduler integration relies on specific Salesforce objects and classes. To simplify the setup, Revenue Grid provides a secure Salesforce managed package that contains all necessary objects and classes and complies with Revenue Grid Privacy & Security policies.
To install the package:
-
Open the package installation link:
RG Salesforce Scheduler Adapter managed package (version 1.30)
-
Log in to your Salesforce account with administrative permissions.
-
Choose the installation scope:
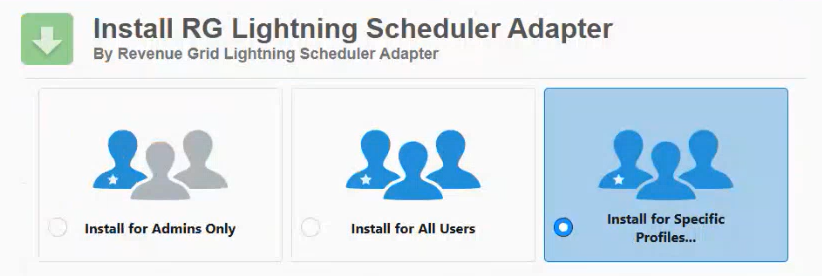
- Admins Only
- All Users
- Specific Profiles (recommended) – restrict access to users using the Salesforce Scheduler integration.
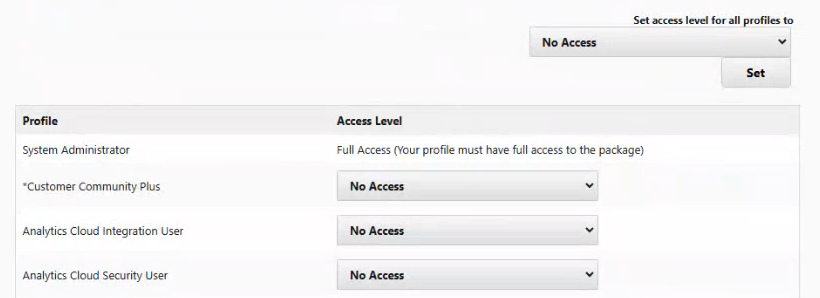
-
If you select Specific Profiles, set access for the required profiles using the controls provided. For detailed instructions, refer to this Salesforce guide.
-
Acknowledge the warning about installing a non-Salesforce application.
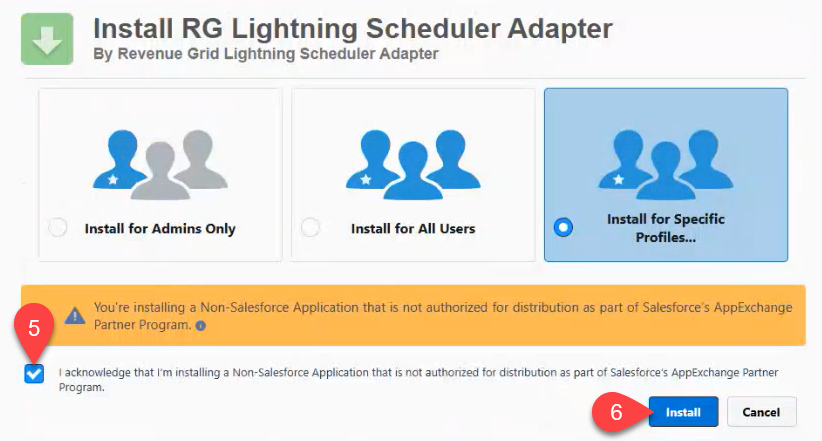
-
Click Install. You will see the following notification:
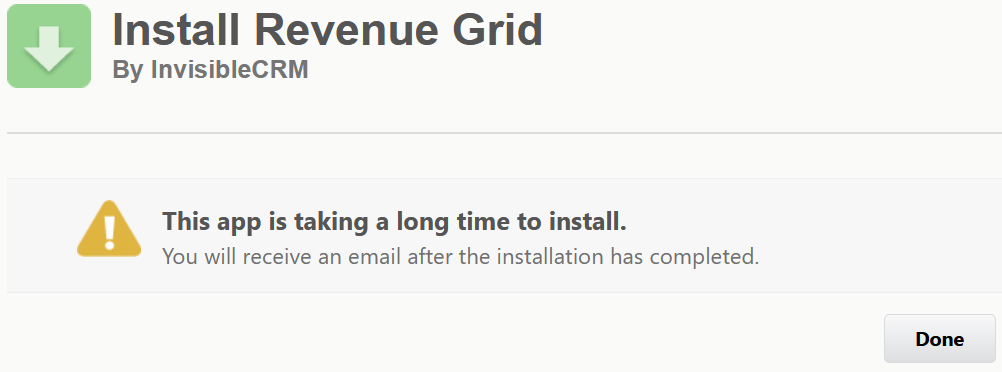
-
Click Done. You will receive an email confirming the successful installation or providing details about any issues.
Step 2: Set the custom Apex class
To retrieve Salesforce Scheduler time slots accurately, configure the custom Apex class included in the managed package within the Salesforce scheduling policy settings.
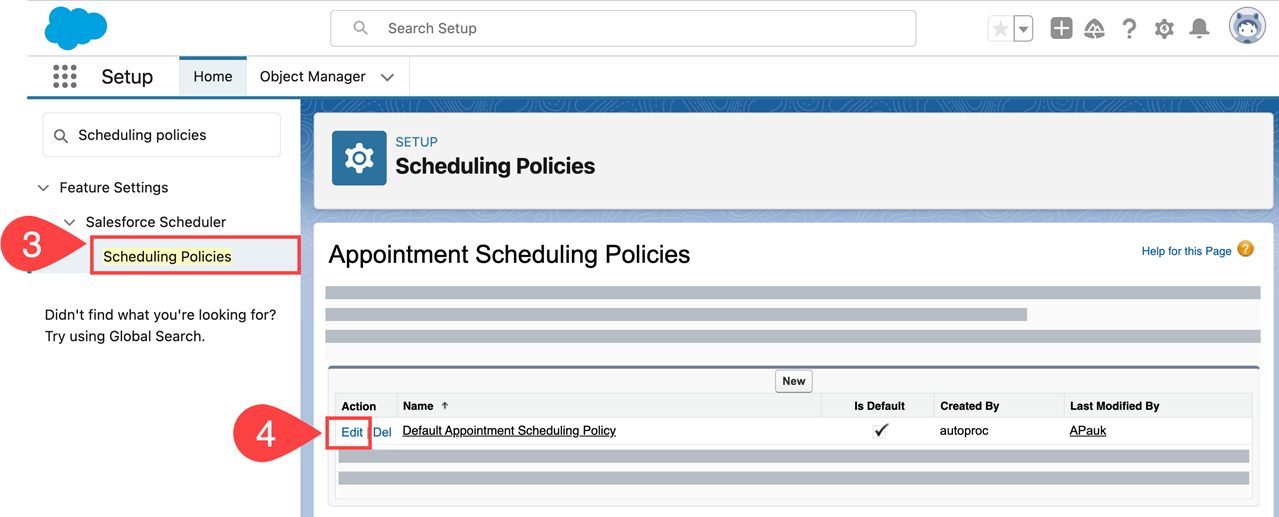
- Open the Salesforce Setup Menu.
- In the Quick Find field, type Scheduling Policies.
- Click Scheduling Policies in the search results.
-
Click Edit next to the scheduling policy marked as Is Default.
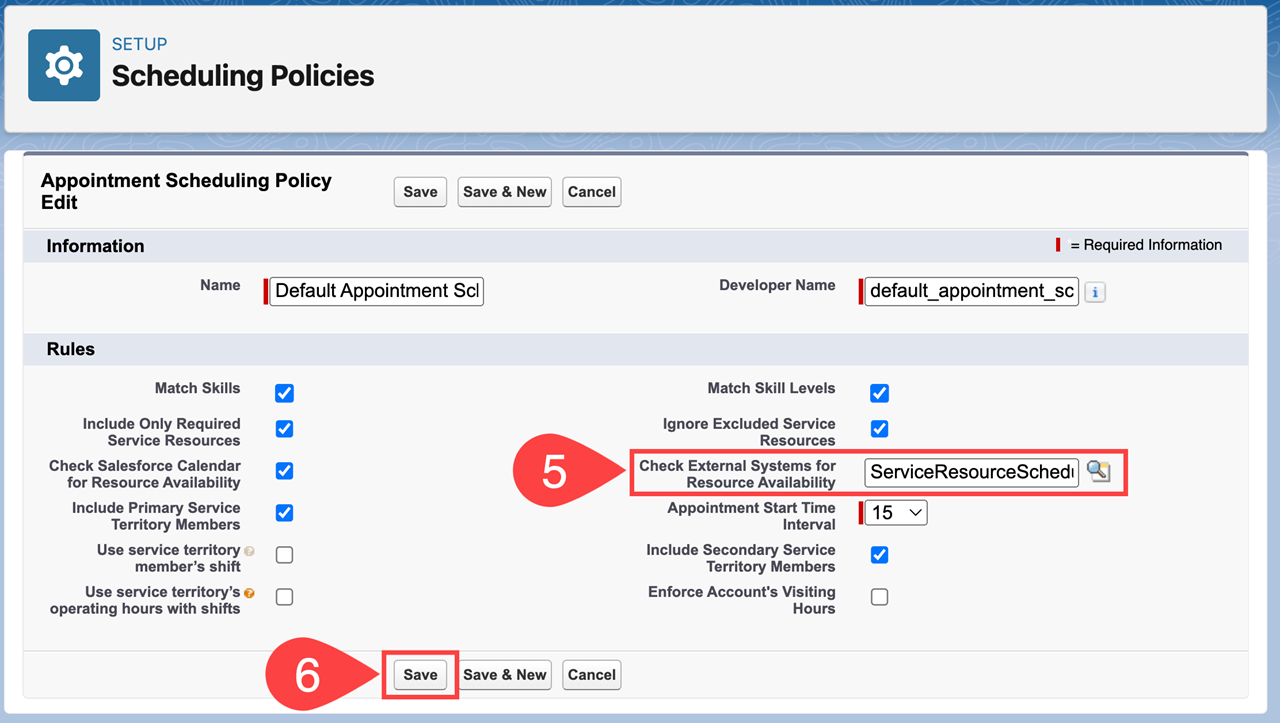
-
In the Check External Systems for Resource Availability field, enter the Apex class:
ServiceResourceScheduleHandlerImpl. -
Click Save.
Important
If your flows use additional scheduling policies, repeat steps 4–6 for each.
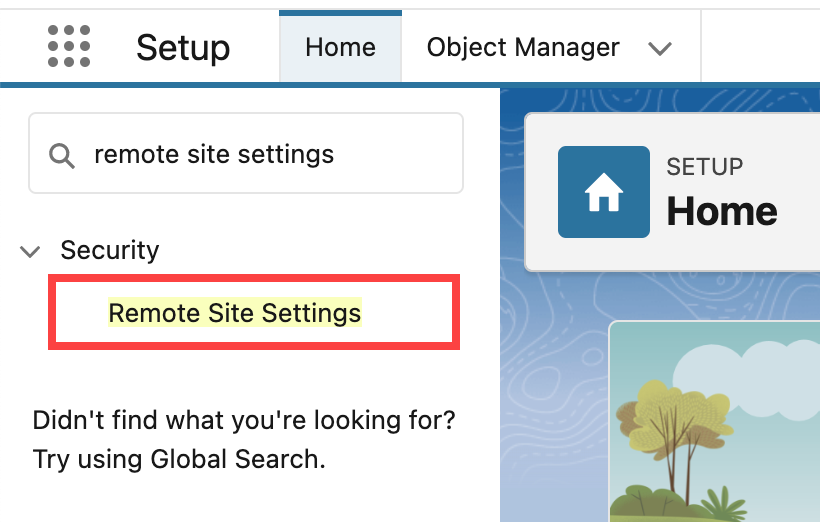
Step 3: Add a new remote site
- In the Quick Find field, type Remote Site Settings.
-
Click Remote Site Settings in the search results.
-
Click New Remote Site.
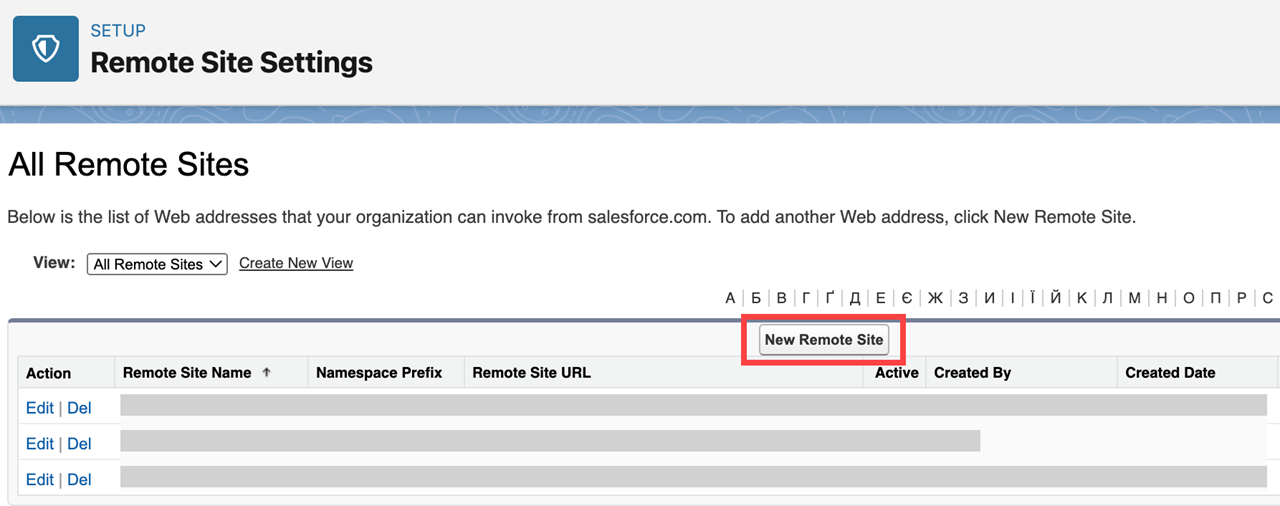
-
Fill in the required fields:
- Remote Site Name: SSA
- Remote Site URL: Enter the Sync URL provided by the RG support team (e.g.,
https://sample-sync.revenuegrid.com). - Select the Active checkbox.

-
Click Save.
Step 4: Connect the Salesforce Scheduler Adapter
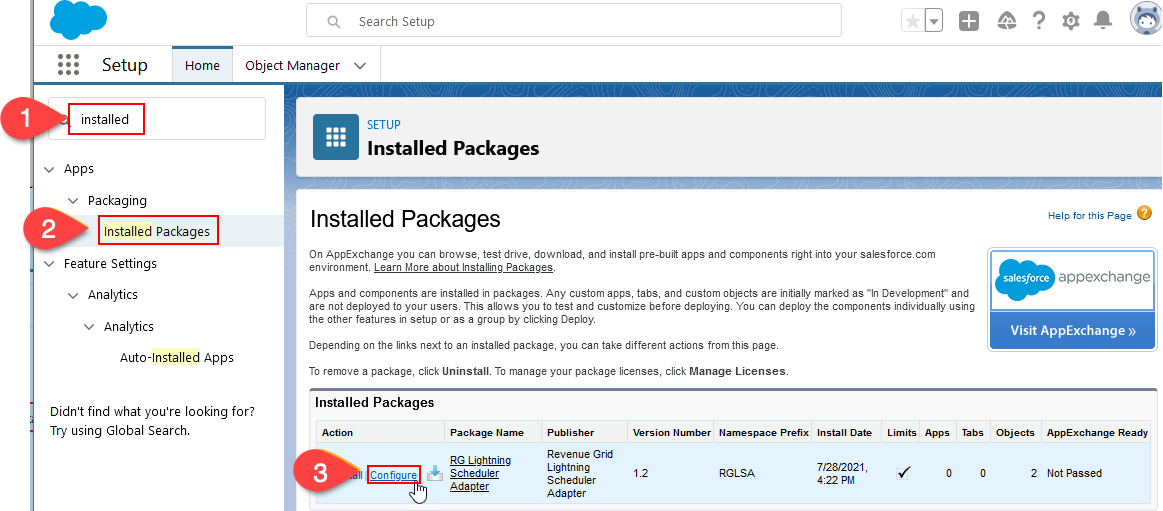
- In the Quick Find field, type Installed Packages.
- Click Installed Packages in the search results.
-
Click Configure next to the RG Salesforce Scheduler Adapter package.
-
Enter the Client ID and Sync URL provided by the RG support team.
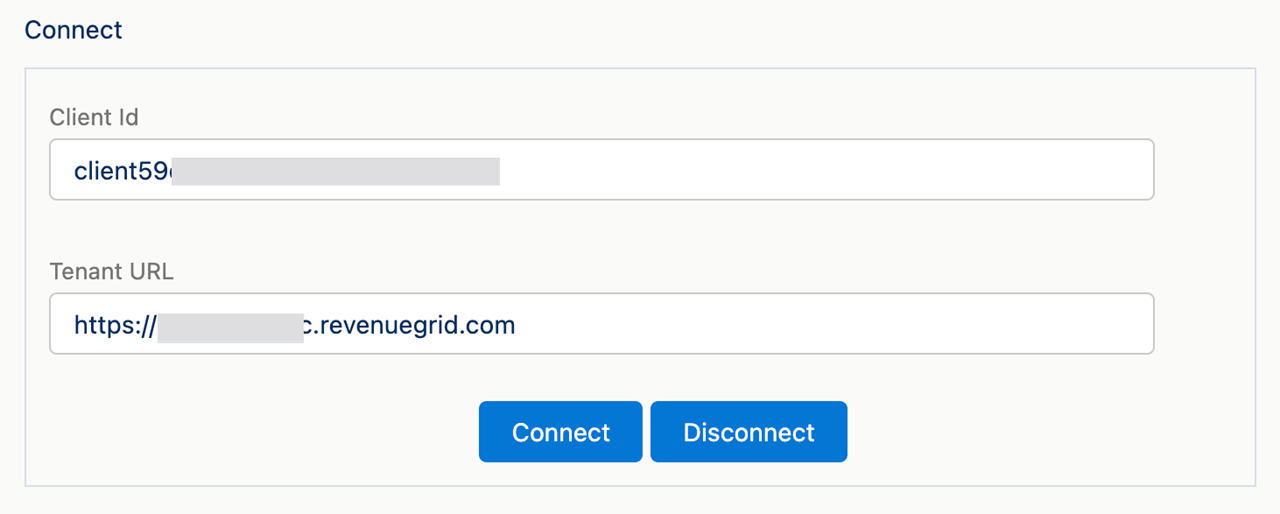
-
Click Connect.
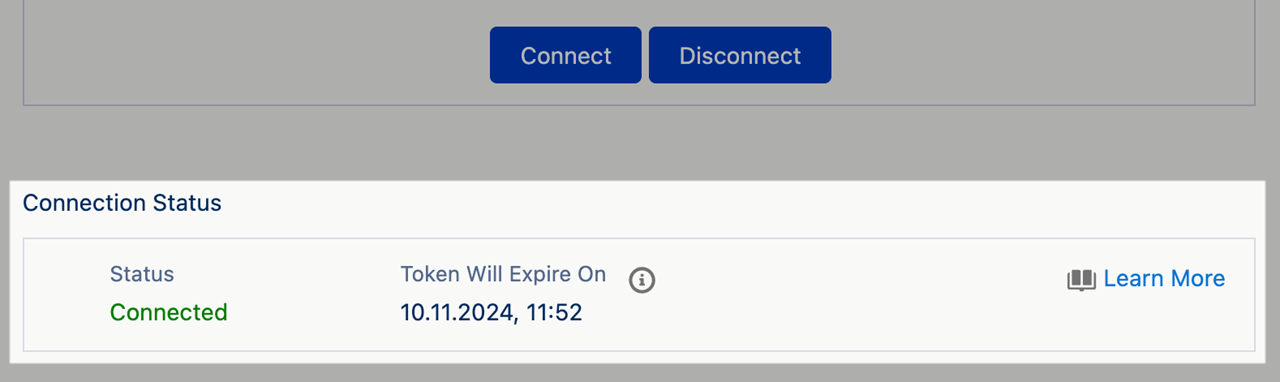
- In the Salesforce OAuth window, log in with the Salesforce Integration User’s credentials.
After a successful connection, the connection status will update accordingly.
Step 5: Check the connection status
- Open the Sync URL in your browser.
- Select Sign in with Salesforce and log in.
-
Navigate to the Connectivity tab and check the CRM configuration status.
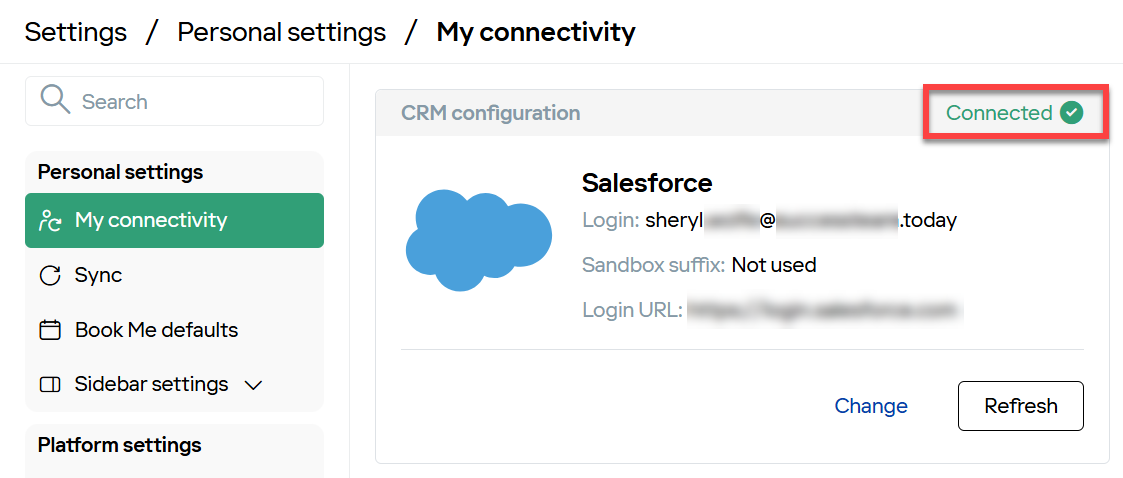
If the connection is unsuccessful, contact our support team.
Troubleshooting
Error: Dependent classes need recompilation
You may encounter the following error during the installation of the RG Salesforce Scheduler Adapter managed package:
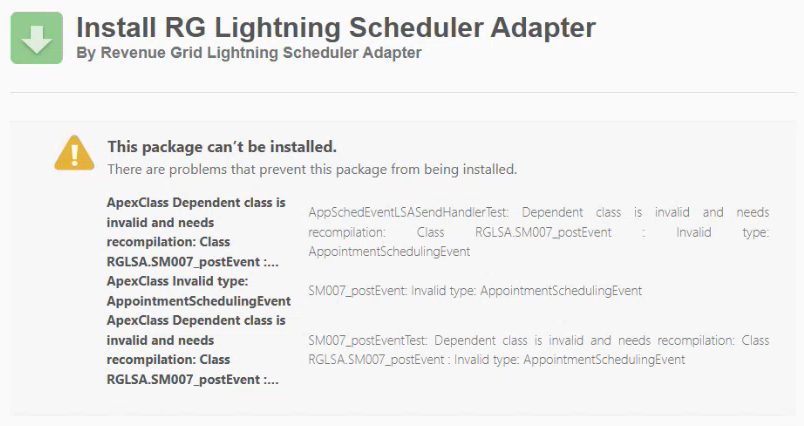
This package can't be installed.
There are problems that prevent this package from being installed.

• ApexClass: Dependent class is invalid and needs recompilation:
  Class RGLSA.SM007_postEvent

• ApexClass: Invalid type: AppointmentSchedulingEvent

• ApexClass: Dependent class is invalid and needs recompilation:
  Class SM007_postEventTest: Dependent class is invalid and needs recompilation:
  Class RGLSA.SM007_postEvent: Invalid type: AppointmentSchedulingEvent

• AppSchedEventLSASendHandlerTest: Dependent class is invalid and needs recompilation:
  Class RGLSA.SM007_postEvent: Invalid type: AppointmentSchedulingEvent
Cause
This error occurs when the Publish Appointments as Platform Events setting is not enabled in Salesforce Scheduler settings.
Resolution
To resolve this issue:
- Enable the Publish Appointments as Platform Events setting.
- Retry the package installation.
If the issue persists, please contact our support team for further assistance.
See also
- About Salesforce Scheduler Adapter
- Revenue Grid API Calls for Salesforce Scheduler
- Configure Salesforce flows for guest scenarios