Troubleshooting issues with Instant Events Sync from Salesforce to MS Outlook


Instant sync of calendar items from Salesforce to MS Outlook and is enabled upon request.
After being created, the calendar item is down-synced to the user’s MS Outlook calendar within several minutes. Usually within 5 minutes; however, this interval can be adjusted to match your org’s needs by submitting a corresponding request to the RG support team.
To use this feature, you must have the latest Revenue Grid package installed in your Salesforce org.
-
The latest version of the managed package:
The Publisher name of the package InvisibleCRM is an old brand name of Revenue Grid.
Tip
Refer to this article for more details on installing and configuring the managed package.
In rare cases, instant sync of calendar items from Salesforce to MS Outlook calendar can function incorrectly. If the calendar items created in Salesforce are not being saved to the mail server calendar within the instant sync time span (5 minutes or custom requested time span). However, the calendar items get down-synced to the mail server calendar during the regular synchronization sessions.
Check your managed package version
To catch up with the latest Salesforce updates and ensure the new features functioning, we regularly release Revenue Grid managed package updates. The updated links are published in this article’s topmost section or in the dedicated managed package article’s topmost section.
The easiest way to check whether you have the latest Managed Package version and to upgrade it if necessary is to:
-
Open the new managed package link in your web browser.
-
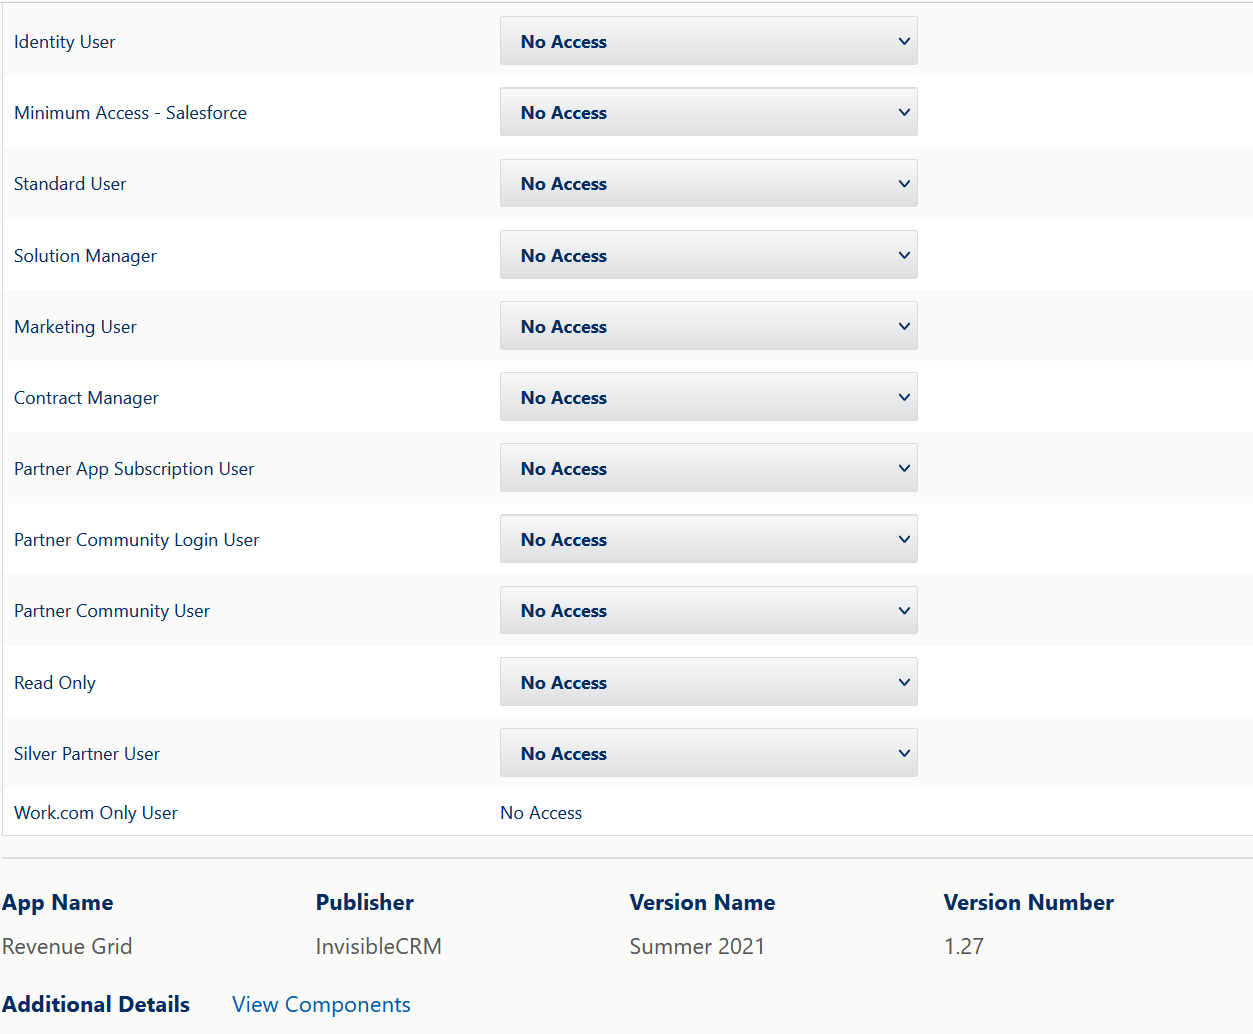
Log in to your Salesforce account (it must have Admin permissions in your Org). You will see the information about the version you have installed and the latest version to which you should upgrade:
- Installed – is the version that is currently installed in your org.
- New Version – is the version that must ensure the proper functioning of all Managed Package’s components.
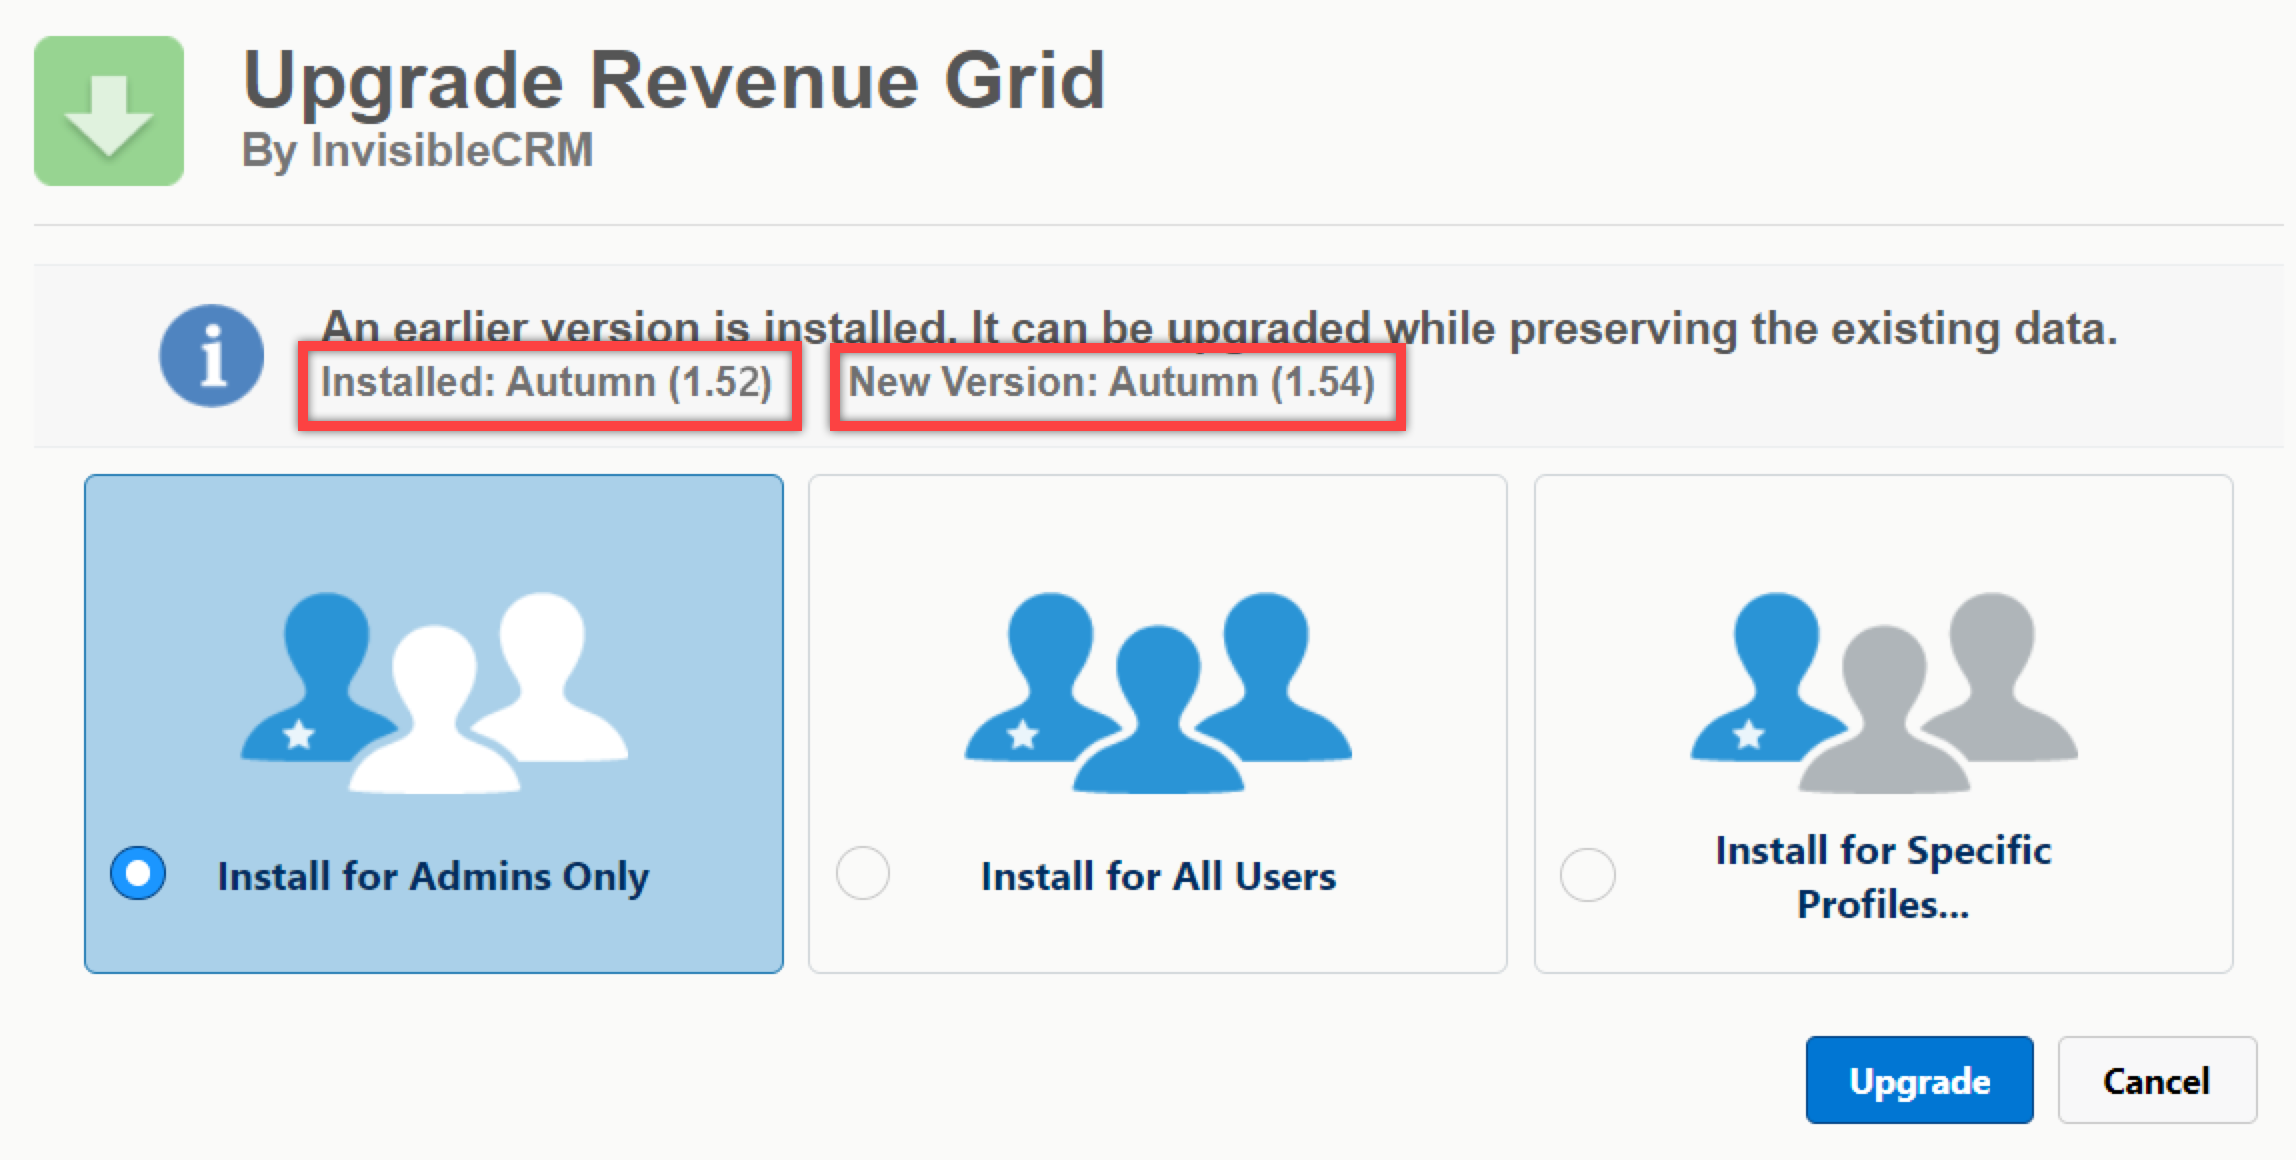
If the Installed and New Version numbers are the same, it means that you have the latest Revenue Grid Managed Package installed. If the versions differ, proceed with the next steps.
-
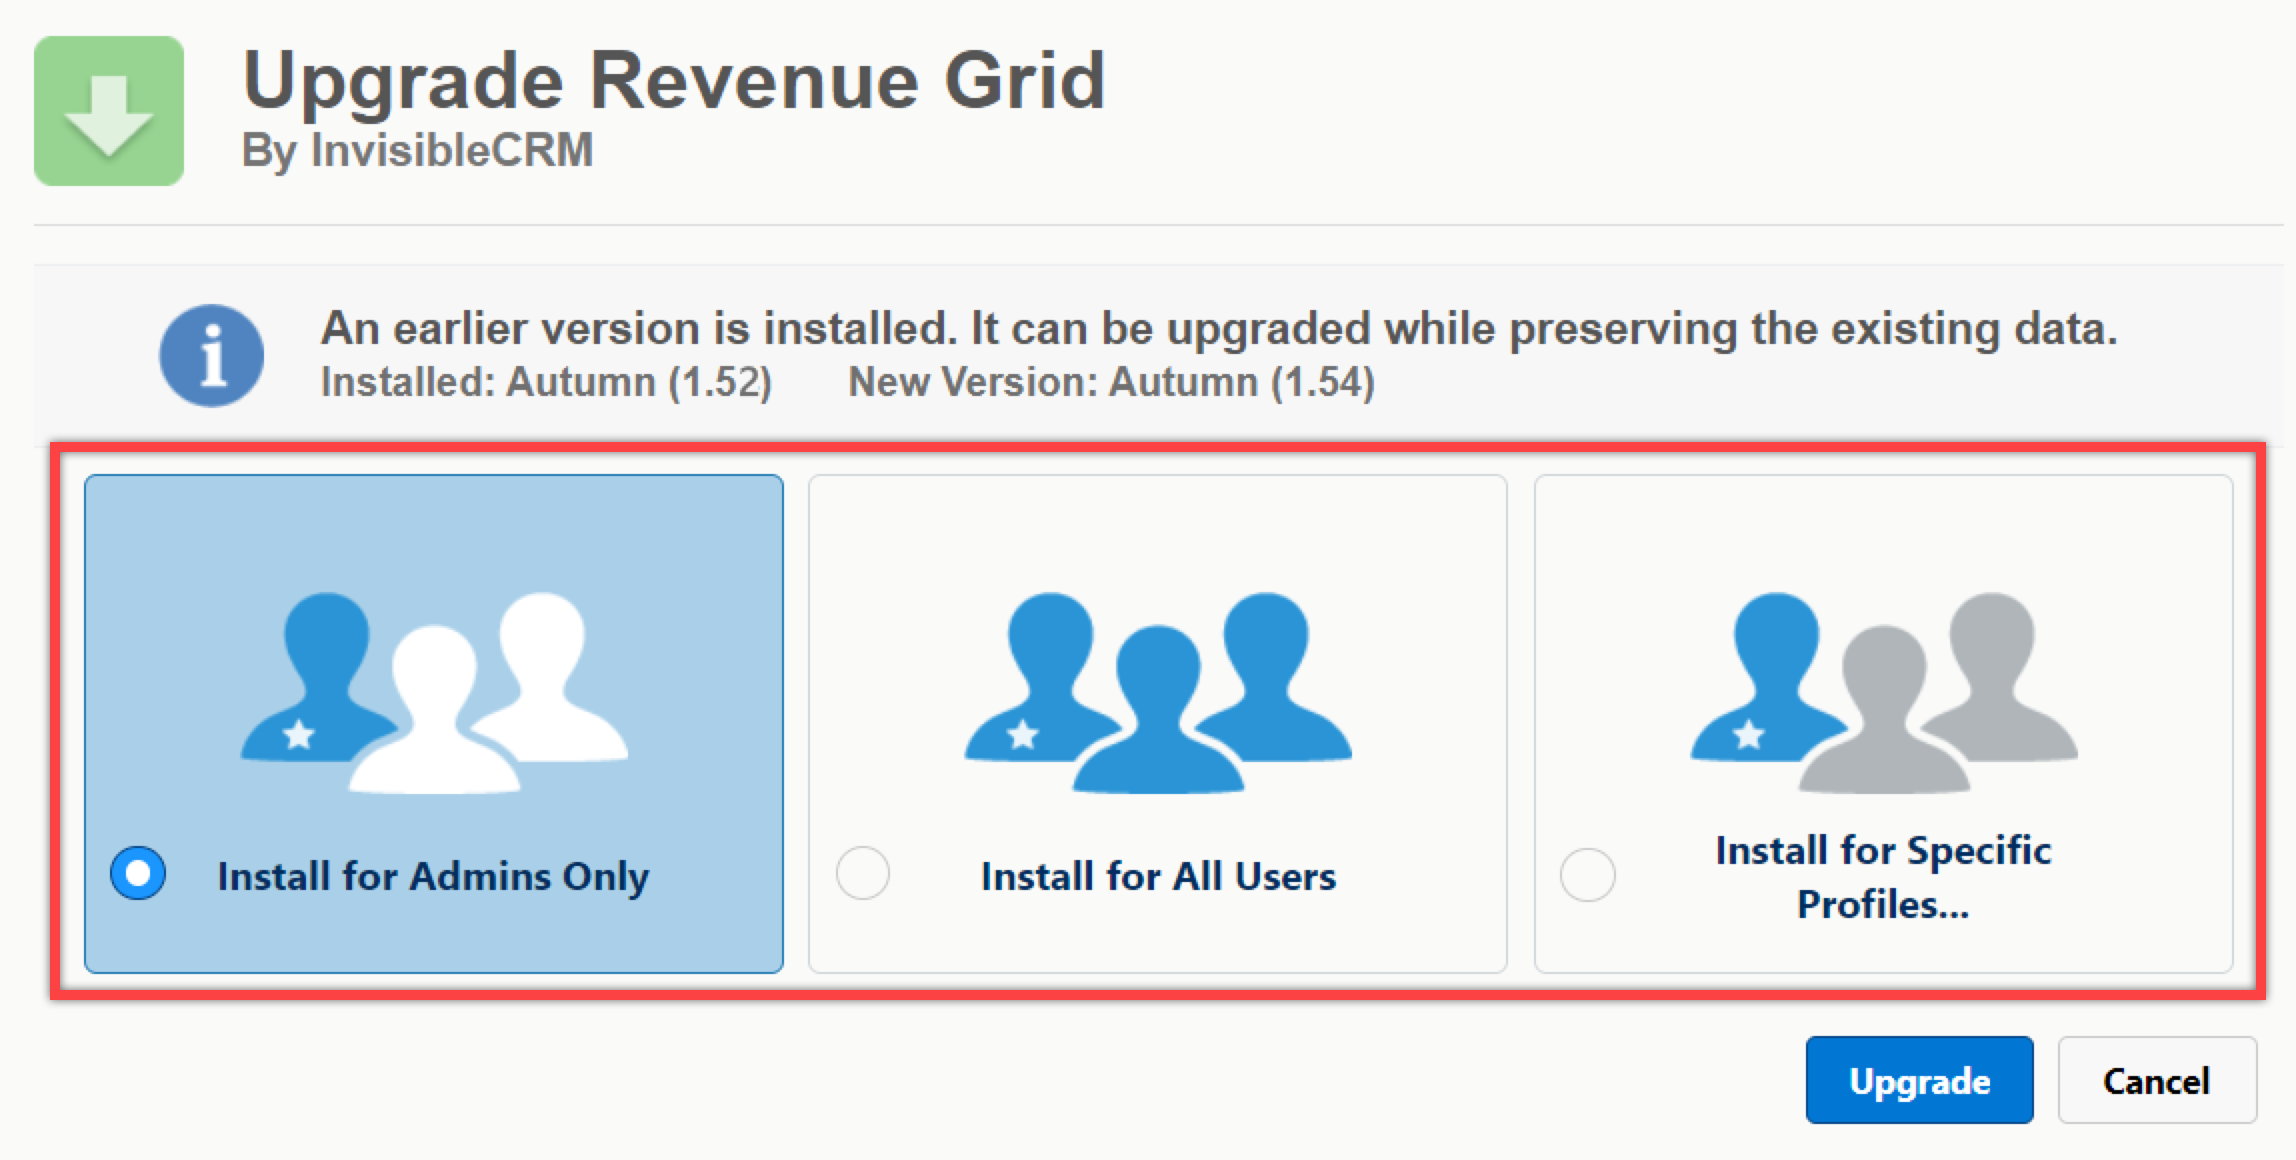
Indicate if you want to upgrade the package for:
- All users in your Org
- (recommended) Install for specific Profiles: which will be using Revenue Grid components
- Only for the Admins
-
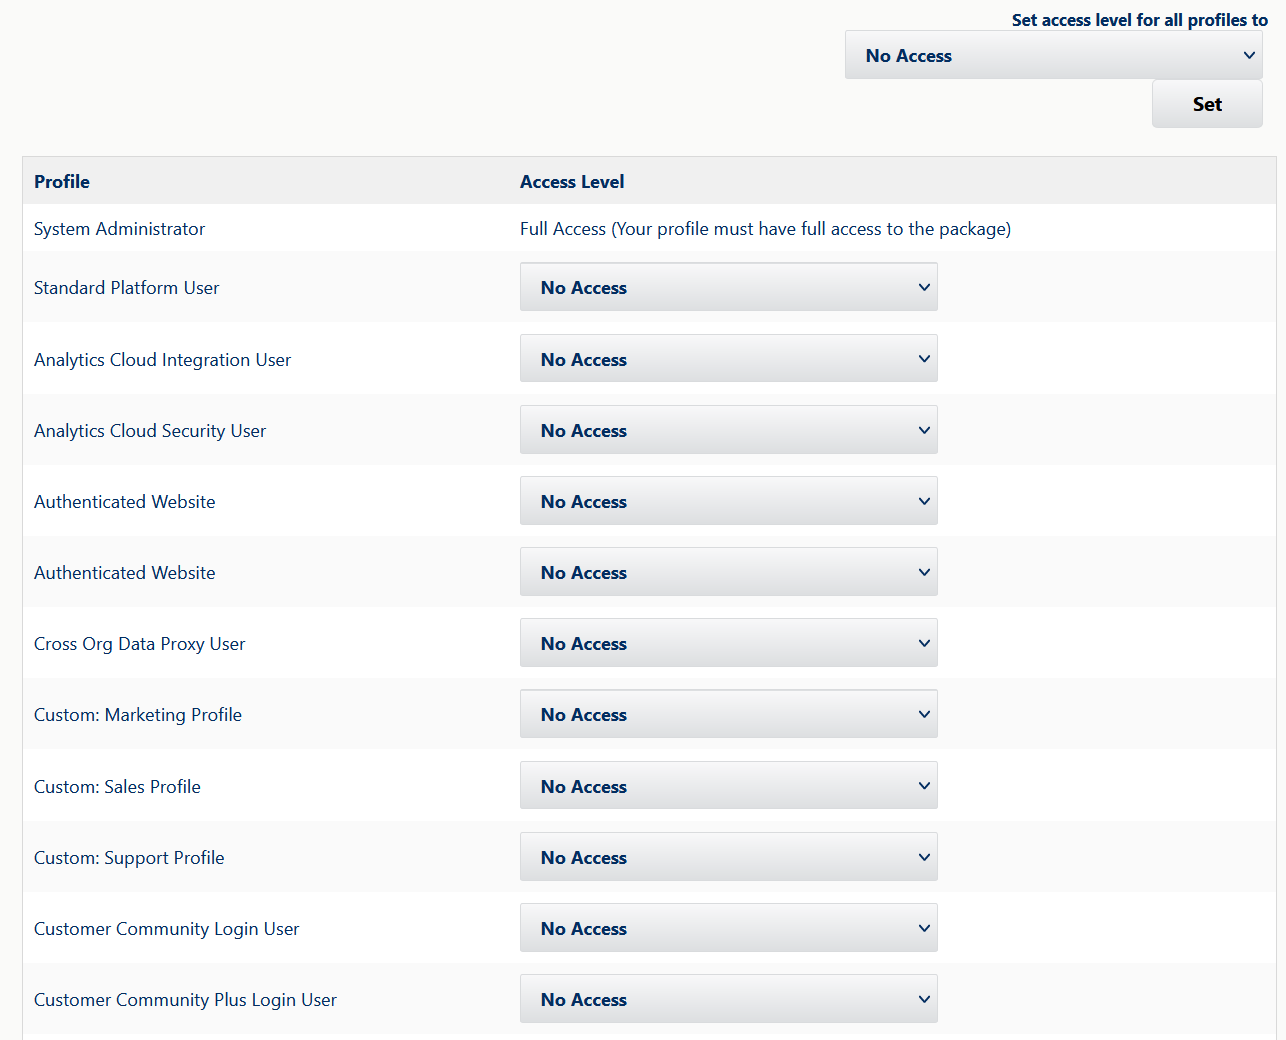
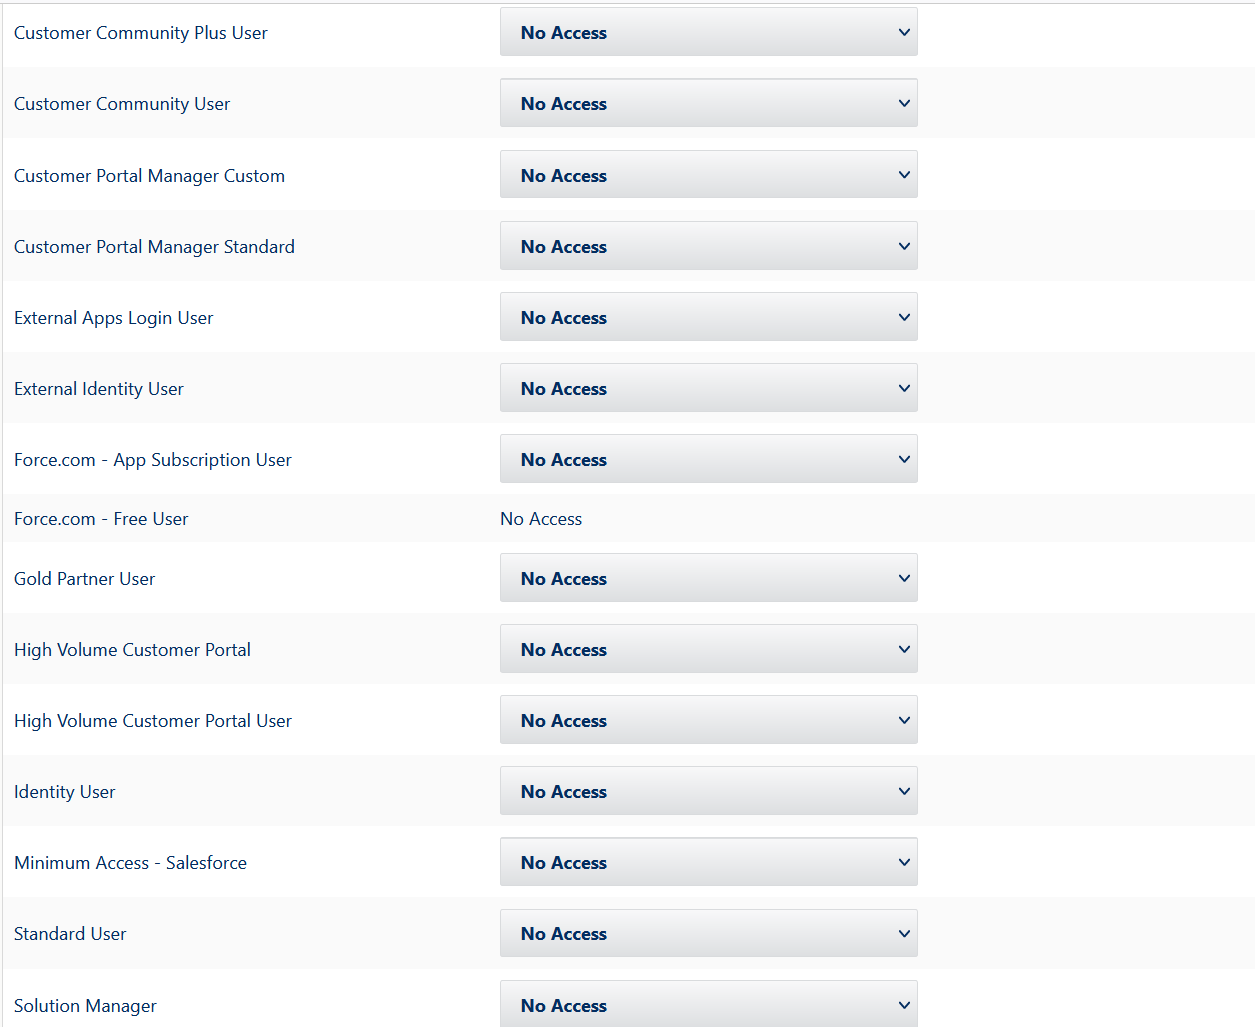
If you chose Install for specific Profiles, set the needed profiles scope using the controls underneath.
Note
Also see the relevant Salesforce guide for details.
List of controls
-
Click the button Upgrade underneath. Next, you will see the following notification:

-
Click the Done button, and soon you will receive an email message from Salesforce confirming that the package was upgraded.
Check the Custom Setting “ClientID”
One of the reasons why instant sync of calendar items from Salesforce to MS Outlook may not function correctly is the lack of ClientId value in the CliendId Config custom setting.
-
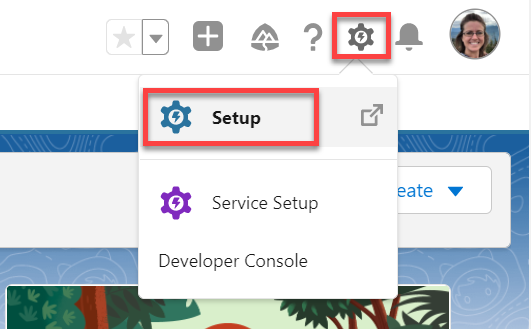
Click on the Gear icon and select Setup.
-
In the Quick Find box in the left-hand sidebar, enter Custom Settings to quickly find the necessary setting.

-
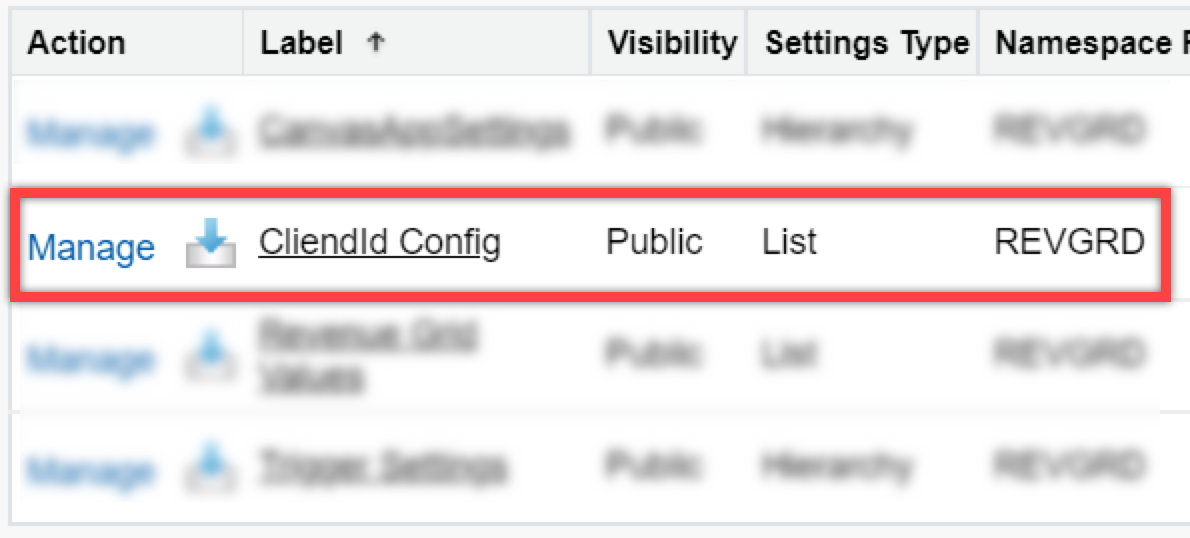
On the opened page, find the CliendId Config setting.
-
Click Manage next to it.
-
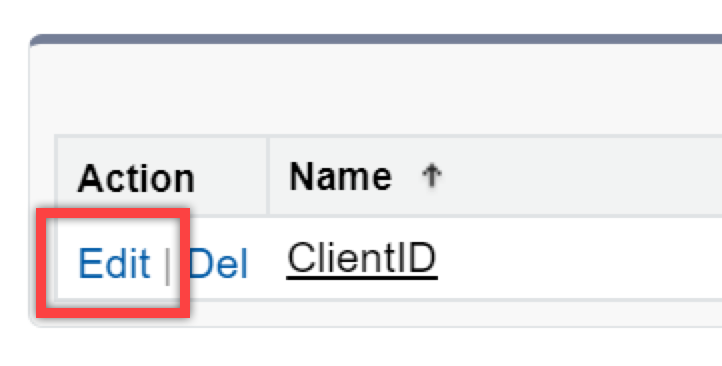
On the CliendId Config page, click Edit.
-
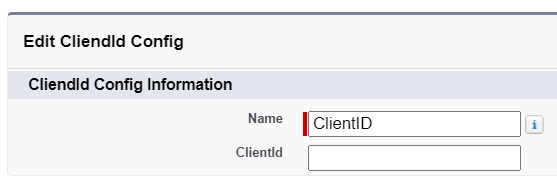
Make sure that the ClientId is filled with numeric value. If it is correctly prefilled, proceed with the next step
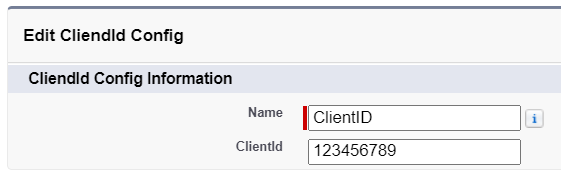
-
If ClientId is empty, request a new ClientId from RG support team and enter/paste it in the corresponding field.
-
Click Save to apply the changes.
-
Next, proceed with checking the Custom Setting Trigger Settings.
Check the Custom Setting “TriggerSettings”
The instant sync of calendar items from Salesforce to MS Outlook may function incorrectly due to misconfiguration of TriggerSettings in Custom Settings.
-
In the Quick Find box in the left-hand sidebar, enter Custom Settings to quickly find the necessary setting.
-
On the opened page, find Trigger Settings.

-
Click Manage next to it.
-
If the page is empty (see the screenshot below), you must create a new custom setting with a new setup owner.
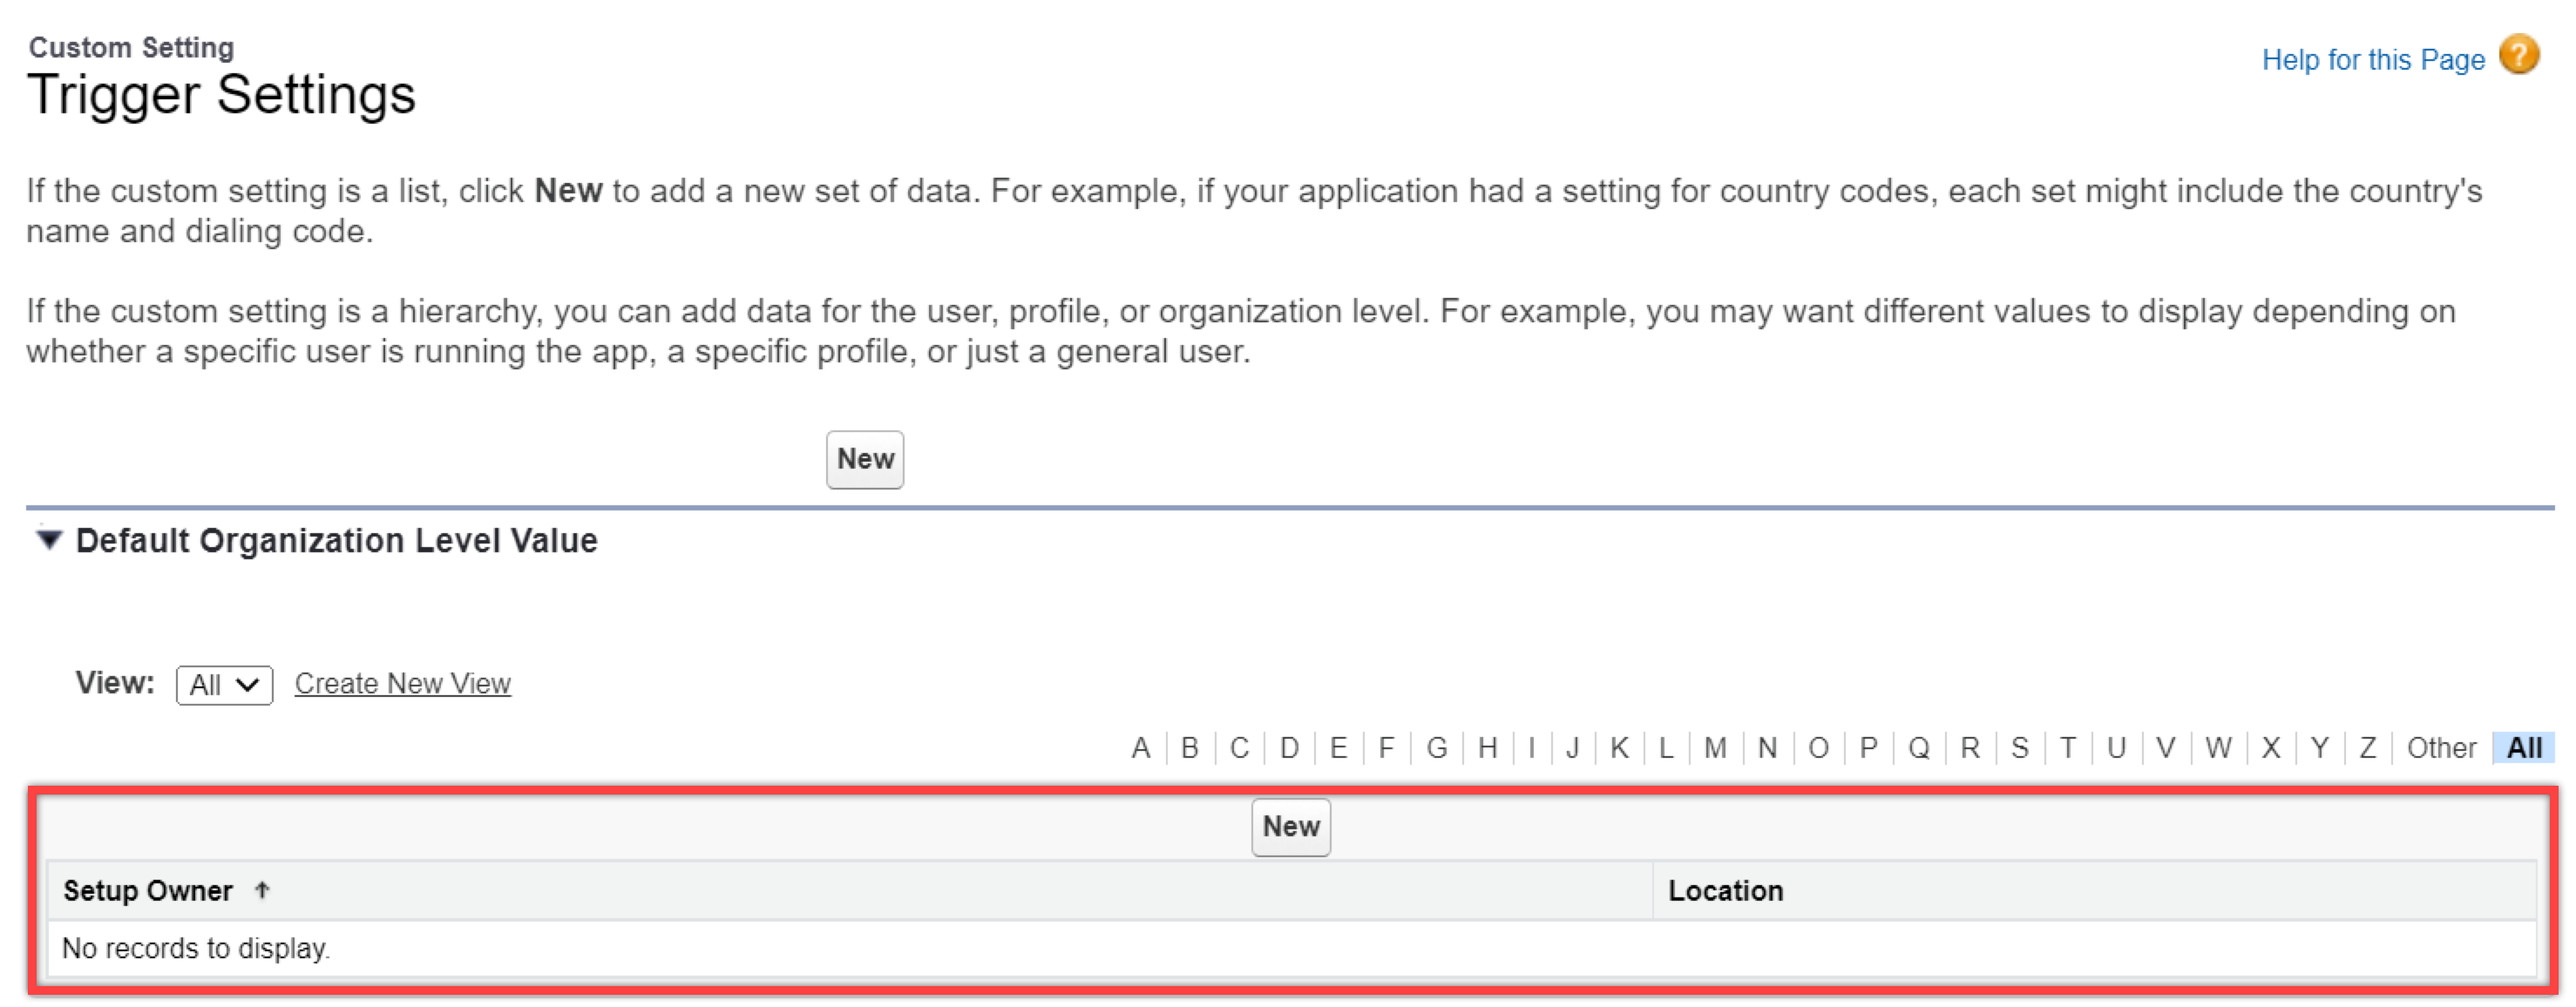
- Under Default Organization Level Value, lick the New button.
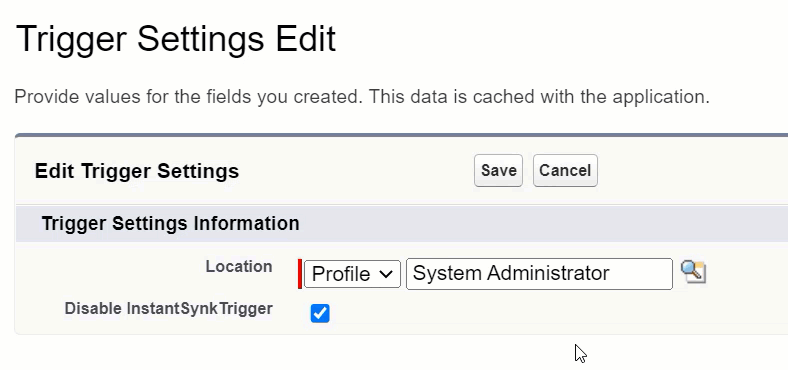
- Under Trigger Setting Information, select Profile and name it System Administrator.
-
Click Save to apply the changes.

-
If a setup owner already exists:
- Click Edit next to it.
- Make sure that the checkbox Disable InstantSynkTrigger is NOT selected. If the checkbox is selected, unselect it and click Save.
-
Proceed with connecting Revenue Grid to your Salesforce configuration.
Connect Revenue Grid to your Salesforce configuration
Note
For performing this step, request “ServerSyncTenantUrl” from RG support team in advance or generate it on your own following the instructions provided in this article.
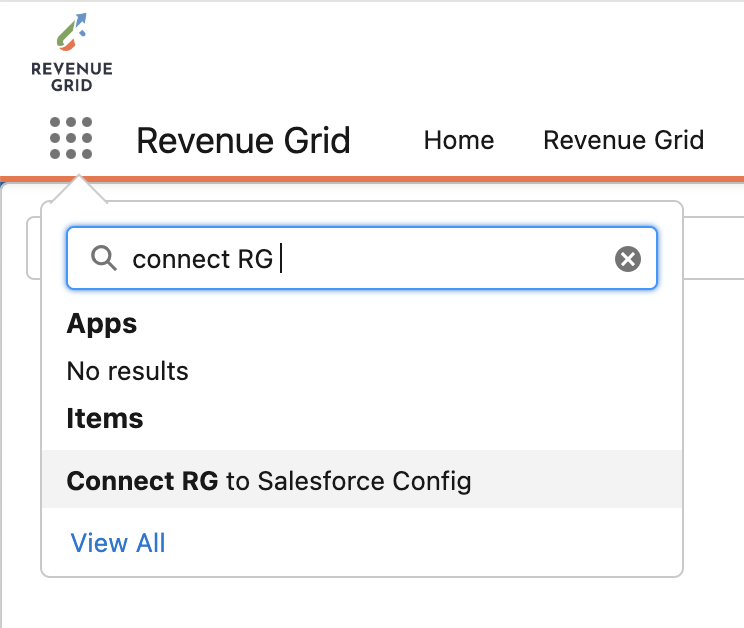
- Go to App Launcher.
-
Enter Connect to RG in the Search field.
-
On the page that is opened, in the Enter your tenant URL here… field, enter the ServerSyncTenantUrl provided by our support team.

Note
ServerSyncTenantUrl should follow this pattern: https://[ your tenant ]-sync.revenuegrid.com/ .
If you do not know your ServerSyncTenantUrl, you can either request it from RG support team or generate it on your own following the guidelines in this Revenue Grid instruction. -
Click Connect.
- Next, you will see a standard Salesforce OAuth window. Log in to it with Salesforce credentials to authorize data access for integration.
After connecting Revenue Grid to your Salesforce configuration, instant sync of calendar items from Salesforce to MS Outlook should function as expected.