Get the Revenue Grid Managed Package up and running


To enable the full scope of Revenue Grid features after installing the Solution, the local Salesforce Admin should install a special Revenue Grid Salesforce managed package that includes a number of auxiliary custom fields, classes, and other components.
In addition to providing auxiliary components, the managed package allows Revenue Grid controls to be integrated into the Salesforce user interface using Lightning Web Components and Named Credentials.
Note: This functionality is available only in Salesforce Lightning Experience and is not supported in Salesforce Classic.
The managed package is guaranteed to be secure, confidential, and free of malicious content under Revenue Grid Privacy & Security policies.
The package’s publisher, InvisibleCRM, is an old Revenue Grid brand.
Note
If the error “This package can’t be installed” occurred on the managed package installation to the Salesforce Professional Edition, refer to this article to learn how to handle the issue.
The extra features provided by the package
- The possibility to dock Revenue Grid Email Sidebar into a user’s Salesforce page, this way enabling various scenarios of convenient emails and calendar data handling directly from users’ Salesforce accounts.
- The package includes an extended set of custom object fields required for using the complete Revenue Grid Revenue Intelligence package .
- Direct and handy Salesforce reports access and use. With this component installed, the end users will be able to use a pre-configured set of Salesforce reports or customize reports to be used for their specific needs.
-
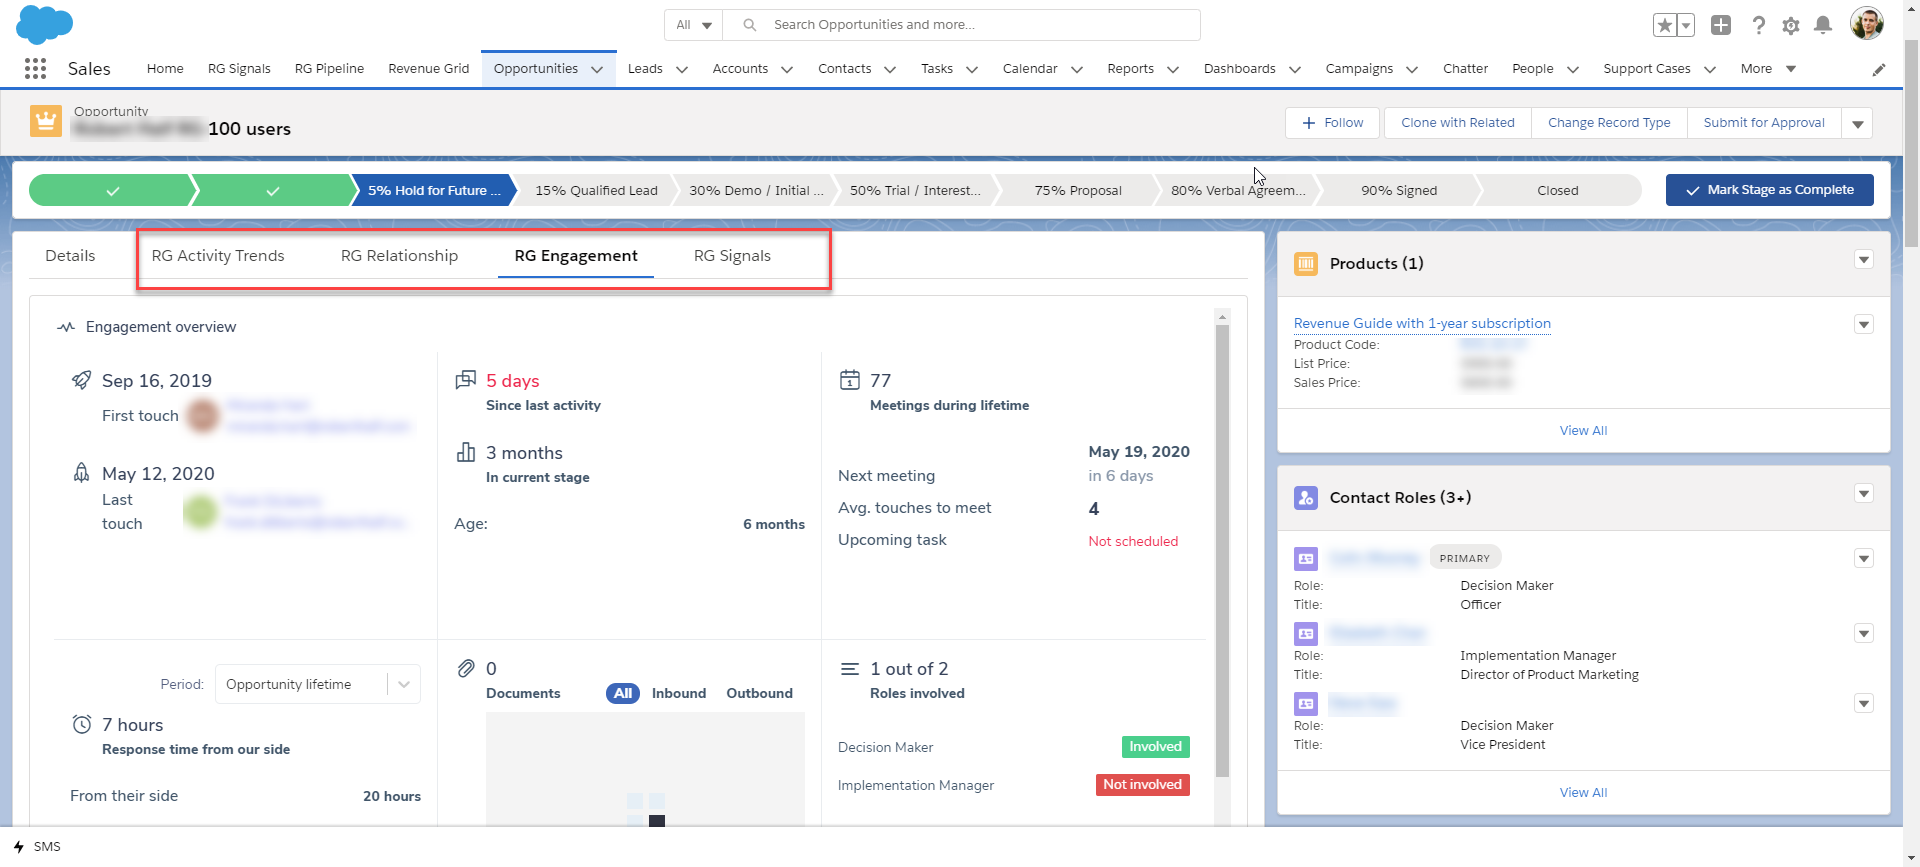
For the Revenue Engagement users, the package allows to dock Revenue Engagement tabs straight into their Salesforce user interface.
Prerequisites for the managed package installation
Using Revenue Grid for Salesforce requires setting up My Domain name for your Salesforce org and deploying it for the users. Follow the instructions in this Revenue Grid article to learn how to do that.
I. Install Revenue Grid managed package
-
Open the package installation link:
- Revenue Grid managed package (version 1.89)
- Revenue Grid managed package for Salesforce Professional Edition
Note
If you are using a Salesforce Sandbox, see this Salesforce help article to learn more about installing packages in a Sandbox.
-
Log in to your Salesforce account (you must have Admin permissions in your org).
-
Choose the installation scope:
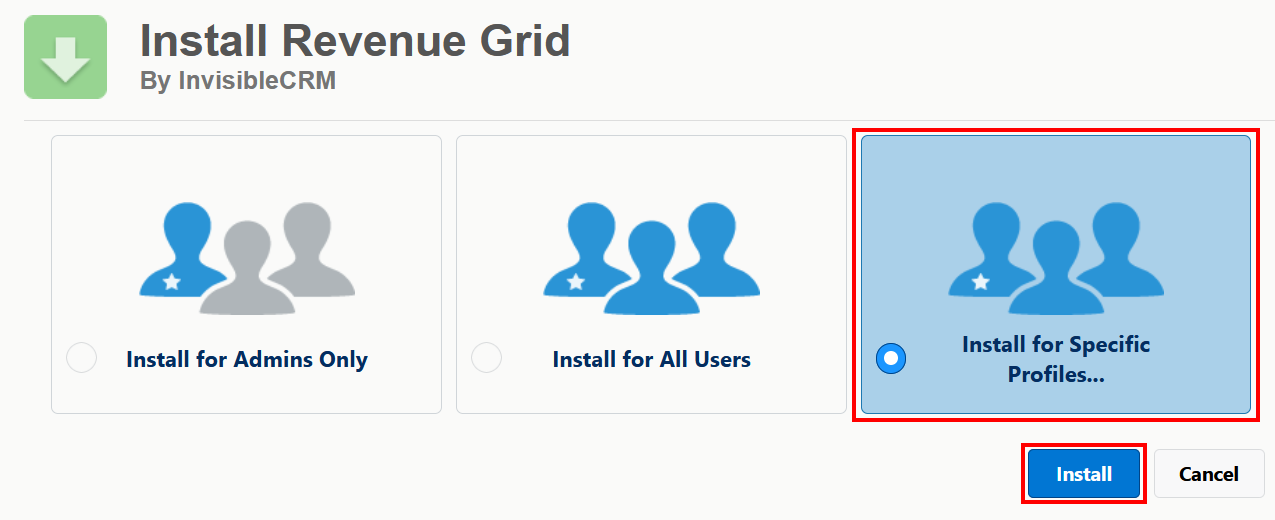
- Admins Only
- All Users
- Specific Profiles (recommended) – limits access to selected users who need the Salesforce Scheduler integration.
-
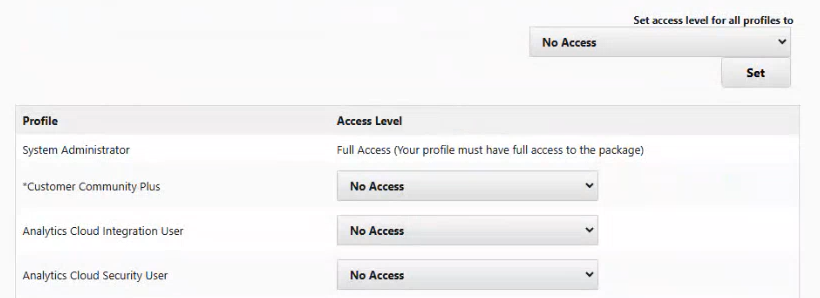
If you select Specific Profiles, set access for the required profiles using the provided controls. For detailed instructions, refer to this Salesforce guide.
-
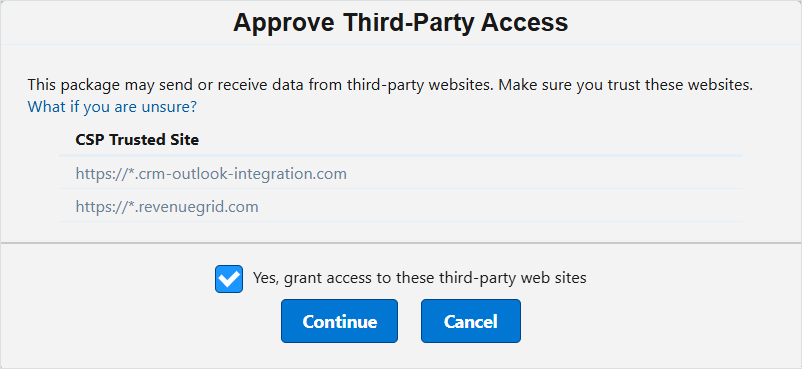
Click Install. The Approve Third-Party Access dialogue will appear.
-
Select Yes, grant access to these third-party websites, and click Continue.
-
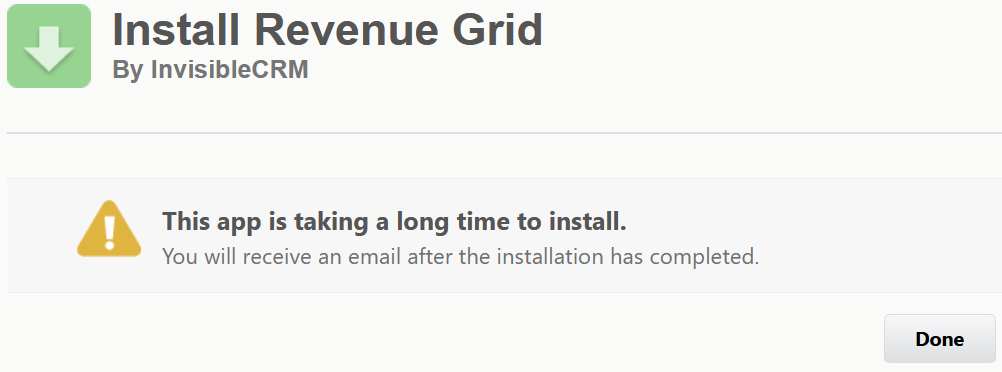
When you see the message “This app is taking a long time to install,” click Done. After the installation is complete, you will receive an email confirming the successful installation or detailing any issues.
-
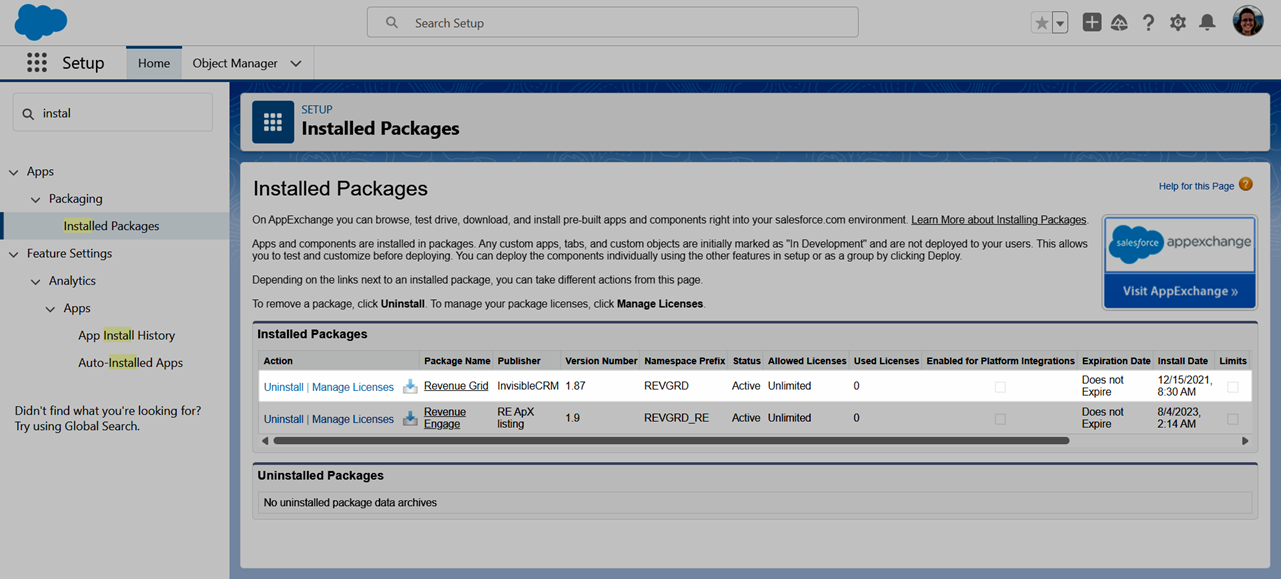
After the Revenue Grid Salesforce managed package is successfully installed, you can access it in Salesforce by navigating to Platform Tools > Apps > Packaging > Installed Packages.
II. Configure the app in Salesforce
After installing the managed package, you can proceed to configure the Revenue Grid app in Salesforce.
Obtain your tenant URL and authorization credentials
Before you start tp configure the integration, generate your tenant URL and authorization credentials.
-
Generate your Revenue Grid tenant URL.
-
Generate the Client ID and Client Secret.
See, Generate Client ID and Client Secret for Revenue Grid and Salesforce integrations.
Important
The Client Secret is displayed only once—immediately after the integration is created. Copy and store it securely, as it cannot be viewed again later.
Edit the Revenue Grid named credentials
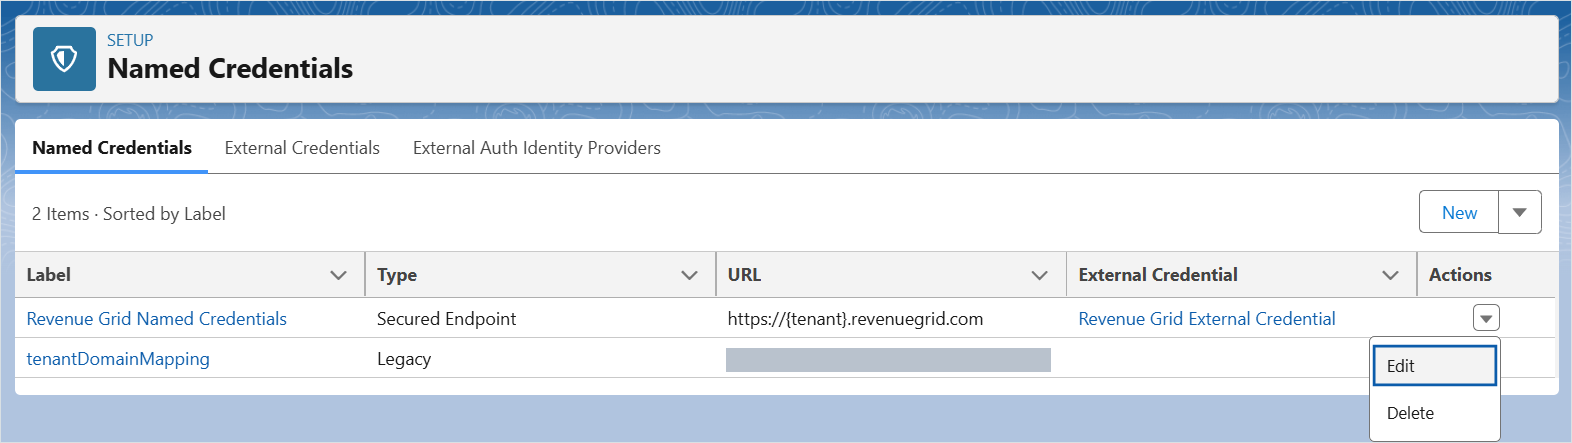
- Open the Salesforce Setup page.
- In the Quick Search field, enter Named Credentials and select Named Credentials from the search results.
-
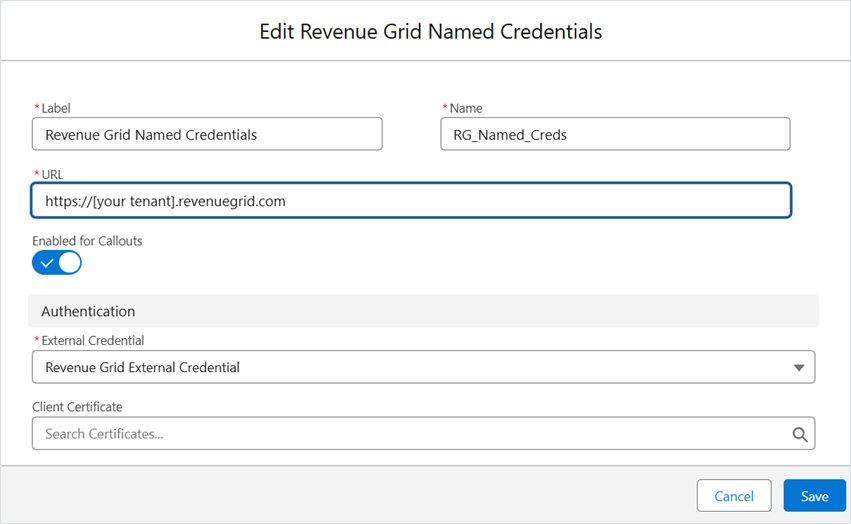
Find Revenue Grid Named Credentials in the list and, in the Actions menu next to it, click Edit.
-
Replace the URL with the value of your RevenueGridTenantURL, and click Save.
-
Open Revenue Grid External Credentials.

-
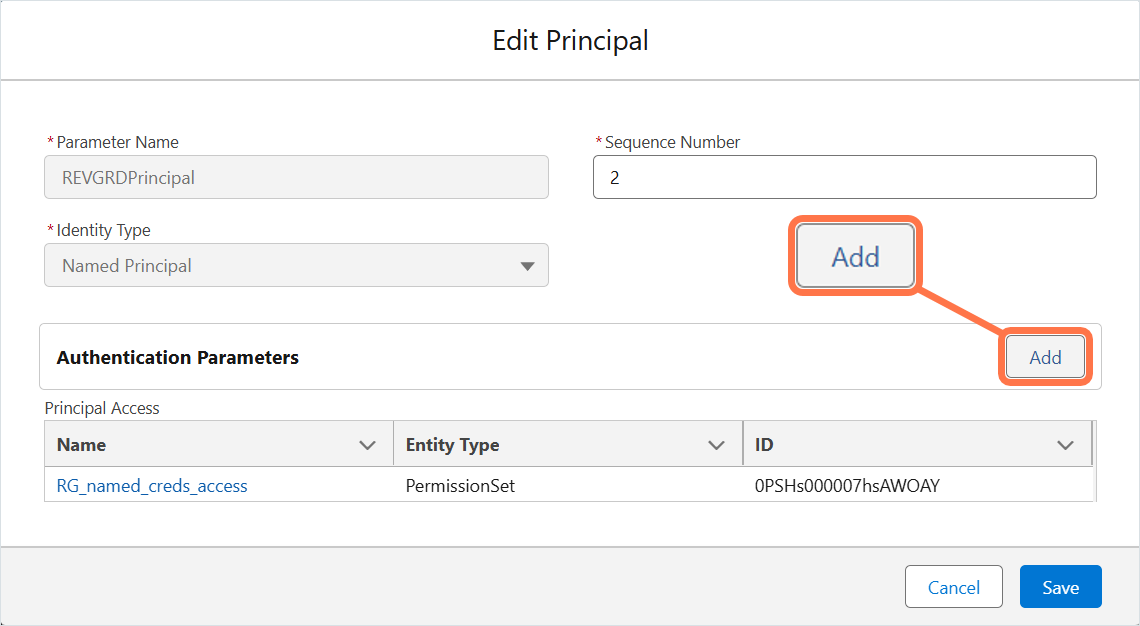
Under the Principals section, click Edit next to the REVGRDPrincipal.

-
In the Edit Principal dialogue, click the Add button two times to add two parameters.
-
For the first parameter:
- In the Name field, enter client_secret.
- In the Value field, enter the value of the client secret.
-
For the second parameter:
- In the Name field, enter client_id.
-
In the Value field, enter the value of the client ID.
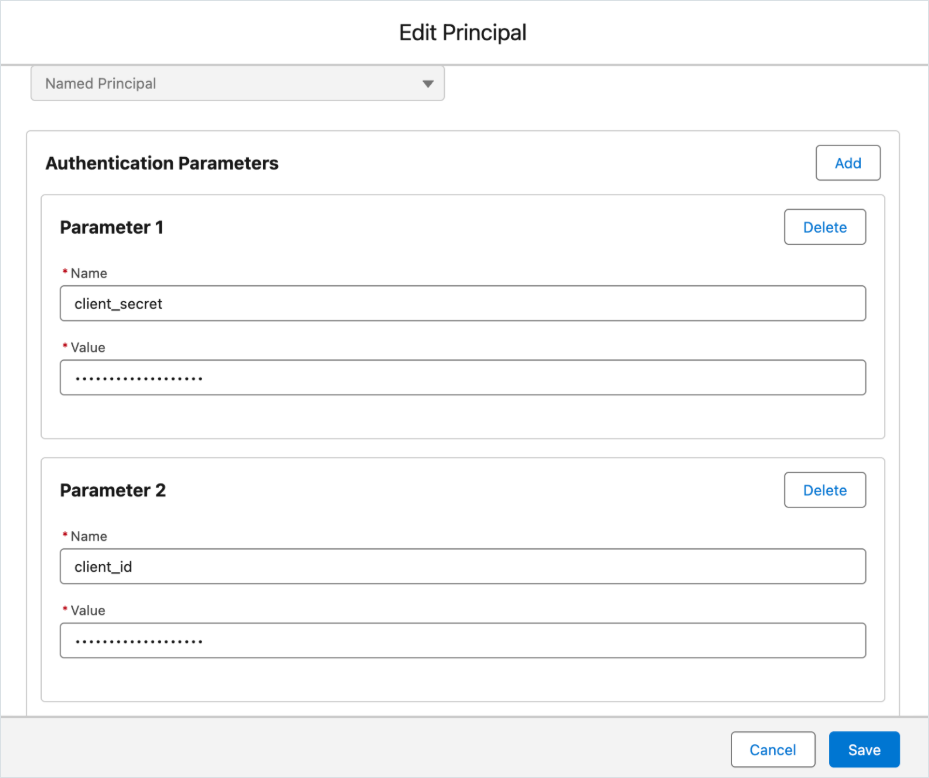
-
Click Save.
Create a permission set
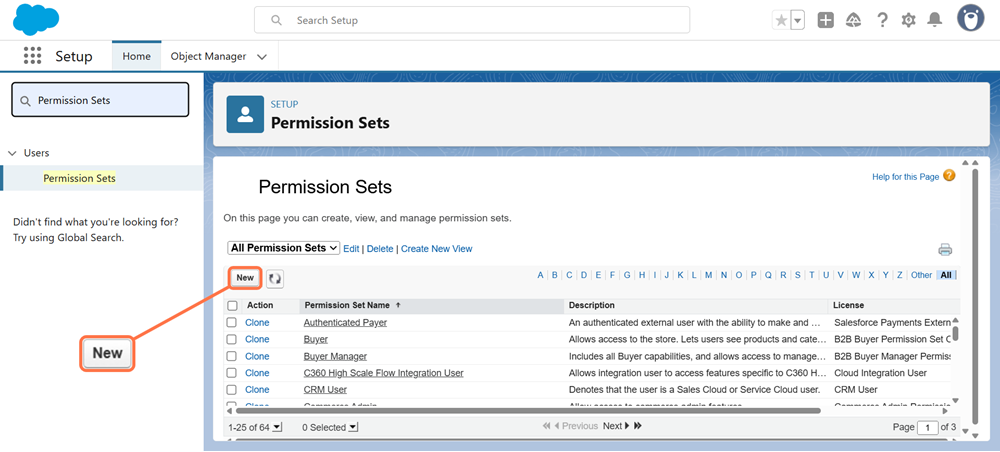
- In the Quick Search field, enter Permission Sets and select Permission Sets from the search results.
-
Click New.
-
In the Label field, enter a name for the permission set (for example, Revenue Grid access).

-
Click Save.
-
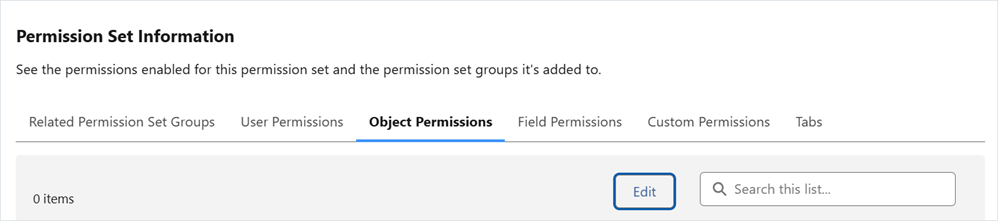
On the permission set page, click View Summary.
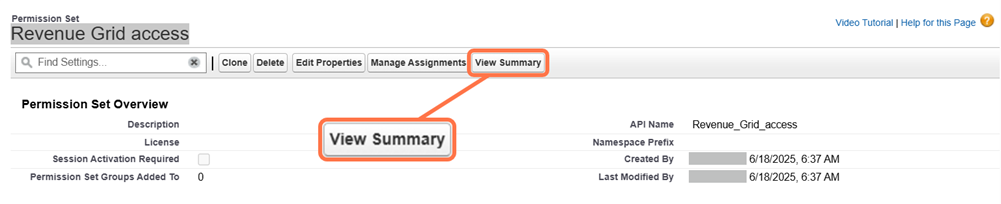
-
Under Permission Set Information, select the Object Permissions tab, then click Edit.
-
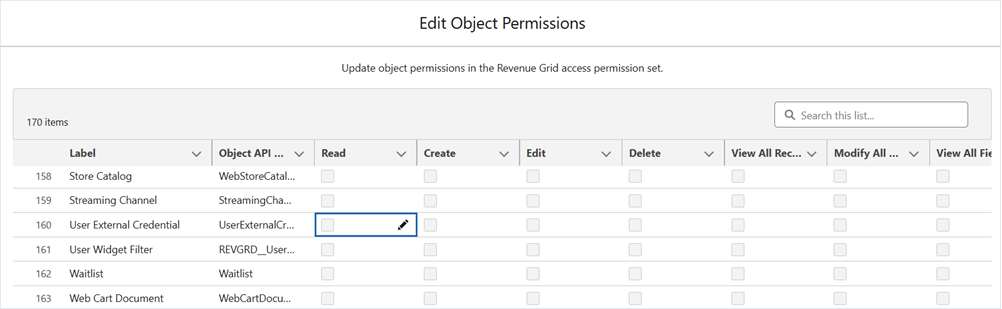
Scroll to the User External Credential object. In the Read column, click the edit icon ().
-
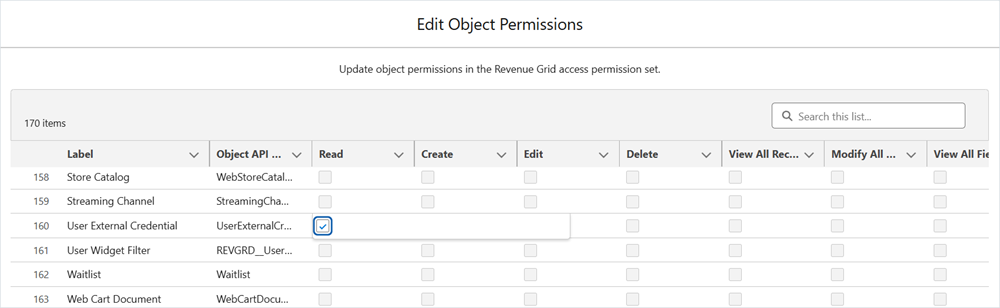
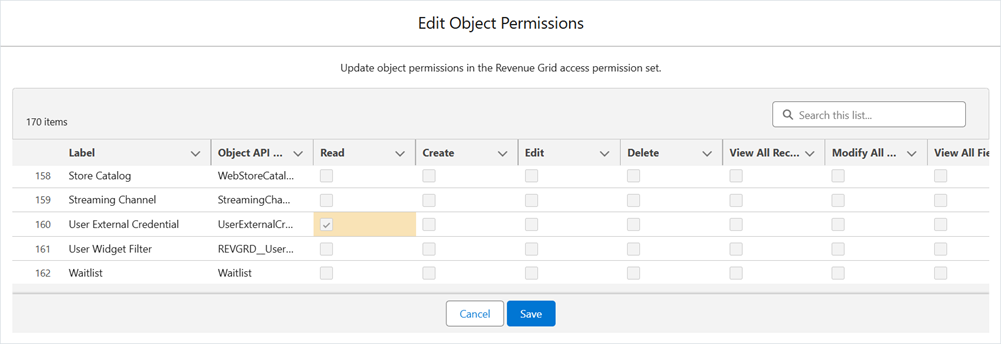
Select the checkbox that appears, then click outside the field to exit edit mode.
-
Click Save.
-
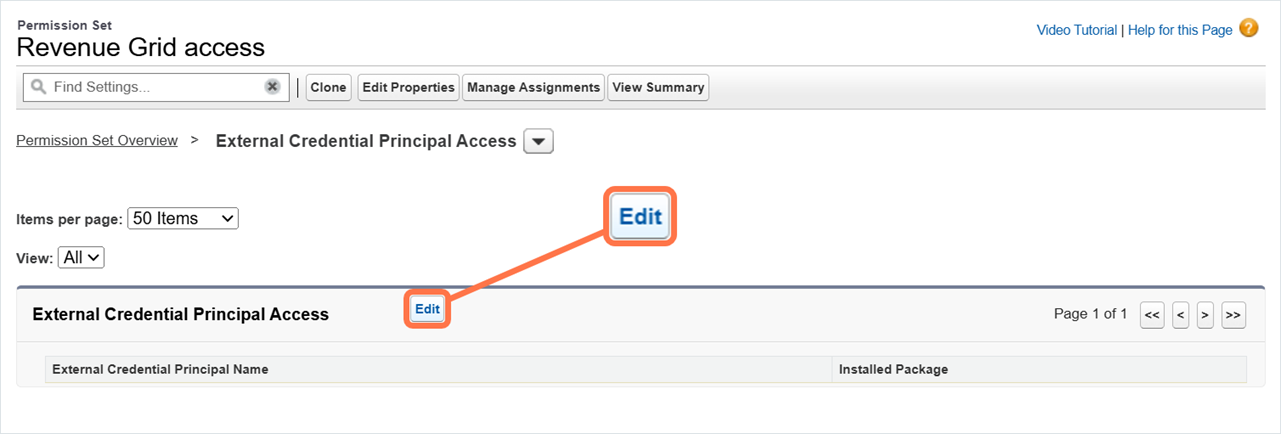
Back to the page of the created permission set and under Apps, open External Credential Principal Access.
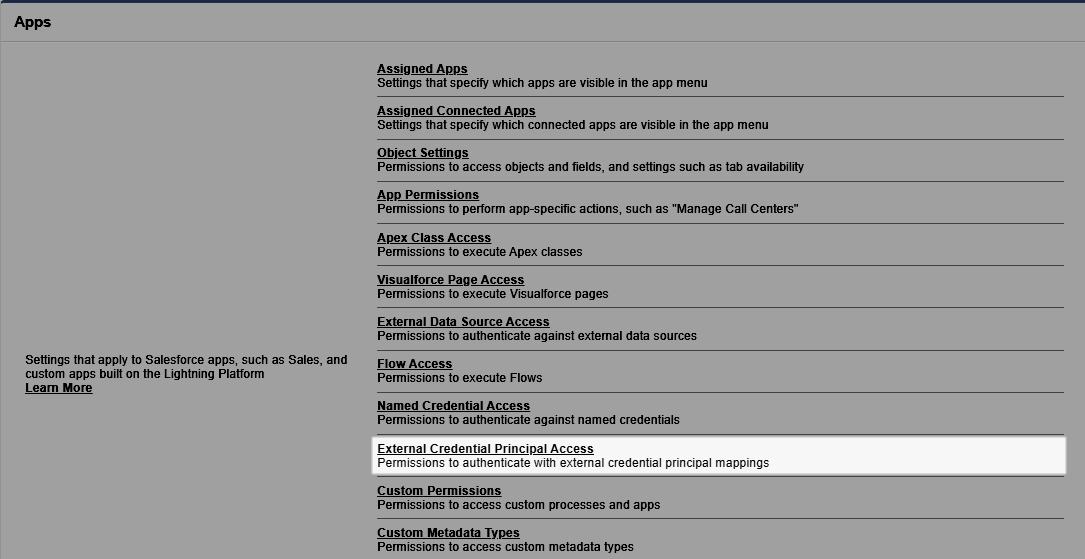
-
Click Edit.
-
In the Available External Credential Principals list, select RG_Ext_Creds - RVGRDPrincipal (A), and click Add (B).

-
Click Save.
Assign the permission set to users
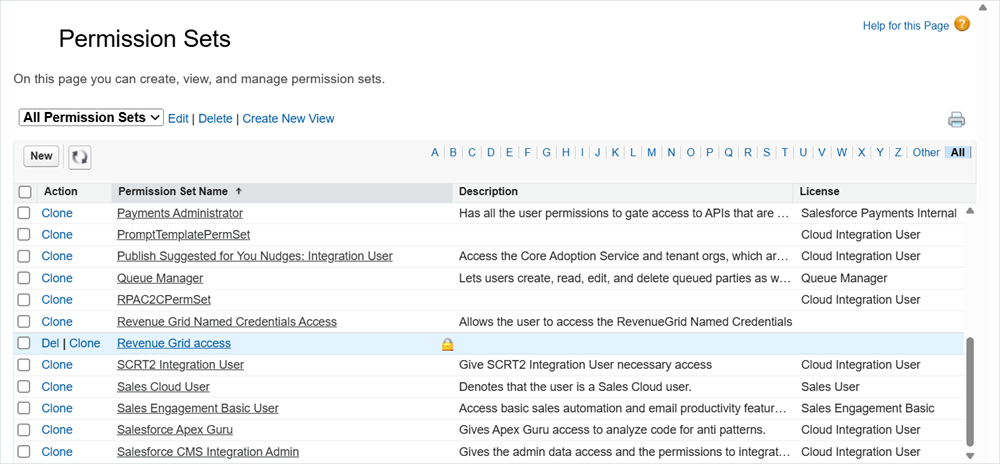
-
Return to the Permission Sets page and open created permission set.
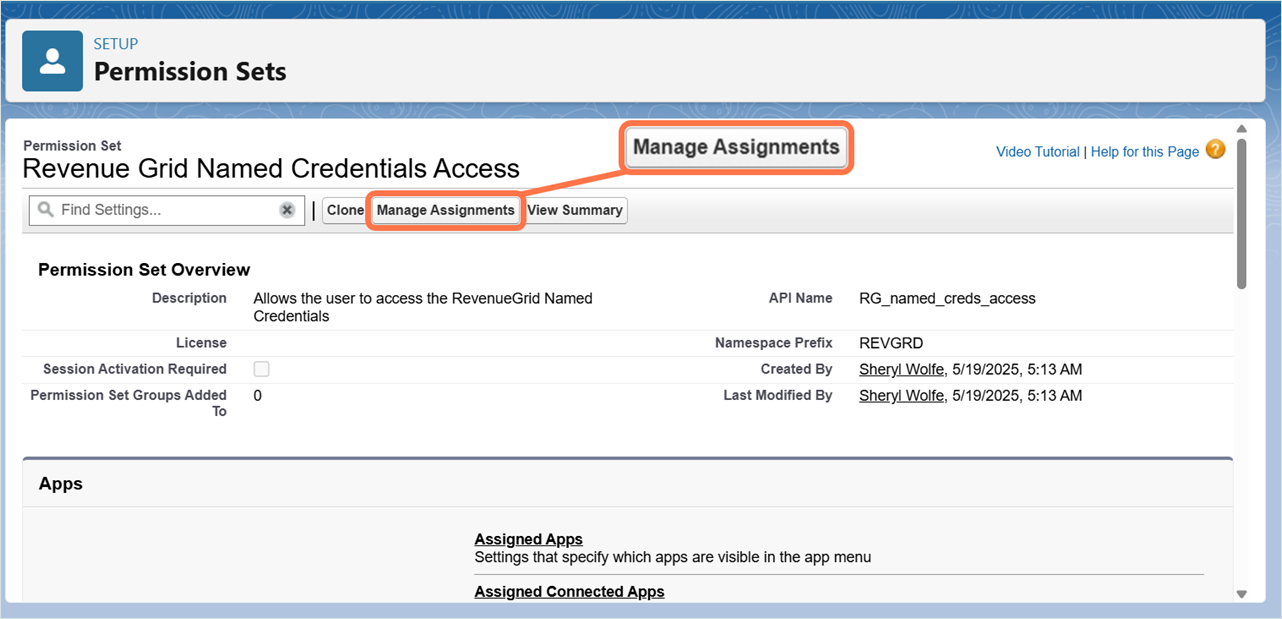
-
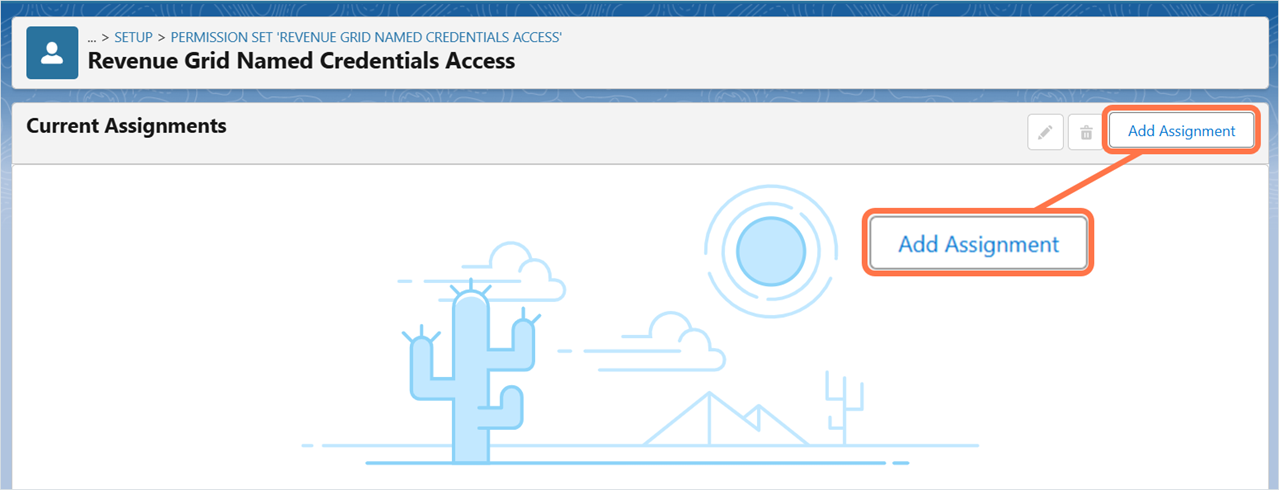
Click Manage Assignments.
-
Click Add Assignment.
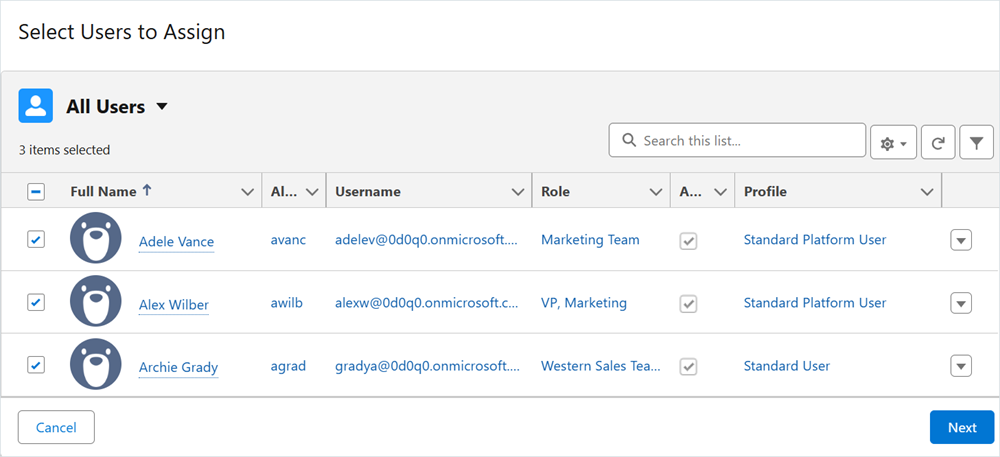
-
Select the users to assign the permission set to, then click Next.
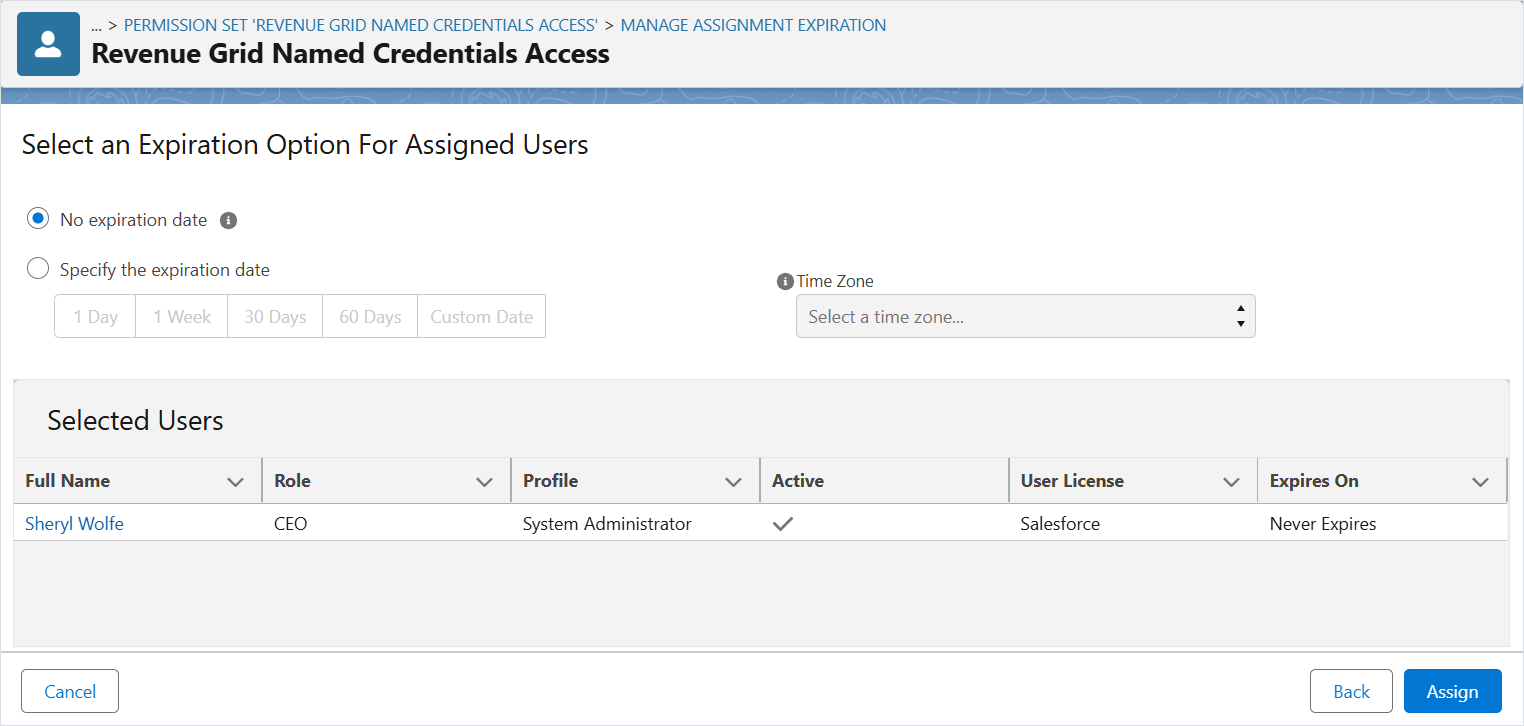
-
Click Assign.
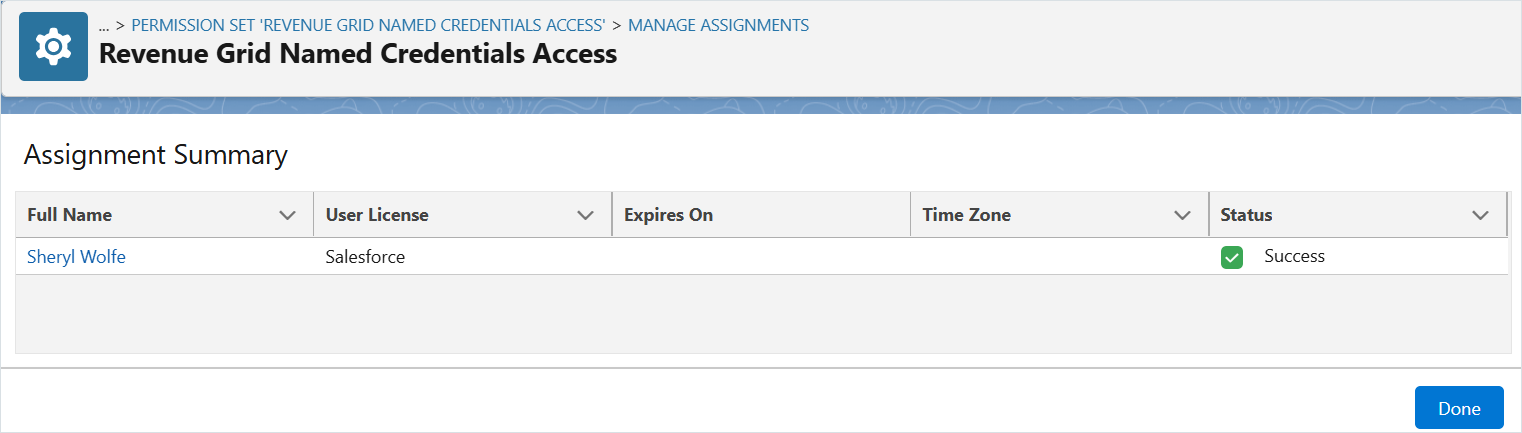
-
When the assignments are complete, click Done.
III. Add Revenue Grid components to Salesforce user interface
After installing the Revenue Grid managed package, you can give your users quick access to actionable sales insights by adding Revenue Grid widgets to Salesforce. These widgets help sales reps and managers monitor opportunity health, track engagement, identify gaps, and evaluate performance directly within the Salesforce interface.
You can access Revenue Grid widgets in three flexible ways:
- Open the Revenue Grid app in App Launcher to view all widgets in one place.
- Add Revenue Grid tabs to the most-used Lightning apps.
- Embed widgets on record page layouts to surface insights where users need them.
For detailed setup steps, see Add Revenue Grid widgets in Salesforce (admin guide).
For user-level instructions, see Add Revenue Grid widgets in Salesforce (user guide).
Updating the managed package
To stay compatible with the latest Salesforce updates and ensure new Revenue Grid features work as expected, we regularly release updates to the Revenue Grid managed package.
See this article for instructions on how to update the managed package.
Package contents
All specific components the Revenue Grid adds to your Salesforce configuration are listed on this page.