Collaborative Forecasts in Salesforce
Collaborative Forecasts is the Salesforce functionality that enables the sales team to plan and predict their sales process and sales results.
Turning on and configuring Collaborative Forecasts in Salesforce is an essential prerequisite for using Revenue Grid forecasts and reports, which are built upon the relevant data retrieved from Salesforce.
Note
It’s recommended to enable Collaborative Forecasts in Salesforce. But even if they are not enabled in Salesforce, you will see the related reports. However, the Quota will not be displayed in the reports.
1. Turn on Collaborative Forecasts
1.1. Switch to Lightning Experience as described in this article
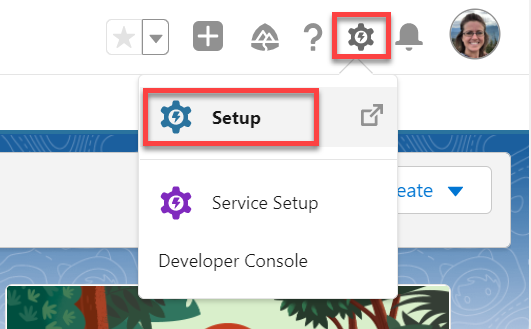 1.2. Click the Gear (Setup Menu) icon in the upper right corner of the page to open Salesforce Setup menu
 1.3. In the Quick Search box in the upper left corner, type "Forecasts Settings" to quickly find the necessary tab
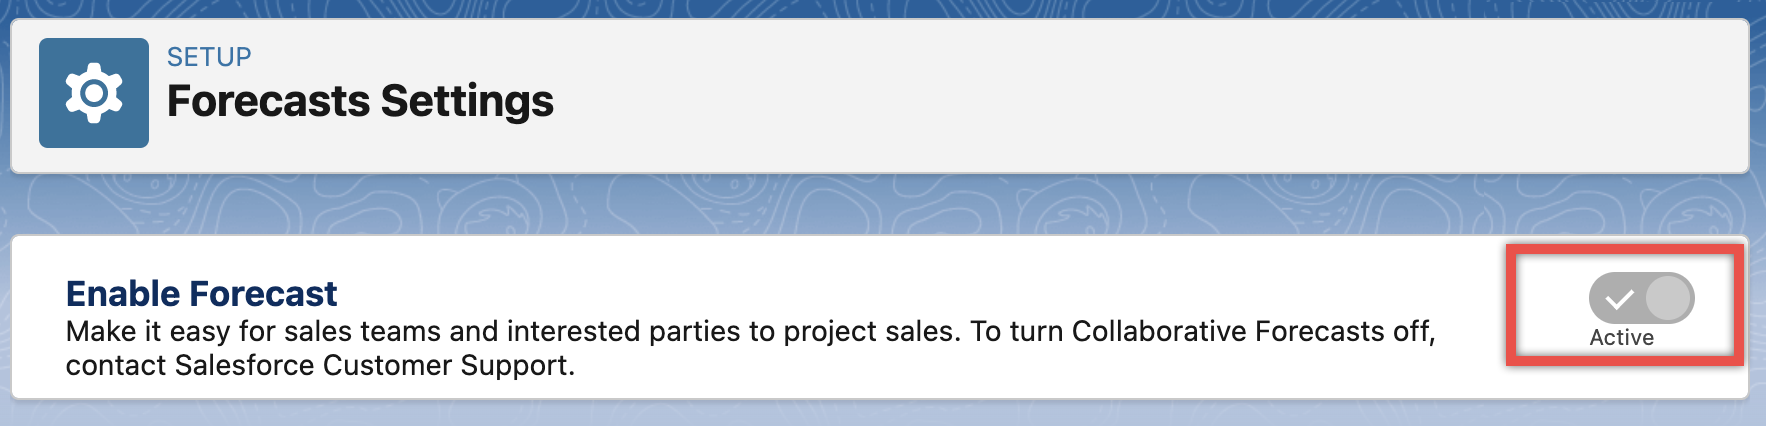
1.4. Select Forecast Settings
1.5. If the Enable Forecast switch button is disabled, turn it on, so it's "Active"
Note
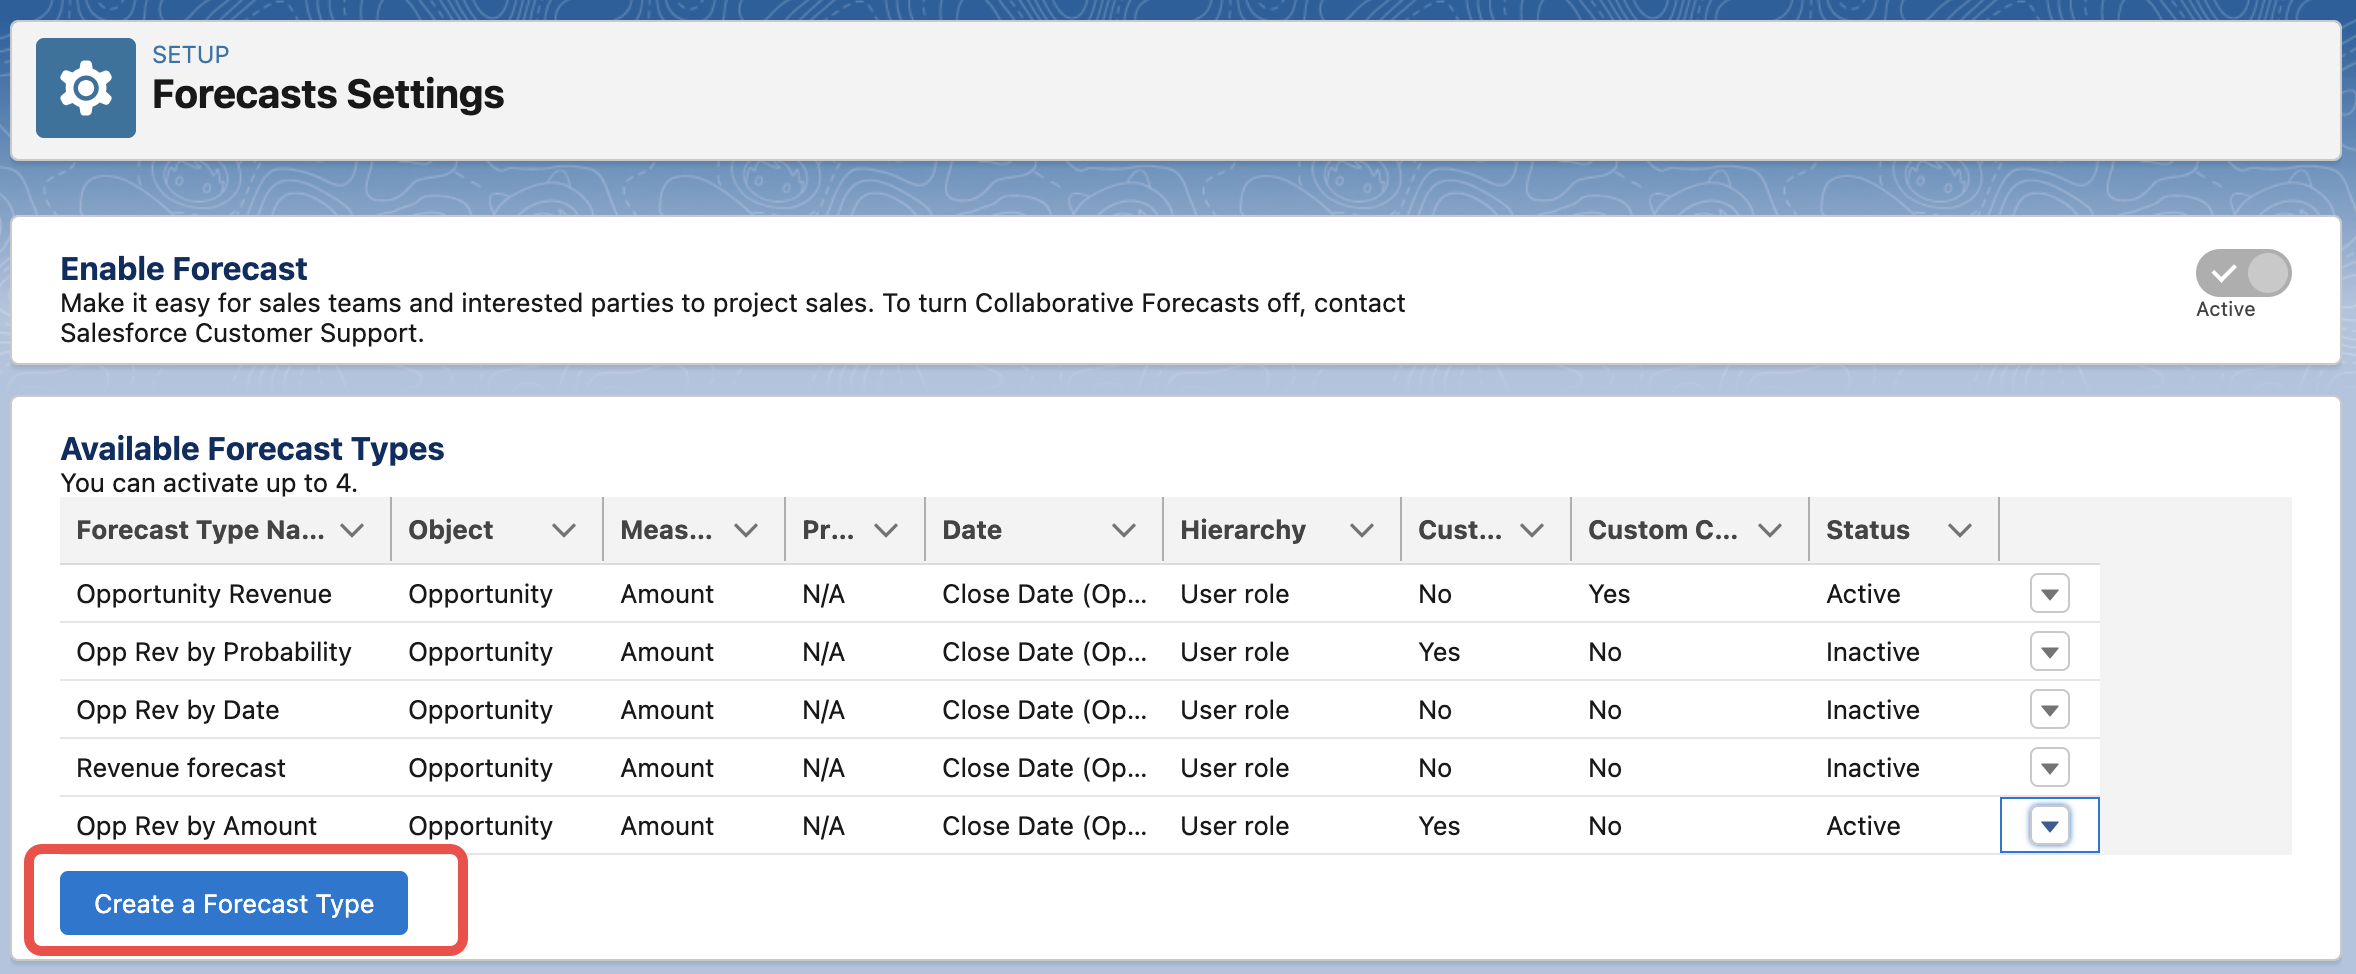
After you turn on the Enable Forecast switch button, the forecast called Opportunity Revenue will automatically appear on the list Available Forecast Types. This forecast is enough to get Revenue Grid’s functionality running. Refer to this Salesforce article for more information about forecast types and their configuration.
2. Create Forecast types
Forecast type is the configuration for displaying specific data from different standard and custom Salesforce fields in your forecasts. Refer to this Salesforce article for more information about forecast types and their configuration.
You will be able to change the forecast type to display only the relevant data in Forecast Chart and Forecast table, as well as on the Opportunities and My profile pages.
To create a new forecast type:
2.1. Find the Available Forecast Types section
2.2. Click Create a Forecast Type
2.3. In the Create a Forecast Type pop-up window, click Start
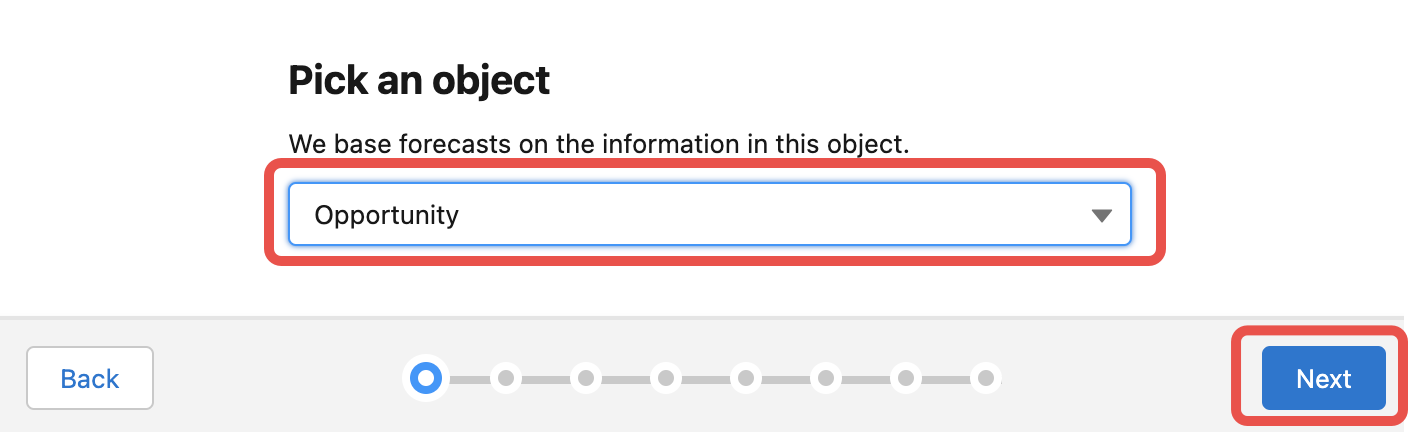
2.4. Next, select the object to base your forecast type on.
Currently Revenue Grid supports only Opportunity-based forecast types
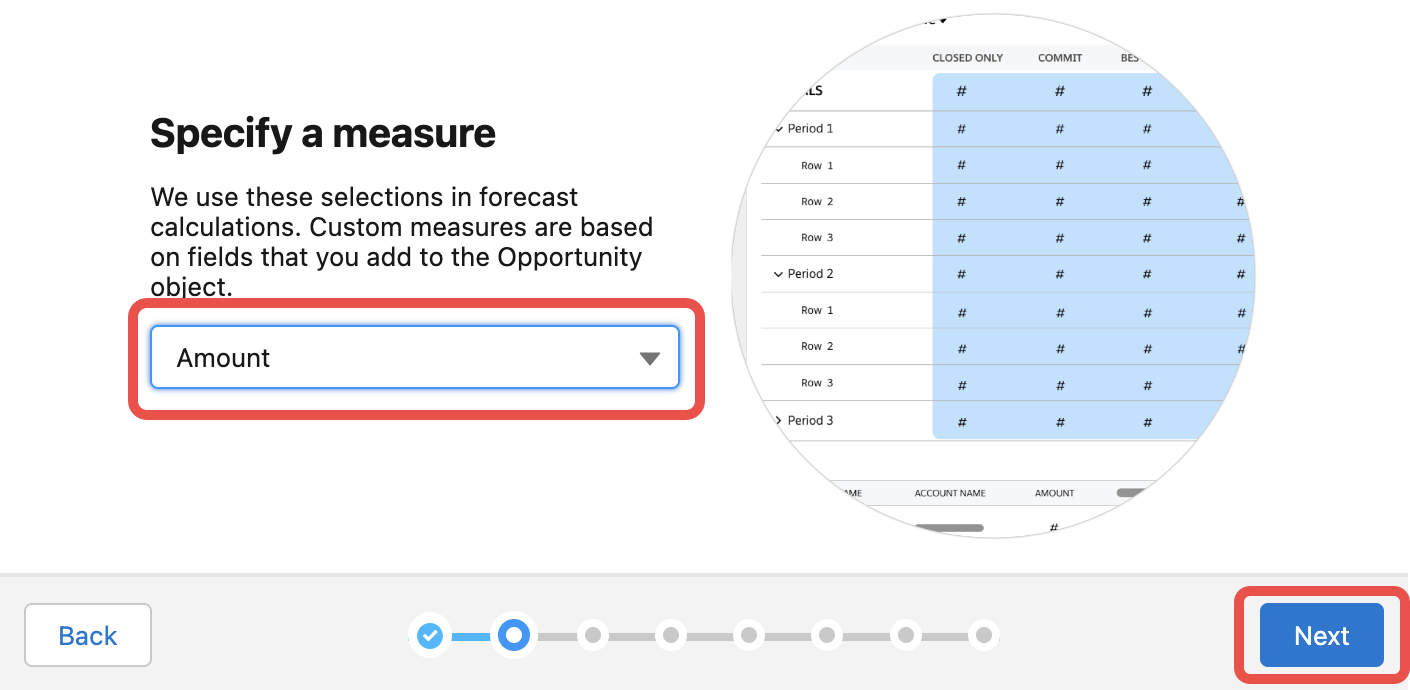
2.5. Select a measure for forecast, for example, Amount. Click Next
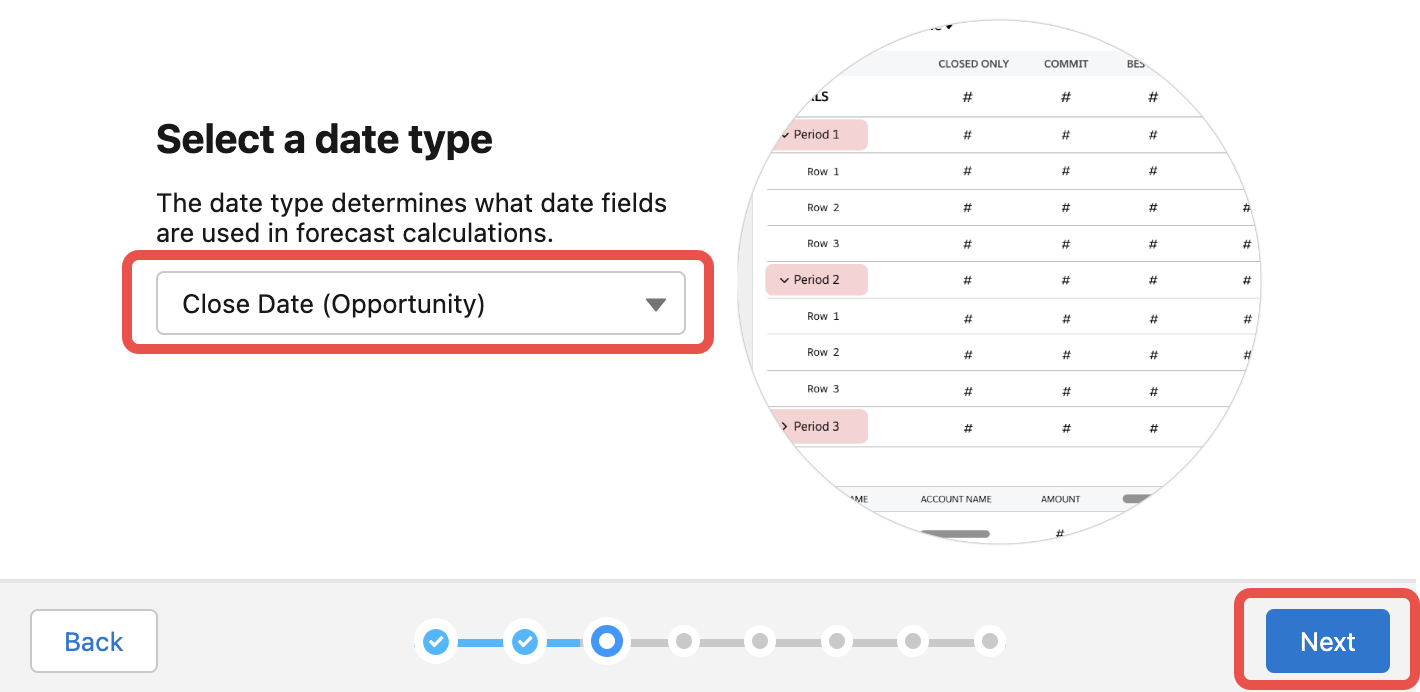
2.6. Select the date type and click Next.
The date type determines what date fields are used in forecast calculations.
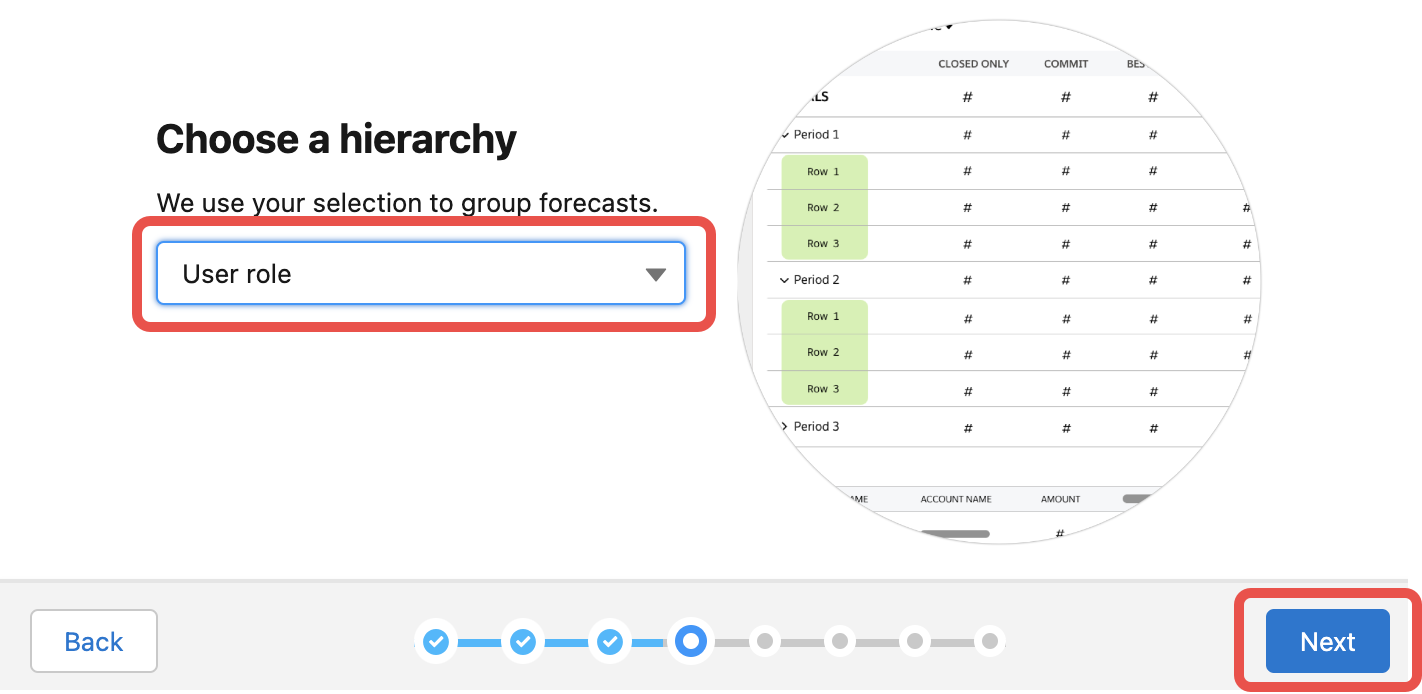
2.7. Select the hierarchy for this forecast type. Click Next.
The selected hierarchy will be used to group forecasts.
2.8. You can add up to 3 filters. This is an optional configuration, you can omit it by clicking Next.
If you add such filters, only the data that meets all specified conditions will be shown in your forecasts.

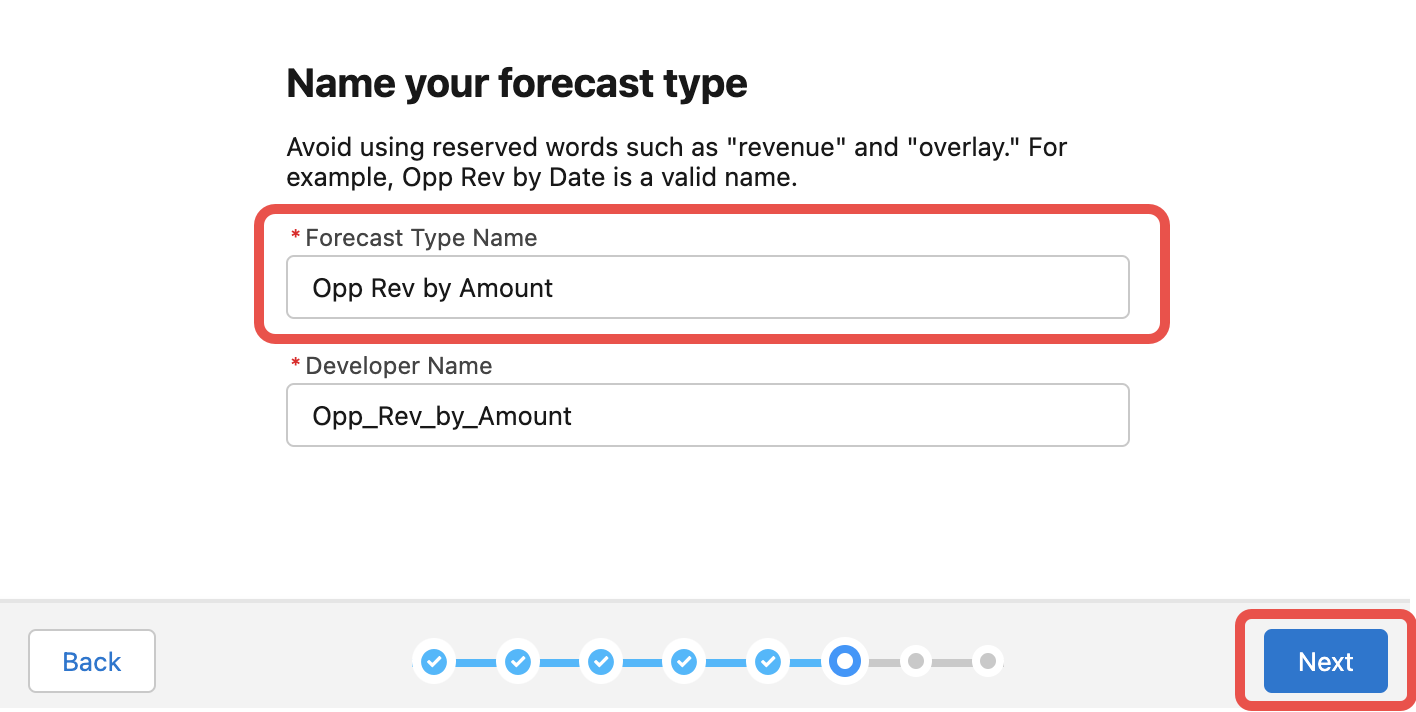
2.9. Assign a name to the forecast type, the developer (API) name will be automatically prefilled
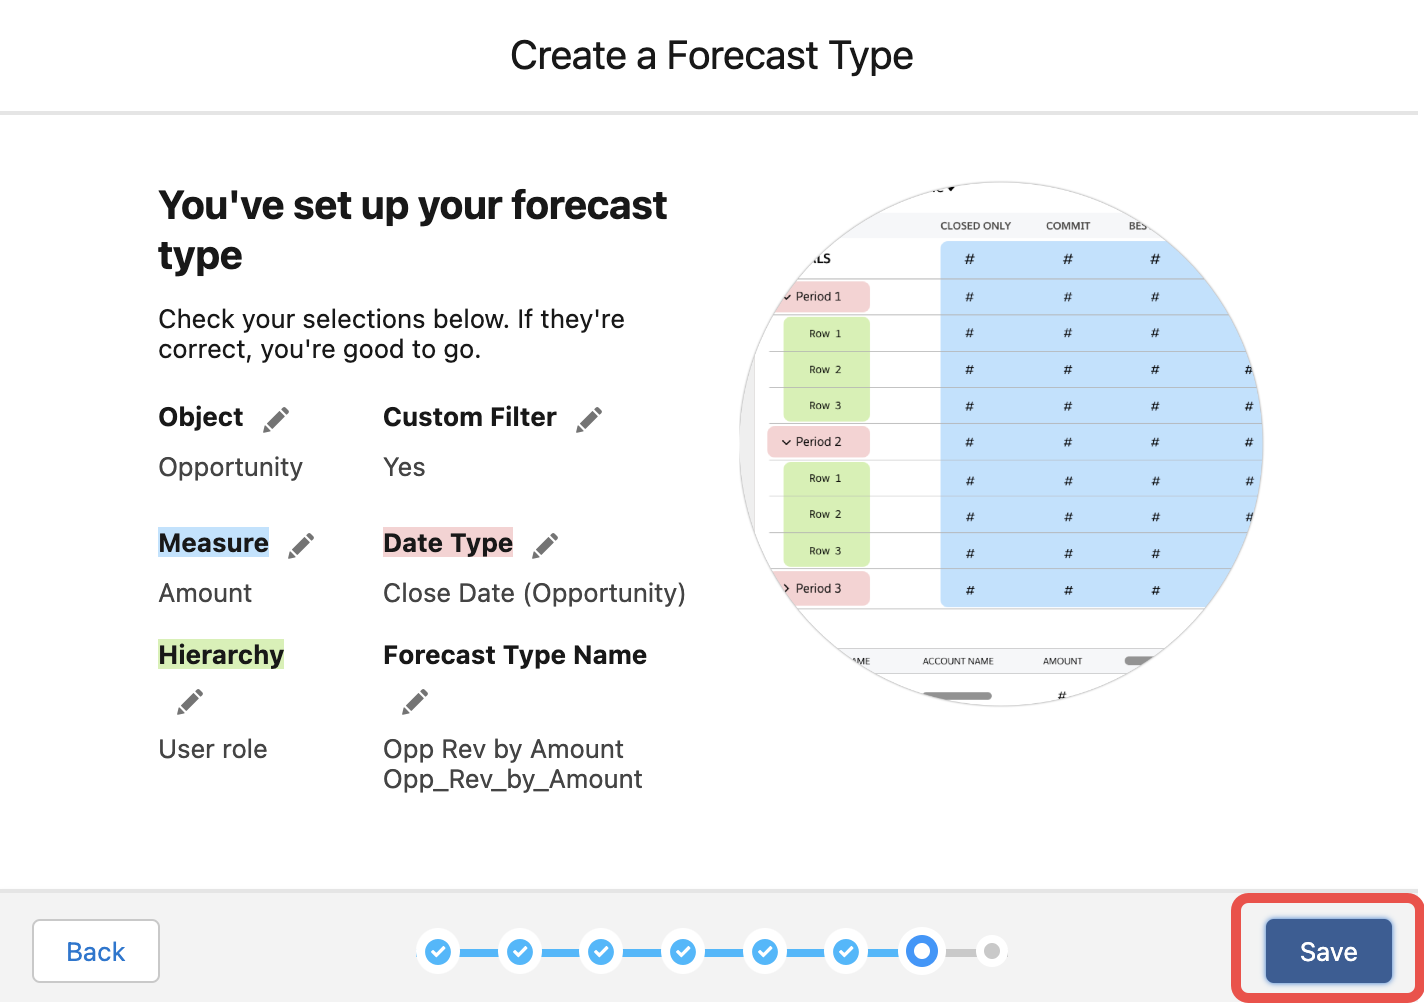
2.10. On the you’ve set up your forecast type page, check your selections. If they are correct and match your needs, click Save
2.11. Customize the opportunity list and click Next
Select the fields you want to appear in your opportunity list on the forecast page. Add or remove them using the arrow buttons.
In the right-hand column, you can also change the order of the columns using up and down arrows.
2.12. On the final setup screen, click Done to finish
2.13. Next, the new forecast type will appear on the Available Forecast Types list
2.14. To start using this forecast type, you must activate it.
To activate the forecast type:
• Click on the down arrow next to the Inactive status
• Select Activate from the drop-down menu
Tip
If you do not see the column with down arrows on the list of Available Forecast Types, try scrolling the table to the right.
You can assign a specific quota to every active forecast type. Learn more about quotas in this article
3. Select Collaborative Forecast Rollup
You can select between two collaborative forecasts rollup options:
Single forecast category rollups combine the opportunities within each forecast category into separate forecasts for each category. It's a default rollup method.
Cumulative forecast rollups combine opportunities from multiple forecast categories into cumulative forecast categories.
Tip
Salesforce-recommended rollup method is the cumulative rollup . You can read more about the collaborative forecasts roll-up methods in this Salesforce article
To select the necessary collaborative forecasts rollup option:
3.1. On the Forecasts Settings page, find the section Manage Forecast Rollups
3.2. Click Edit
3.3. Select the preferred forecast rollup method

Important
Switching from one rollup method to another deletes adjustments for all active forecast types.
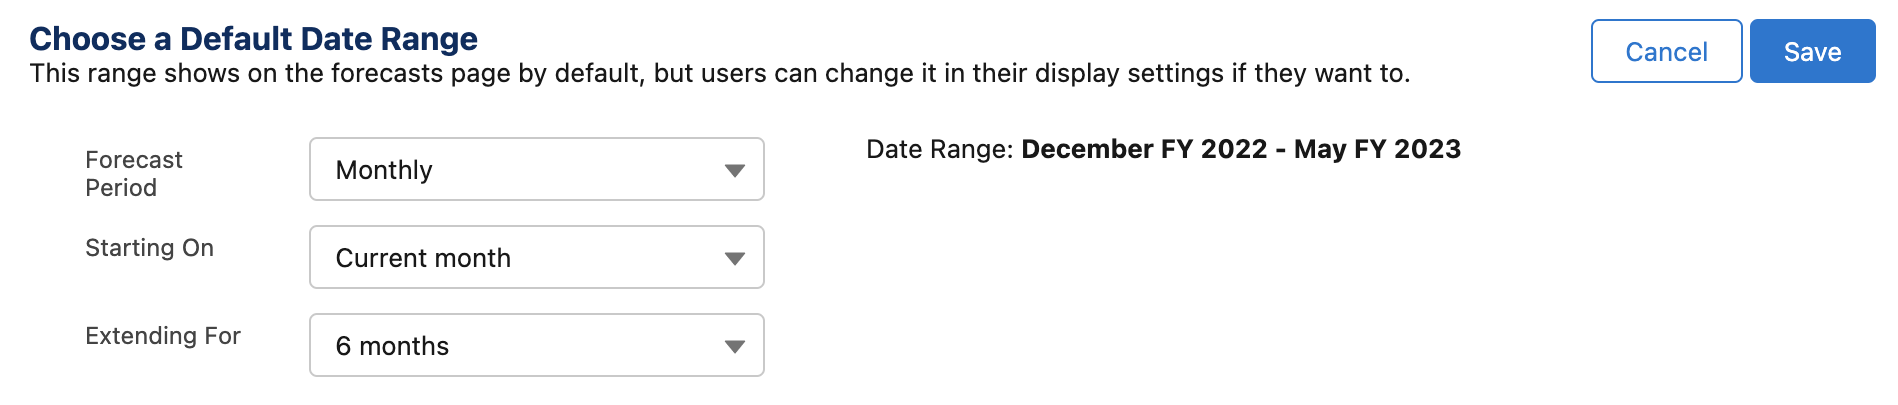
4. Set the default date range
The default date range is the date range for displaying the forecasts grid on the forecasts page. Refer to this Salesforce article for more detailed information about the date range.
Tip
The default date range must be set to Quarter to ensure that users’ quotas are correctly displayed in Revenue Grid. If Forecast period is set to Quarter, Revenue Grid will not be able to retrieve the data necessary for reporting and forecasting
4.1. On the Forecasts Settings page, find the section Choose a Default Date Range
4.2. Click Edit
4.3. Specify the preferred
- Forecast period
- Starting On
- Extending For
4.4. Click Save to apply the changes