How to Convert a Shared MS Exchange Mailbox to a Regular User Mailbox


Revenue Grid and Revenue Grid work with data from end users’ email accounts; handling of email and calendar data from shared Exchange mailboxes is supported.
Some setup scenarios require converting an existing shared MS Exchange mailbox to an individual user one, in order to enable Revenue Grid and Revenue Grid functions for it. This article describes two ways to do that: using MS Exchange Admin Center or MS Exchange Online PowerShell.
A converted account can be used by an end user or configured as a Service account for mass deployment of Revenue Grid / Revenue Grid.
Note
After mailbox conversion all mail data it contains remains intact.
Method 1: Convert using MS Exchange Admin Center
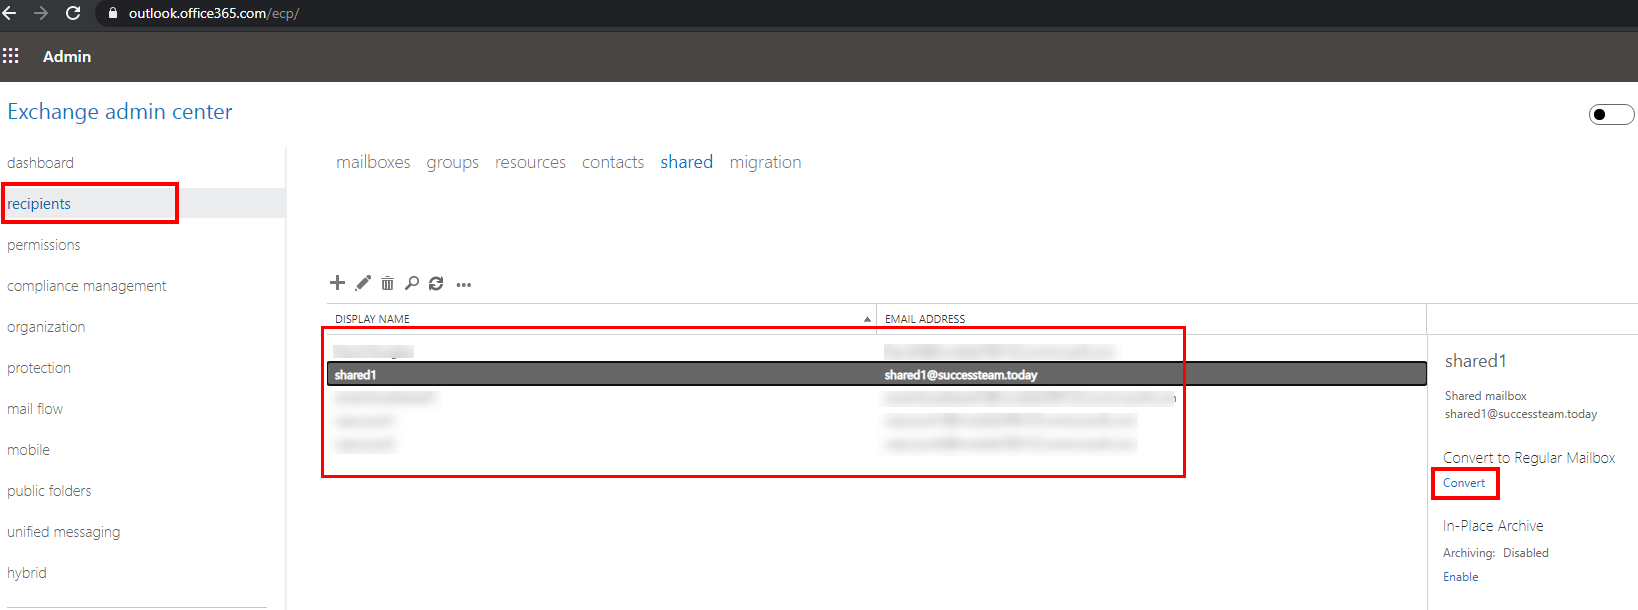
- Log in to the Admin Center with Exchange Admin credentials https://outlook.office365.com/ecp.
-
Click Recipients > Shared and select the shared account that you want to convert.
-
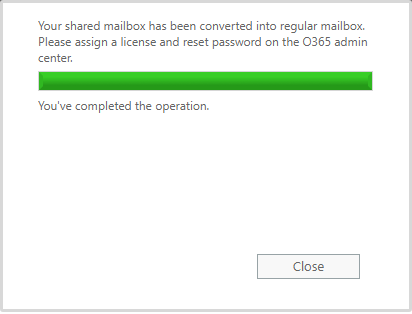
Click Yes in the Warning dialog and then Close the dialog after conversion is complete.

-
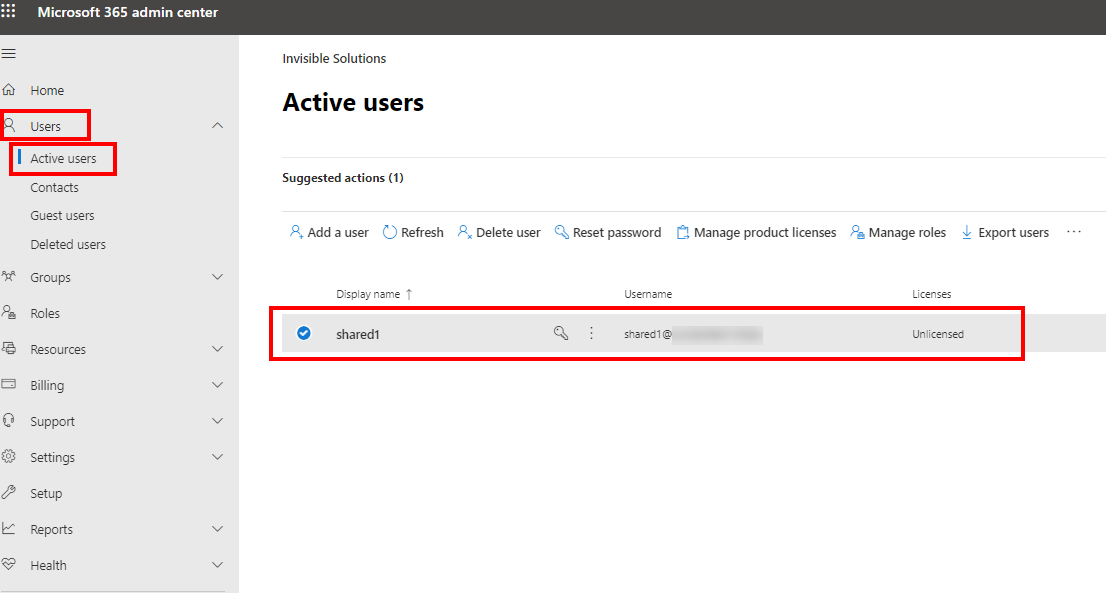
To activate the converted user, open Microsoft 365 Admin Center and log in to it with Admin credentials https://admin.microsoft.com
-
Click Users > Active Users, search for recently converted mailboxes.
-
Assign an Exchange license for each converted mailbox and Save changes to apply the changes.

Method 2: Convert using Exchange Online PowerShell
-
Open PowerShell and connect to your Microsoft 365 tenant by entering the following cmdlets:
$UserCredential = Get-Credential $Session = New-PSSession -ConfigurationName Microsoft.Exchange -ConnectionUri https://outlook.office365.com/powershell-liveid/ -Credential $UserCredential -Authentication Basic -AllowRedirection Import-PSSession $Session Connect-MsolService -
Next, to convert a mailbox from shared to regular by entering the following cmdlet, where {Shared1} is the mailbox’s name:
Set-Mailbox {Shared1} -Type Regular -
Now check that the mailbox was successfully converted to regular by entering the following:
Get-Mailbox -Identity shared1 | Format-List RecipientTypeDetails RecipientTypeDetails : UserMailbox -
Next, to ensure that the mailbox is active and has a license assigned: view the summary information about mailboxes’ plans and licenses for each plan, by running the following command:
Get-MsolAccountSku -
If there is no usage location assigned to the converted mailbox, you can assign it with this cmdlet:
Set-MsolUser -UserPrincipalName "{[email protected]}" -UsageLocation US
In addition, to assign an Exchange license to the converted mailbox, enter the following command (use the AccountSkuId retrieved on step 4):
Set-MsolUserLicense -UserPrincipalName "{[email protected]}" -AddLicenses "<AccountSkuId>"
