Salesforce Scheduler Adapter: How To Manage Calendars in Salesforce
Salesforce Scheduler Adapter (SSA) is an integration for simplifying appointment scheduling. It parses and synchronizes your availability from Salesforce, Outlook, Gmail, and iCloud calendars in real time.
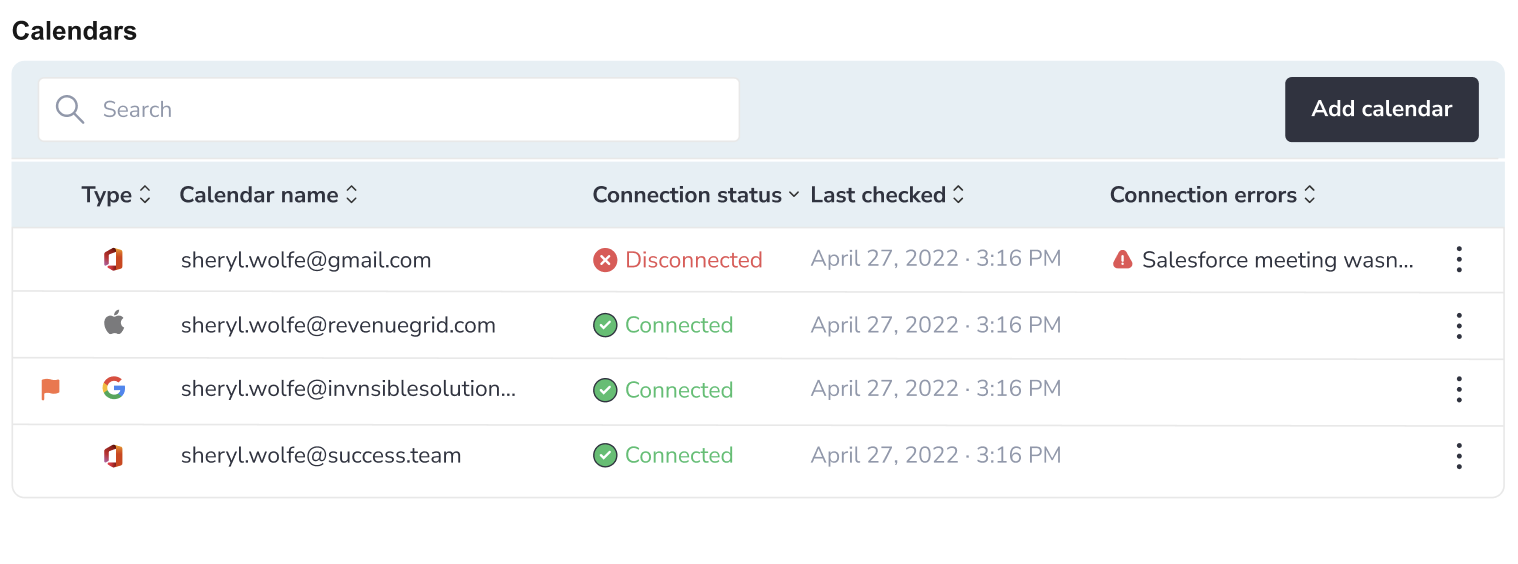
In the Salesforce interface, you see a list of calendars you have added, their statuses, and conveniently manage them using the Calendars widget.
Open the Calendars widget
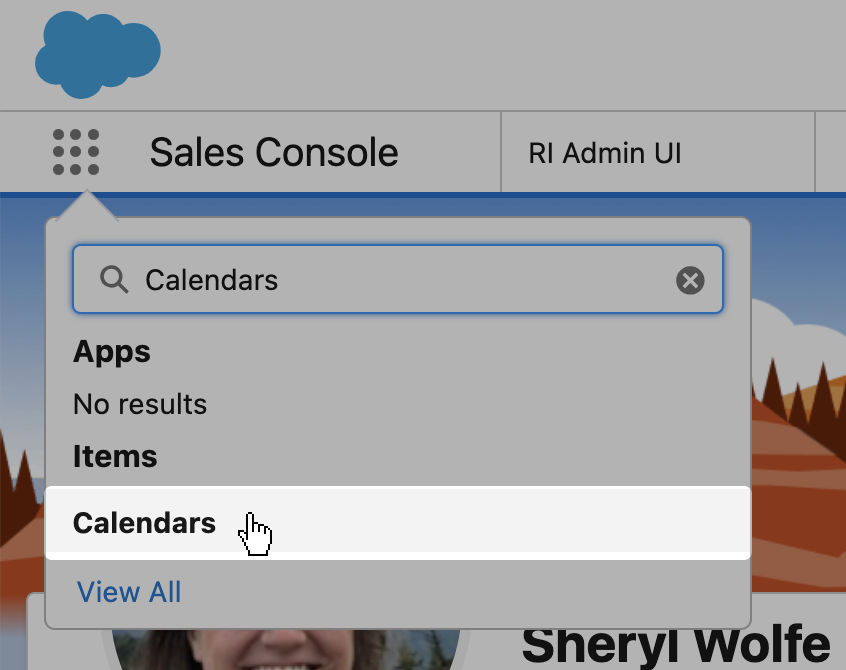
To open the Calendars widget in Salesforce:
- Log in to Salesforce.
- Open App Launcher in the upper left-hand side of the page.
- Enter Calendars in the search field.
-
Click on the Calendars item to open it.
Add a Gmail or Outlook calendar
To start syncing your relevant calendars, you need to add them in the Calendars widget:
- Click on the Add calendar button in the upper right-hand corner of the widget.
- Select the necessary calendar service you use (MS Office, Gmail).
-
Log in with your email server credentials and provide the requested permissions.
Important
Note that the maximum number of calendars that can be connected at once is 10 (ten). If you have 10 calendars added, the Add calendar button becomes inactive. If you need to add more calendars, delete one of the existing calendars.
Add an iCloud calendar
To add your Apple iCloud Calendar, follow the steps below or consult this Apple guide
- Click on the Add calendar button in the upper right-hand corner of the widget.
- Select the iCloud calendar service. You will see a field for inserting a link appear on the screen.
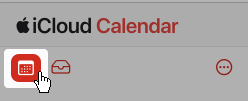
- Next, open your iCloud Calendar.
-
Click on the calendar icon in the left-hand side corner of the window to display the list of all your calendars.
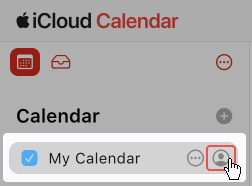
-
Hover over the calendar you need to add and click on the share icon that appears.
-
Enable the Public Calendar switch button.
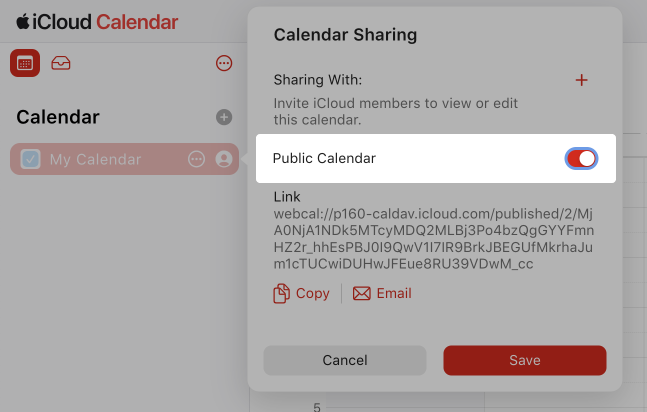
-
Copy the link that appears and click Save.

-
Paste the copied link in the field in step 2.
Actions with the calendars
To open the actions menu, click on the three dots icon on a calendar.
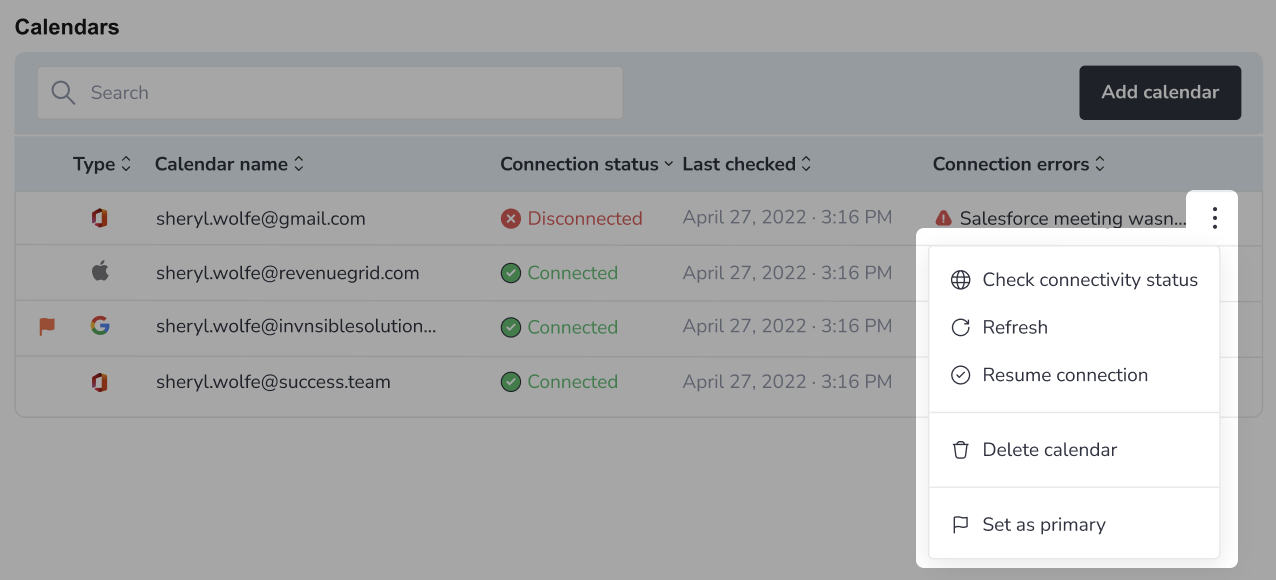
The available actions are:
- Check connection status. Used for checking whether the calendar functions correctly and the availability time spans are retrieved as expected.
- Refresh connection. You can refresh the connection if it gets disconnected due to an error. For example, you changed the email server access credentials, and the system is not able to retrieve your availability time spans.
- Pause/Resume connection. If you pause the connection for a calendar, the data from this calendar will not be taken into consideration when building the table of available time slots. You can resume connection any time.
- Delete calendar. Calendar deleting is irreversible. If you delete a calendar and would want to add it again, click the Add calendar button and add it anew.
-
Set as primary. The new calendar items (meetings, appointments) will be created in the primary calendar. You can change the primary calendar at any time.
Important
Apple iCloud Calendar cannot be set as a primary calendar due to technical limitations of Apple API.