Install and run Revenue Grid Email Sidebar for Microsoft 365

This article explains how to install and start using the Revenue Grid Email Sidebar in Outlook for Windows or Outlook on the Web, as part of the Microsoft 365 suite. A Salesforce account is required for login.
Important
Before using the Revenue Grid Email Sidebar in Outlook for Windows, make sure you have the latest version of Microsoft Edge installed. Microsoft Edge is required to render the Sidebar in Outlook.
Install Revenue Grid Email Sidebar app
You can install the Revenue Grid Email Sidebar in your Microsoft 365 email client—whether using Outlook for Windows or Outlook on the Web—by using one of the following methods:
To install the Sidebar in Outlook for Mac, see Install Email Sidebar in Microsoft Outlook for Mac.
Installation from the Microsoft App Store
To install the Sidebar using the Microsoft App Store:
-
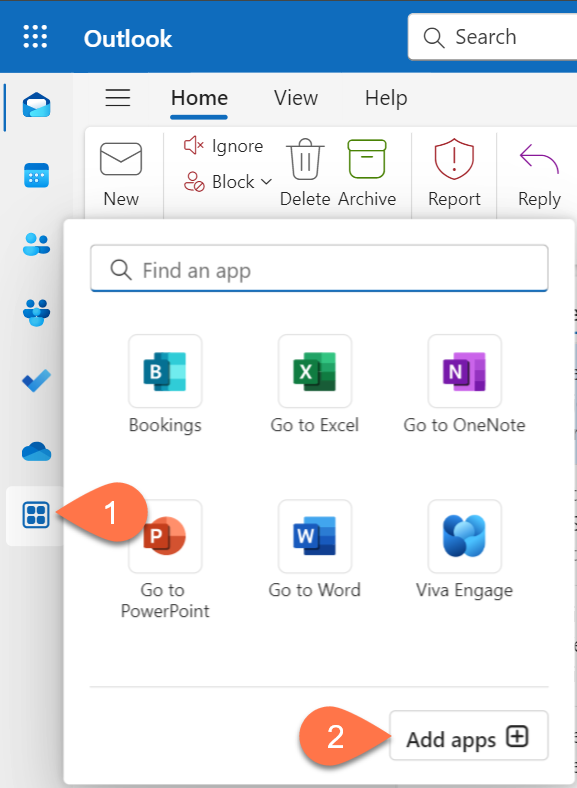
In Outlook, open the App Store:
-
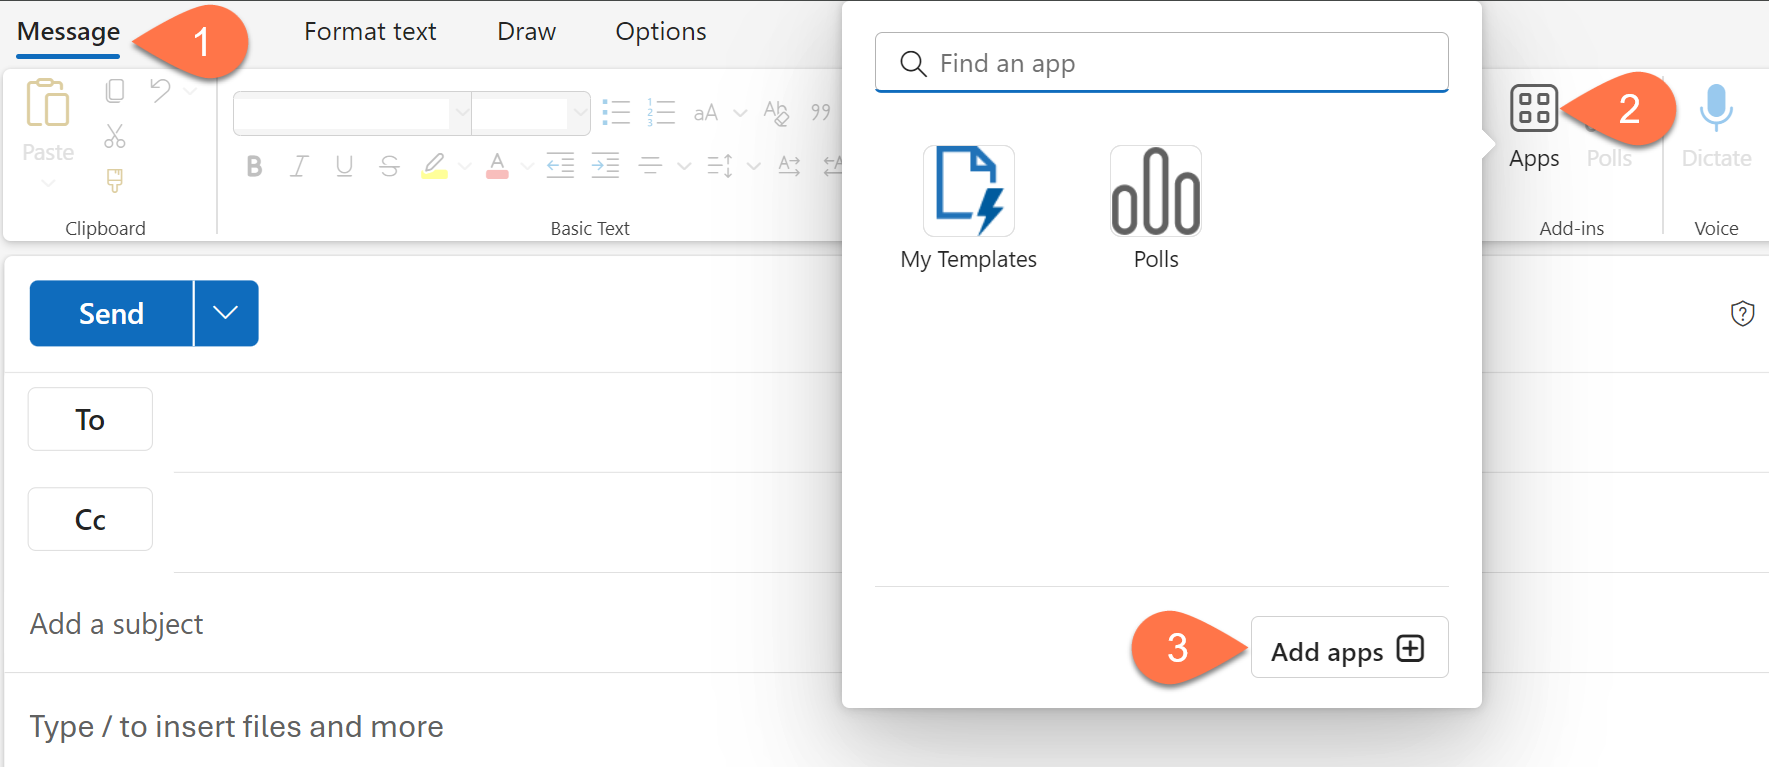
While composing a new email or reply: On the Message tab, in the Add-ins group, select Apps > Add apps.
-
While reading an email: On the action bar, select the Apps icon > Add apps.

-
From the navigation bar: Select More Apps > Add apps.
-
-
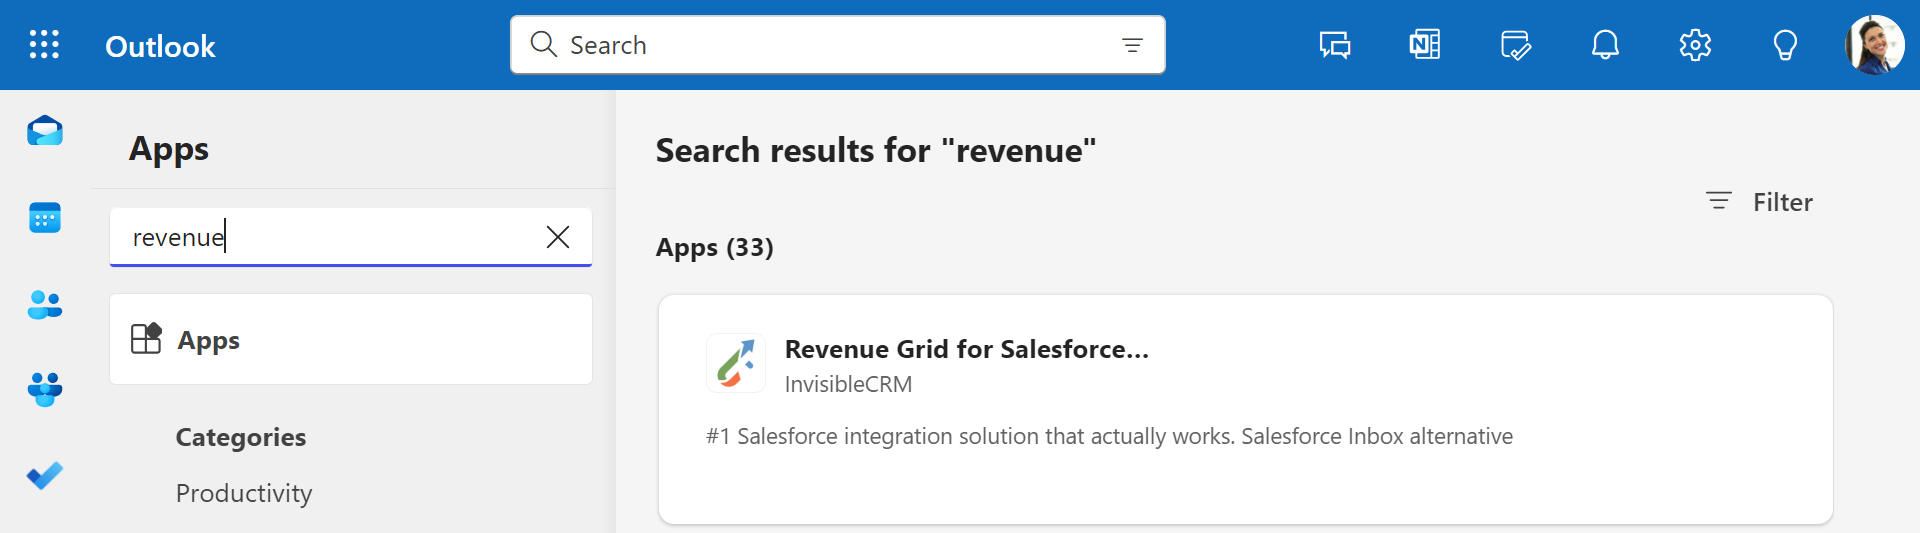
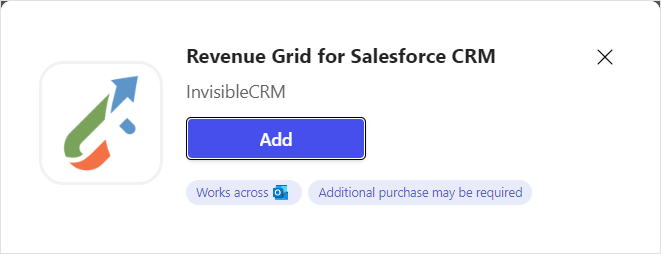
In the App Store, enter Revenue Grid in the search box. Select Revenue Grid for Salesforce CRM from the results.
-
In the dialog that appears, select Add.
-
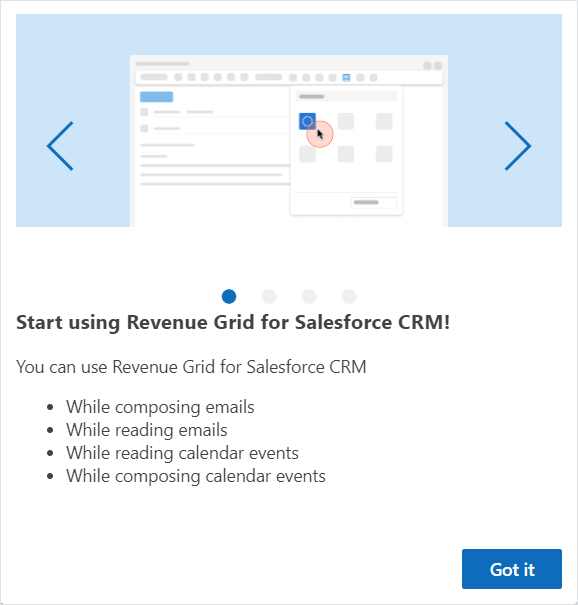
Select Got it when the welcome message appears.
The Sidebar is now available in Outlook across all supported platforms, including Mac, iOS, and Android, when signed in with the same account.
Installation from Revenue Grid website
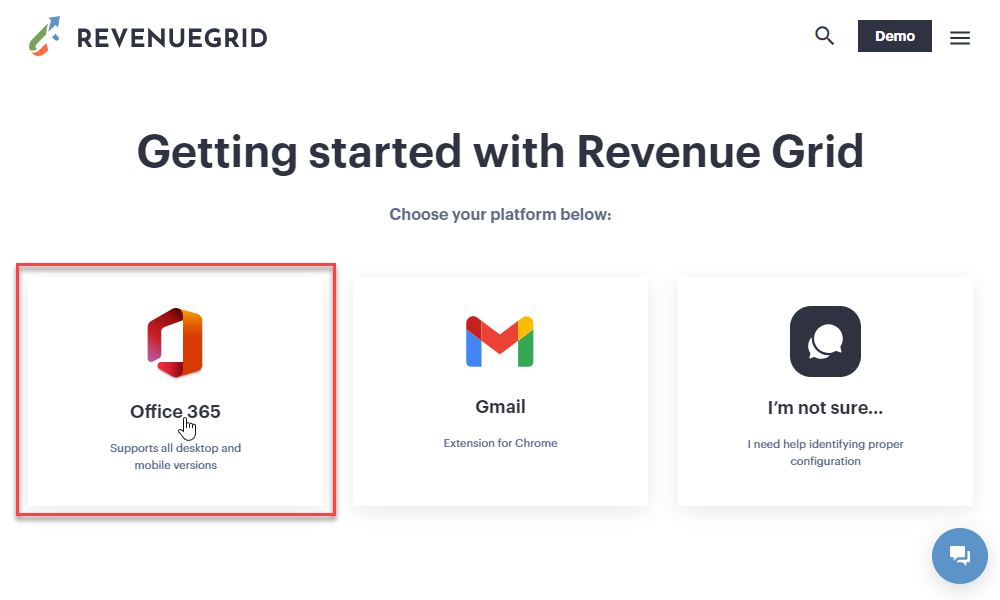
To install the Sidebar from the Revenue Grid website:
-
Go to the Getting started page.
-
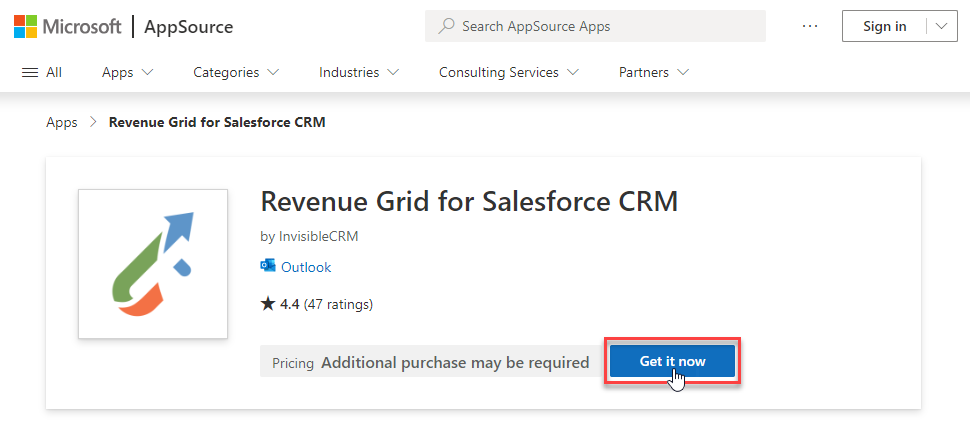
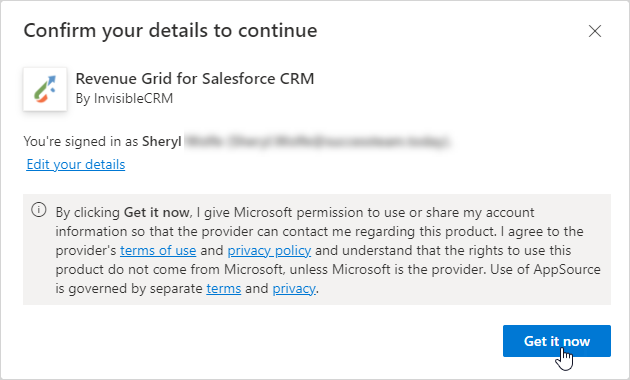
Select Office 365. You’ll be redirected to the Revenue Grid for Salesforce CRM listing in Microsoft AppSource.
-
Select Get it now.
-
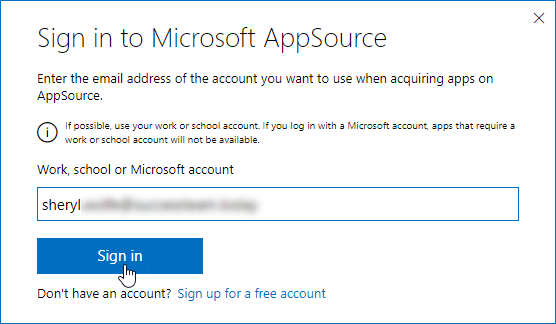
Enter your Microsoft 365 email address and sign in.
-
Enter your credentials or select an existing account.
-
Select Get it now to confirm and proceed.
After installation, the Sidebar becomes available across Outlook on all supported devices.
Run the Sidebar
To begin using the Sidebar:
Open the Sidebar
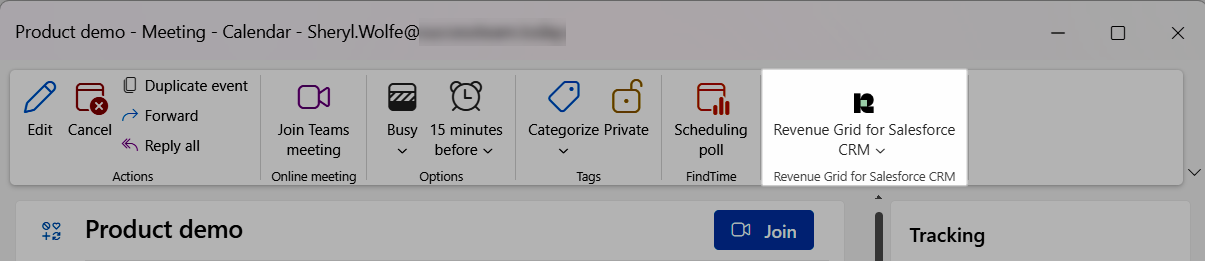
To open the Sidebar in Outlook, select the Revenue Grid for Salesforce icon. The icon’s location depends on the context:
-
Reading mode: In the action bar of the selected message, as a standalone icon or under the Apps menu.

-
Compose mode: In the Message tab on the ribbon, as a standalone icon or under the Apps menu.

-
Calendar Events: In a separate section on the ribbon.
If you don’t see the icon, see What to do if the Add-in icon is missing in New Outlook.
Pin the Revenue Grid for Salesforce icon
To keep the icon always visible:
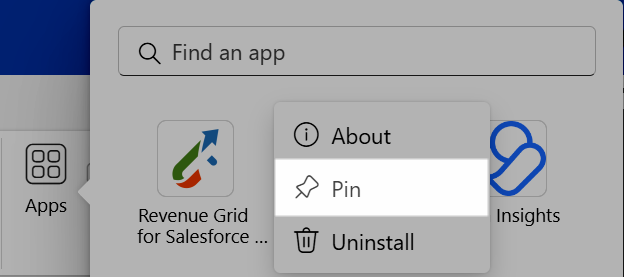
- Select the Apps icon.
- Right-click Revenue Grid for Salesforce CRM.
-
Select Pin.
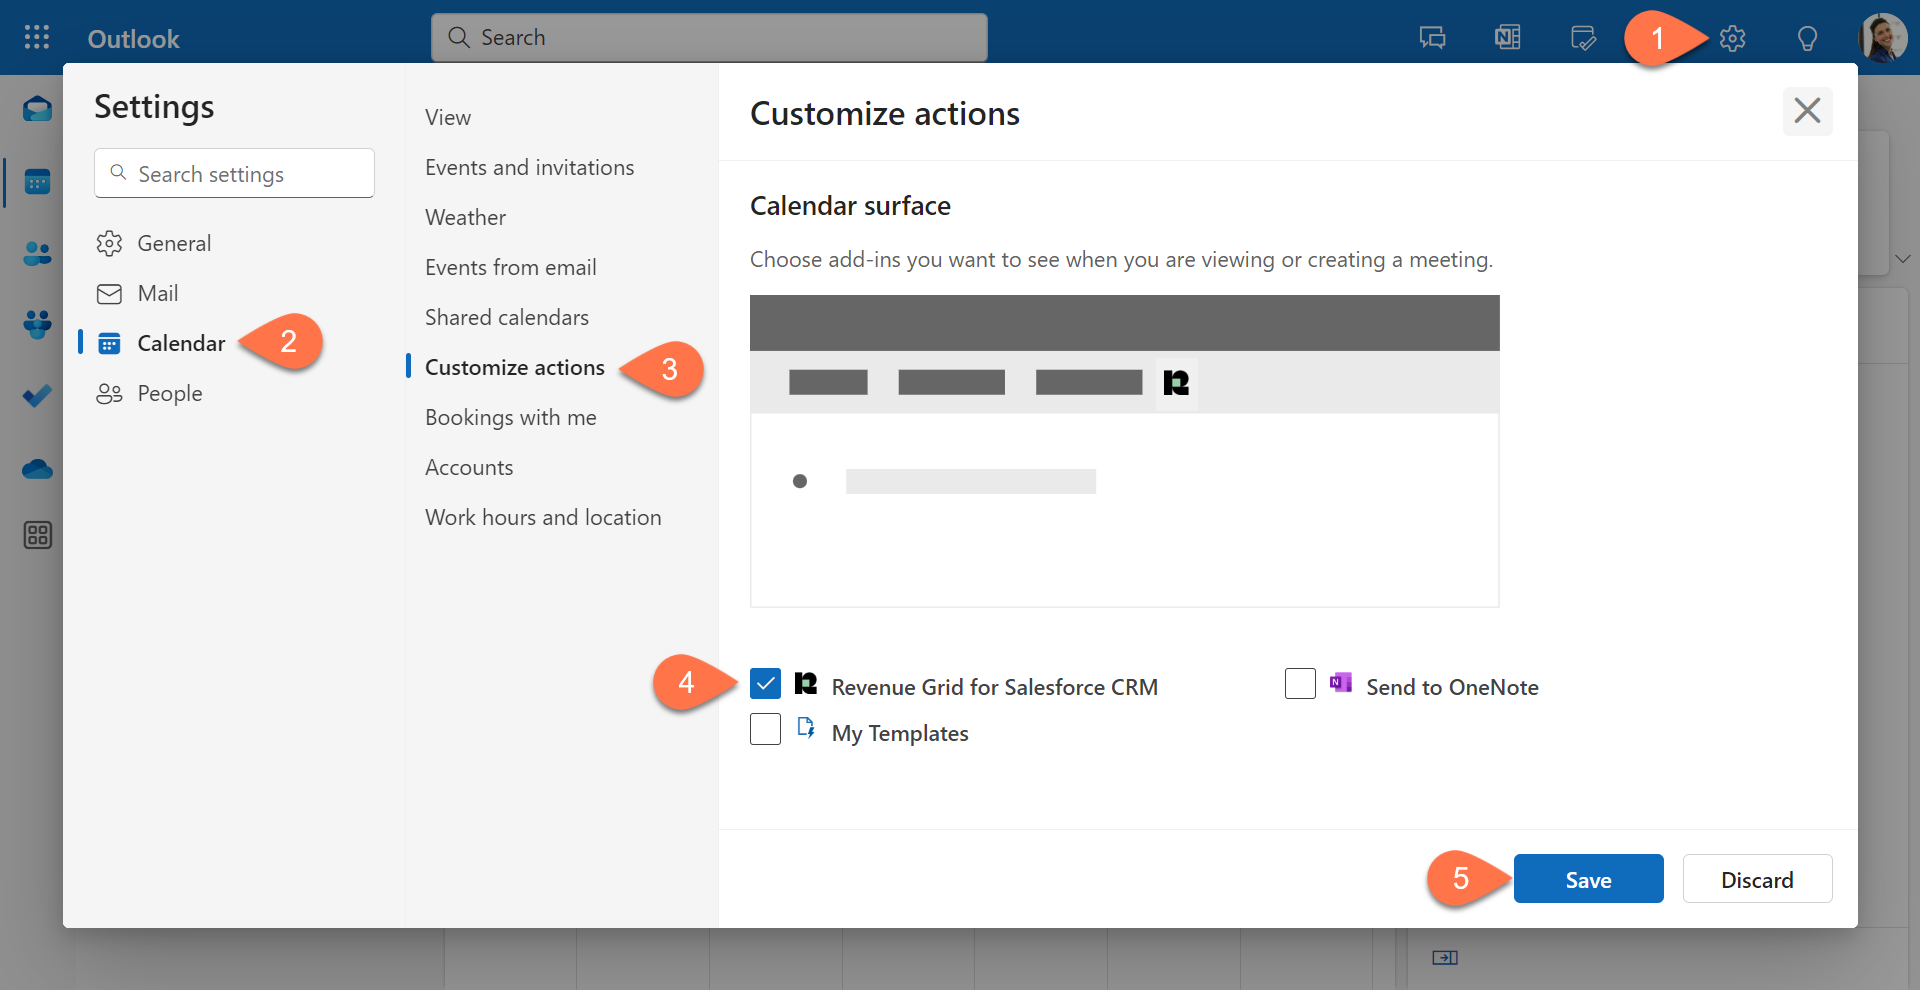
- Go to Settings > Calendar > Customize actions.
- Select the Revenue Grid for Salesforce CRM checkbox.
-
Click Save.
Sign in with your Salesforce account
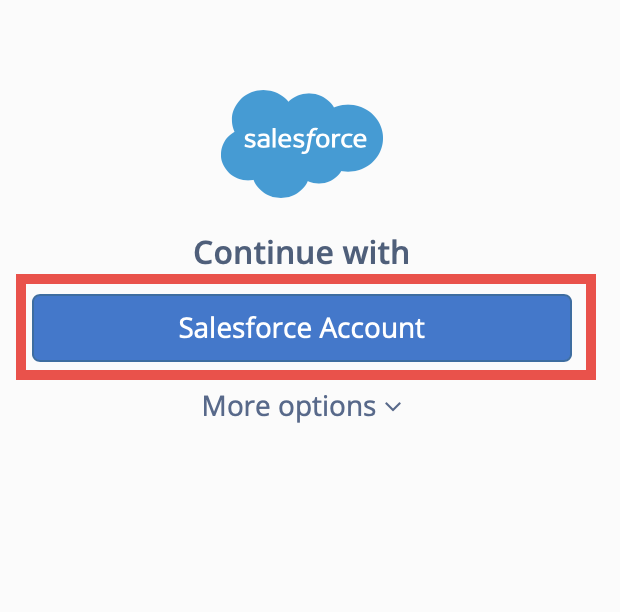
-
Click Salesforce Account. A login dialogue appears.
-
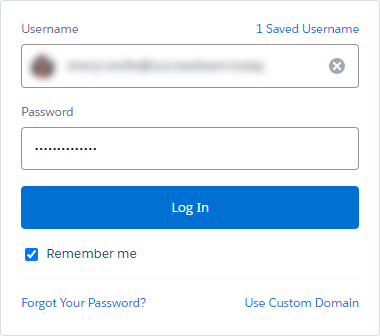
Enter your Salesforce credentials or select a saved account, then click Log In.
-
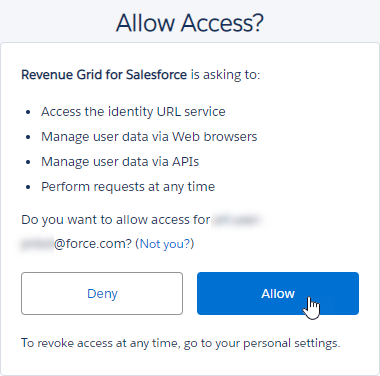
Select Allow to grant permission.
Logging in may take a few minutes, depending on your mailbox and calendar size. The Sidebar matches your data with Salesforce during the first login only.
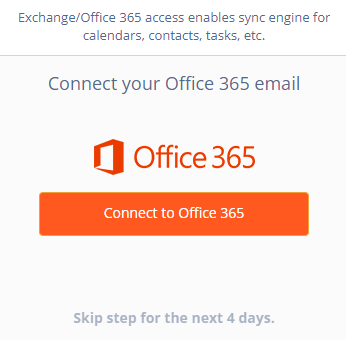
Connect your Microsoft 365 account
After signing in to Salesforce, connect your Microsoft 365 account to enable full Activity Capture 360 features, including syncing emails and calendar events with Salesforce.
Important
If you manage multiple mailboxes, sign in with the same mailbox where the Sidebar is installed. Otherwise, sync may fail even if it appears active.
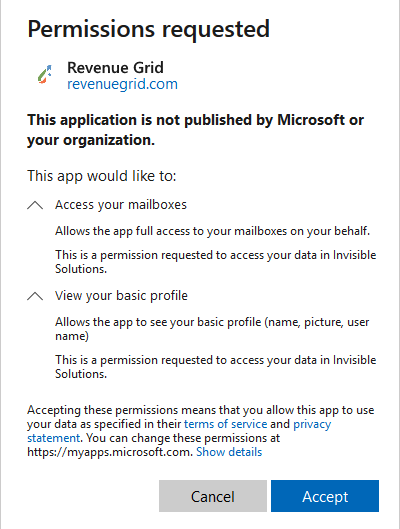
To connect your Microsoft 365 account:
-
Click Connect to Office 365.
-
Enter your Microsoft 365 credentials or select a saved account.
-
Select Accept to grant access. This step may be skipped if permission has already been granted, for example, by your administrator.
Next steps
After you authorize access, sync starts automatically and runs at adaptive intervals. For details, see Adaptive sync session interval calculation explained.
You can manage your synchronization settings as needed:
- Pause sync to temporarily stop automatic syncing
- Resume sync to restart synchronization after a pause or error
- Force sync to manually trigger immediate synchronization
To update your connected Microsoft 365 or Salesforce account credentials later, see Reconnect your mailbox or Salesforce account in Revenue Grid.
You can also customize how the Sidebar displays data, links records, and interacts with your emails, calendar events, and tasks. For details, see RG Email Sidebar settings overview.