How to Properly Add a Custom Object to the Handling Scope
RG Email Sidebar can handle certain custom objects from Salesforce custom objects set in “out-of-the-box” configuration, by retrieving corresponding object layouts data from Salesforce; however, other custom objects will require extra setup actions from the end-user/local Salesforce Admin to be properly handled by RG Email Sidebar.
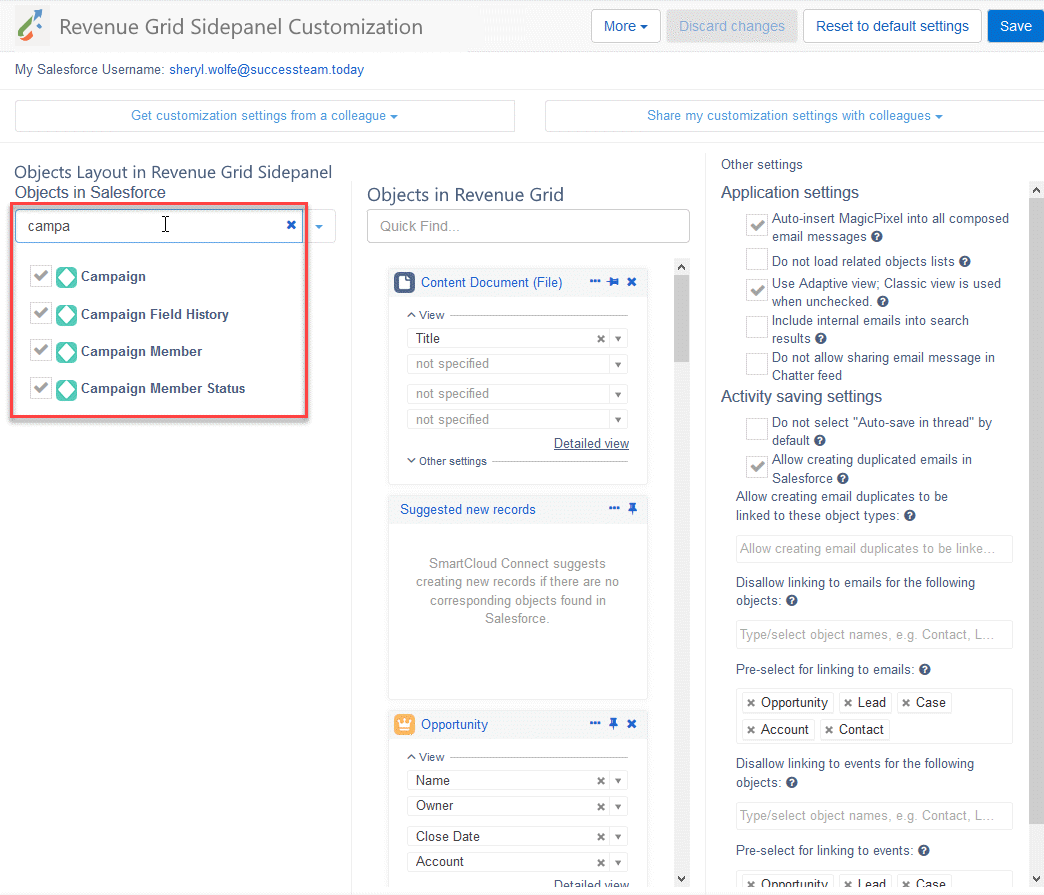
I. We will explain the necessary setup actions taking the Campaigns object as an example. Campaigns is among custom object types which are present in Salesforce set of objects, and in their case enabling the Campaign object card on RGES Customization page alone is not enough to add them to RGES handling scope. The first point to consider is that such objects may have one or more auxiliary related cards, for example a Campaign has associated Campaign Member Status, Campaign Member, and Campaign Field History cards. They contain additional object data, and their absence in RGES processing scope results in primary objects, Campaigns in this case, not being retrieved by RGES initial search (that is, brought up in Related records lists or by user-initiated search.
This way, when adding a custom object to the processing scope via RGES Customization page, make sure to search for its auxiliary cards, by entering the object’s name in the Quick Find… field of Customization page’s left pane “Objects in Salesforce”, then enable all relevant cards.
Next, click Save in the upper right corner of Customization page to apply the changes and refresh the Add-In. This should include the object into RG Email Sidebar’s handling scope (including a dedicated tab added for this object type on the home screen), as well as user-initiated search.
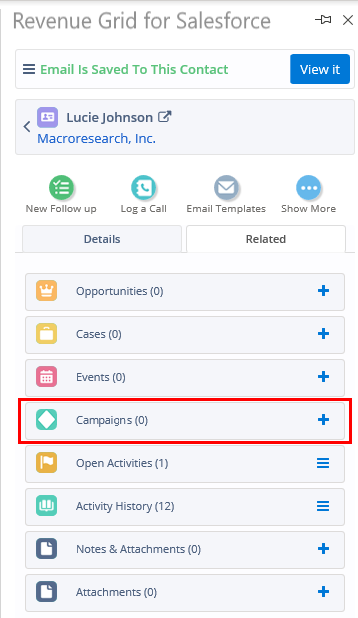
II. Next, to include the object into the Related records list, you should ensure that your related Business record’s layout in Salesforce is correspondingly configured. Perform the below steps to do that:
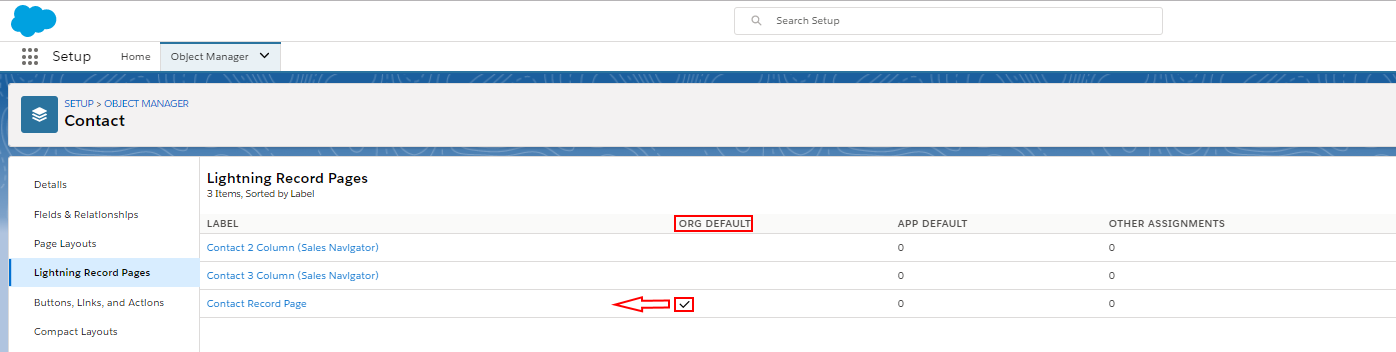
1. Log in to your Salesforce account
2. In Salesforce, open Setup > Object Manager > {Business record related to the added one, e.g. Contact or Account} > Lightning Record page > open the {item marked as Org Default} > Edit
3. To add a custom object to the Related list of a Business record:
3.1. In the right hand pane of Business record’s layout page, click the Add Tab button under Related
3.2. In the page’s central pane, open the added Related tab
3.3. In the search box of the left hand pane, enter ‘related’
3.4. Drag and drop the Related Lists item found to the Related tab into the central pane

4. Click Save in the top right corner of the layout page to apply the layout changes
5. Reapply RGES customization to enable the layout changes; to do that, open Customization page and click Save in its upper right corner. Now the added object should be shown in RGES’s Related records list
III. Finally, to ensure that RGES initial search retrieves and displays the objects of the added type, you should set a corresponding Salesforce List View in RGES’s Contextual Search setting (which will be otherwise set to Do not search):
1. If you do not have a corresponding list view for the object in Salesforce, create a custom Salesforce List View for the object that will include all instances of it
2. Set the created or your existing view in the Contextual search filter for this object in Customization settings
3. Make sure to apply the changes in Customization by clicking Save in the upper right corner