Application Settings in Sidebar Customization


Important
This article explains the features of the old Sidebar settings, previously called Sidebar Customization. If you’re looking for information on the new Sidebar settings, check out this page.
Fine-tune object handling and available actions in RGES Add-in using Application Settings in Sidebar Customization.
Proceed with the steps below to open the Application settings panel:
-
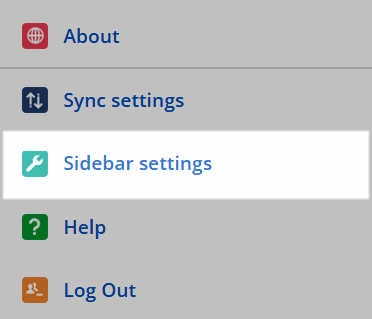
Open RG Email Sidebar in your mailbox
-
Go to ☰ Menu > Sidebar settings
On the right-hand pane of the Customization page, you can find Application settings described below.
-
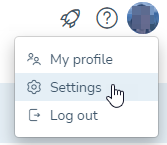
Open Revenue Grid in your browser
-
Click your Profile icon in the upper right corner of the RG interface and then click Settings
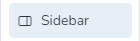
- Click Sidebar on the left-hand pane
On the right-hand pane of the Customization page, you can find Application settings described below.
Note
After you configure settings, click Save in the upper right corner to apply changes
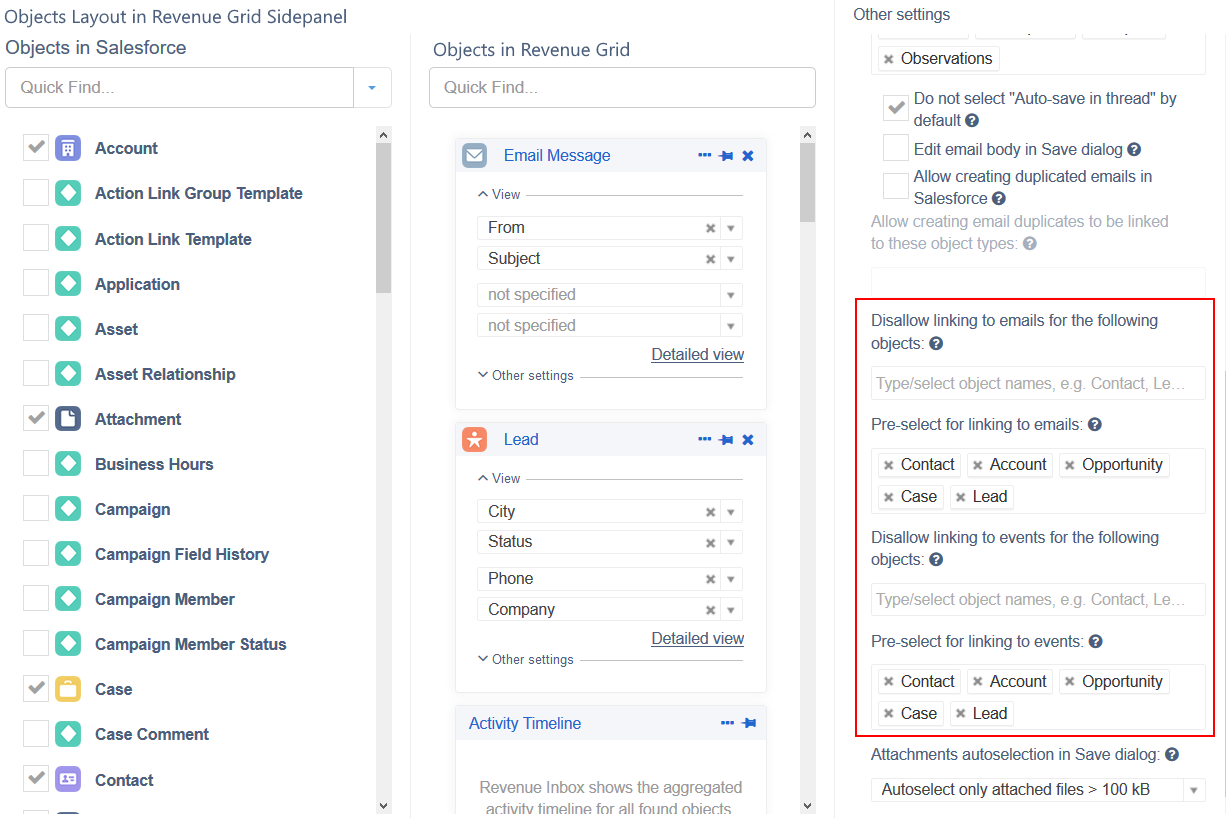
Object linking
-
Preselect objects for linking to emails – specify record types to make them automatically selected for linking with emails in the Save dialog when RGES finds any as a related record. Still, you can manually unselect or add records.
-
Do not allow linking these objects to emails – specify record types to make them unavailable for linking with emails in the Save dialog. This setting prevails over the object preselection setting above.
-
Preselect objects for linking to events – specify record types to make them automatically selected for linking with events in the Save dialog when RGES finds any as a related record. Still, you can manually unselect or add records.
-
Do not allow linking these objects to events – specify record types to make them unavailable for linking with events in the Save dialog. This setting prevails over the object preselection setting above.
Important
Do NOT add all object types to the Do not allow linking these objects to emails/events box. If all object types are selected in this box, RG Email Sidebar is unable to find any object to link the email/event to. Thus, the Save email button becomes greyed-out and unclickable
Smart Actions
-
Select Smart Actions that will appear in the bottom toolbar – this setting allows you to configure what Smart Actions you will have at hand in the Sidebar’s bottom toolbar. Add, remove, and set a specific order easily:
-
To add: click on the blank space in the field and select the needed Smart Action from the drop-down list
-
To remove: click x next to the Smart Action’s name
-
To set a specific order: remove all Smart Actions from the field and then add them in your preferred order, from left to right
-
Engagement tracking
-
Auto-insert Engagement tracking code into composed emails (enabled by default) – enable automatic insertion of the Engagement tracking code into all emails you compose when the Sidebar is open.
-
Notify when tracked email is opened – enable notifications in the Sidebar’s Engagement panel when recipients open emails with Engagement tracking code. Note that RGES notifies you only about openings of emails that are pinned in the Engagement panel.
Important
Engagement tracking code only gets auto-inserted into emails if the Sidebar is opened when you create a new email; if it’s closed when you compose an email, the tracking code will not be inserted
Learn more about the Engagement panel and Tracking Emails Opens…
Attachments handling
-
Do not allow attaching .eml files to objects in the Sidebar – select this checkbox to disable the possibility to attach .eml files to objects in the Sidebar. See this article for more information.
-
Preselect attachments in Save dialog – this setting allows you to configure what kinds of attachments will be automatically selected in the Save dialog. There are 4 available options for attachment preselection:
-
Only attached files > 100 KB – attached files with more than 100 KB size will be auto-selected. This option prevents saving in Salesforce of small images usually added to signatures
-
Specific file types – only the specified file types will be auto-selected for saving to Salesforce. Specify file types without any dots in the box that appear underneath (e.g.,
txtpdfdocx) -
All attached files – all attached files will be auto-selected for saving to Salesforce
-
Do not auto-select attached files – no attached files will be auto-selected in the Save dialog
-
Note
For each option under Preselect attachments in Save dialog setting, you still can manually select needed files or unselect unwanted ones in the Save dialog
Learn more about Attachments saving mechanisms…
Events and Emails saving
-
Get Account for Appointment / Event saved with Contacts – enable automatic retrieval of related Account when searching for a Contact record in the Save dialog. This setting allows you to link a calendar item without attendees (or without needed attendees) to the Contact and its related Account simultaneously.
-
Do not select Auto-save in thread by default – select this checkbox to make the Auto‑save new emails within this thread option unselected in the Save dialog by default. See this article for more information.
-
Allow editing email body in Save dialog – enable the possibility to edit emails’ body text in the Save dialog. This feature has the following limitations:
- Only for emails being saved in Read mode
- HTML formatting is not supported
- Not available for Enhanced Emails, e.g. only Task descriptions can be edited
- Email bodies exceeding the field’s limit (32k characters by default) get auto-truncated
-
Allow creating duplicated emails in Salesforce (enabled by default) – enable the possibility to create email duplicates in Salesforce to allow Revenue Grid to link the same email to multiple Salesforce objects.
Important: Disable this setting only if you want to completely forbid the creation of email duplicates and never need to link emails to multiple objects. -
Allow linking to these objects – specify record types to make them available for linking with email duplicates. Note that the blank field implies that all object types are selected.
Learn more about creating email duplicates in Salesforce…
Other settings
-
Do not allow working with email templates – select this checkbox to disable the possibility of using Salesforce email templates and RG templates in the Sidebar (i.e., all Template-related buttons become unavailable).
-
Do not allow searching objects in LinkedIn – select this checkbox to disable searching related objects in LinkedIn from the Sidebar (i.e., all LinkedIn-related buttons become unavailable).
-
Apply Case assignment rules – select this checkbox to enable the possibility to process Cases created via Sidebar according to the Case assignment rules (i.e., Cases get assigned to corresponding users or put into queues).
-
Apply Lead assignment rules – select this checkbox to enable the possibility to process Leads created via Sidebar according to the Lead assignment rules (i.e., Leads get assigned to corresponding users or queues).
Learn more about Salesforce Assignment Rules and Queues…
Initial search customization
-
Do not load related objects lists – select this checkbox to disable related records look‑up and exclude them from the initial search results. See this article for more information about related records retrieval.
-
Include internal emails into initial search results – select this checkbox to include records with internal email addresses/domains in the initial search results. Note that strict initial search is applied for these records. See this article for more information.
-
Include own email – select this checkbox to include records with your own email address in the initial search results. The strict initial search is also applied for these records.
Learn more about initial search and applied record filters…