Add Recipients to a Sequence
Creation of the new sequence in Revenue Grid consists of the following steps:
1. Create a new sequence
2. Add steps to the sequence
3. Add recipients
4. Activate your sequence
After you have created a sequence, added steps to it, add prospects to the sequence on the Recipients tab.
Adding recipients to a Sequence
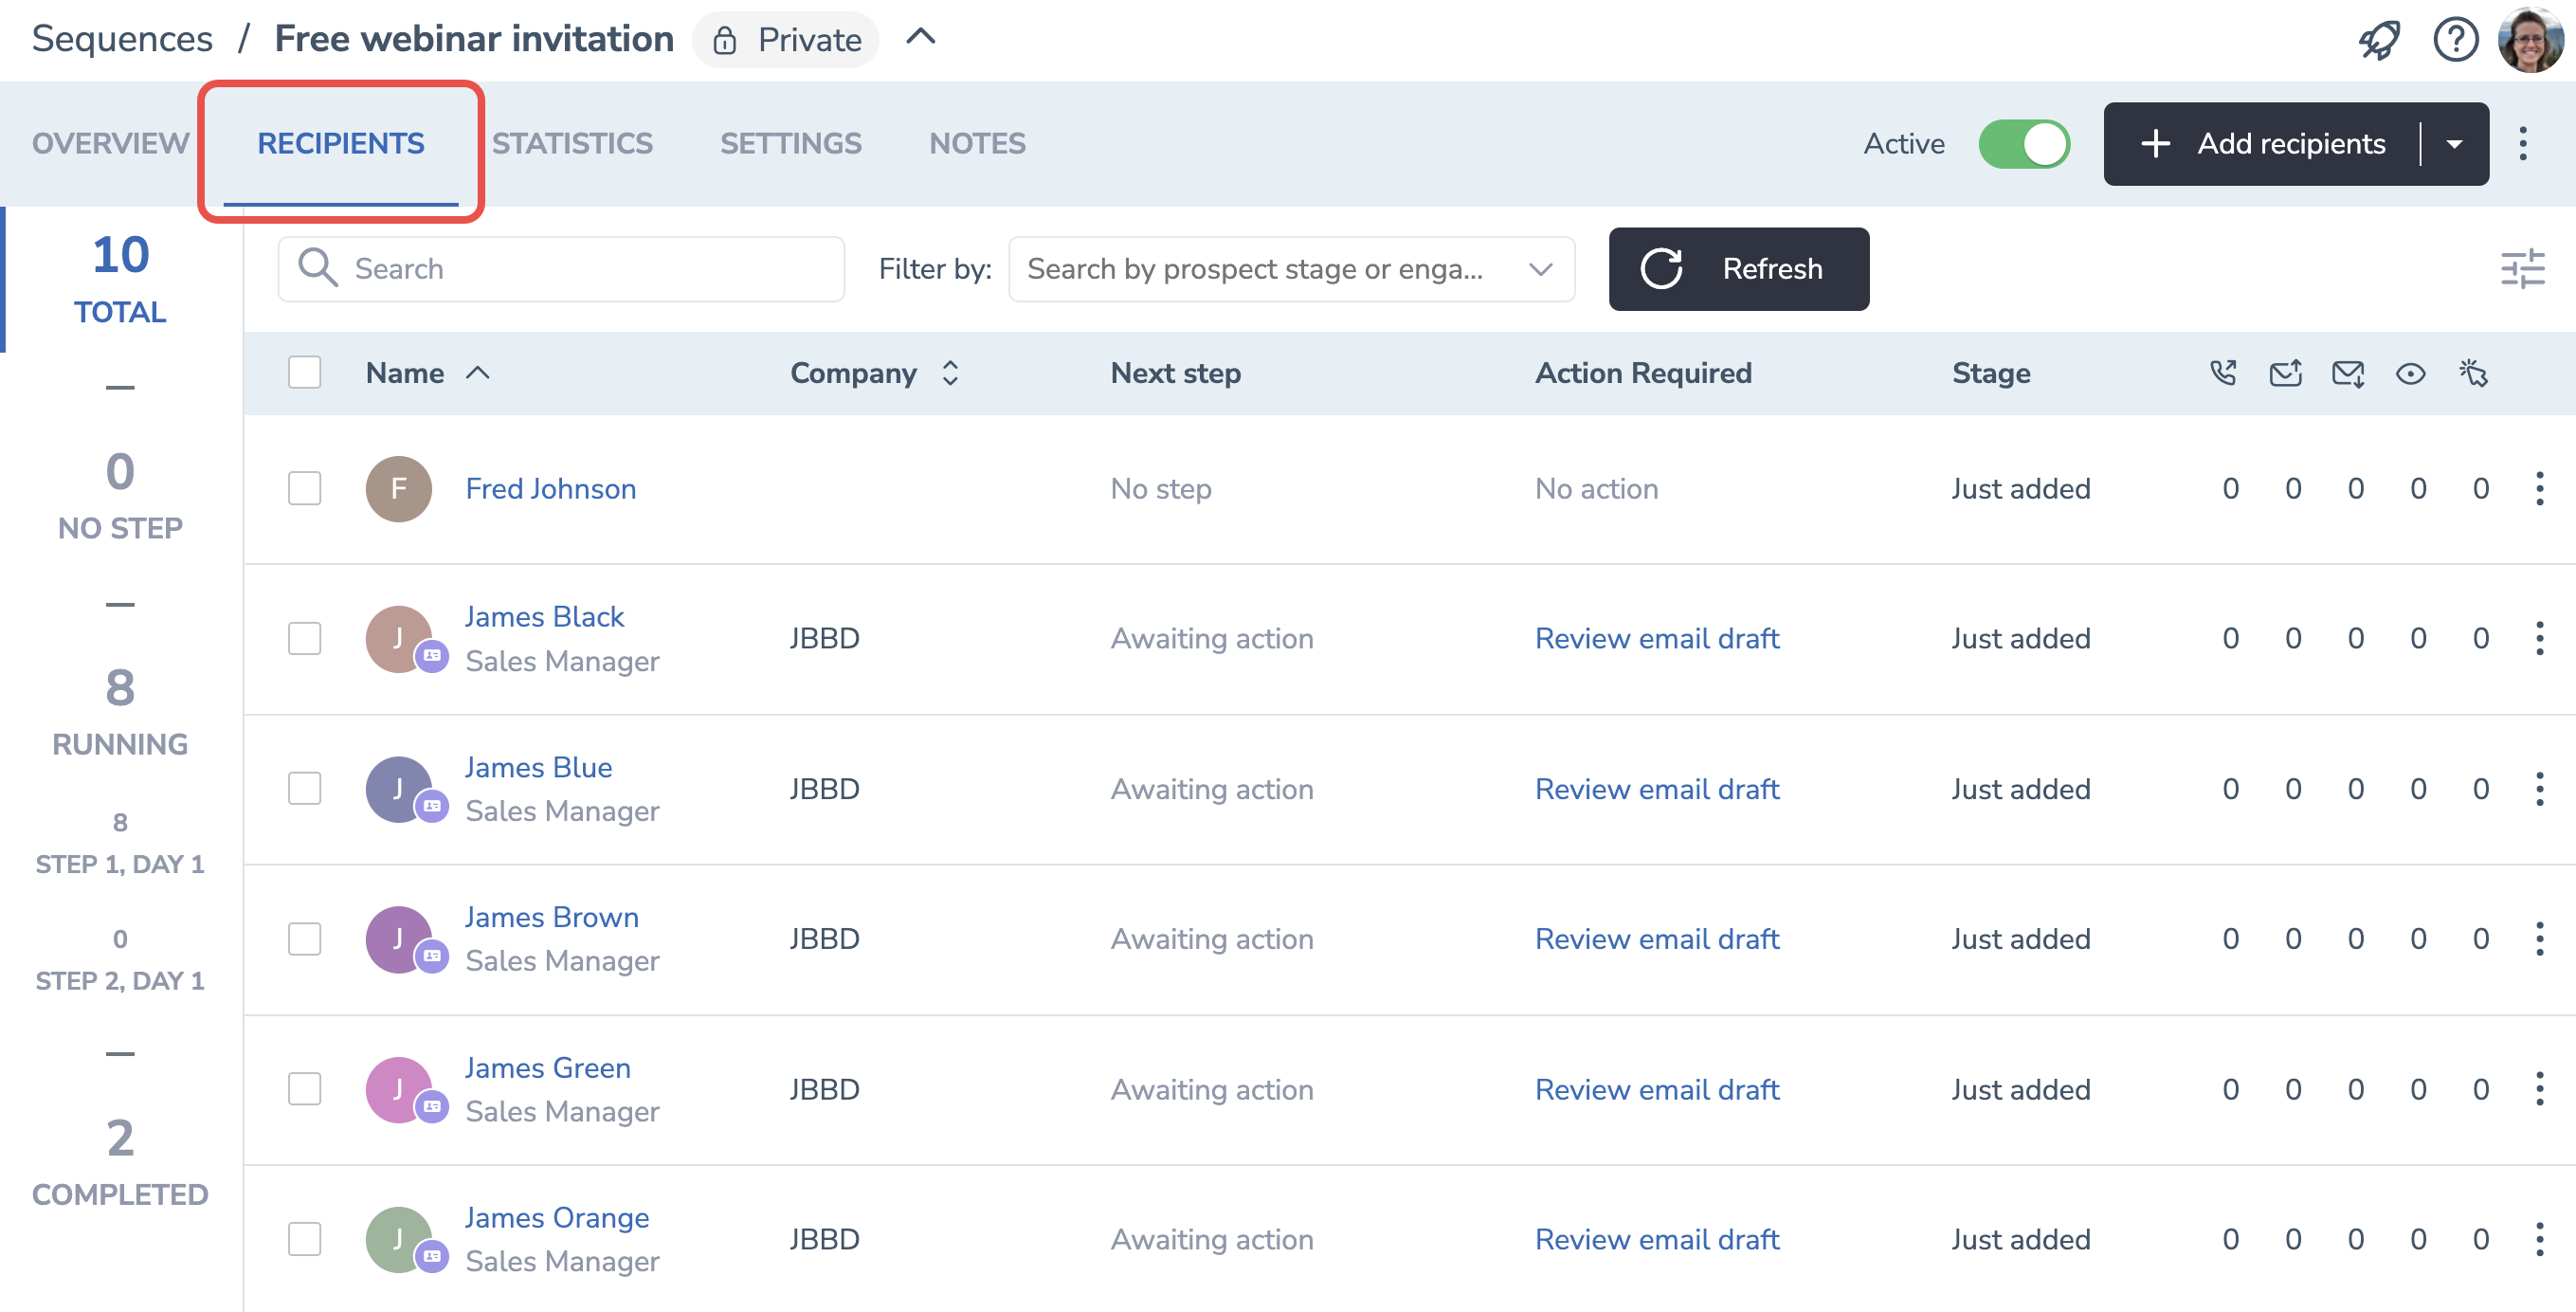
To add recipients to a sequence, go to the Recipients tab. Here, you can manage the Leads/Contacts that will be reached out by this sequence.
- Click
 button in the upper right-hand corner of the page.
 - In the drop-down list, select where you want to import recipients from:
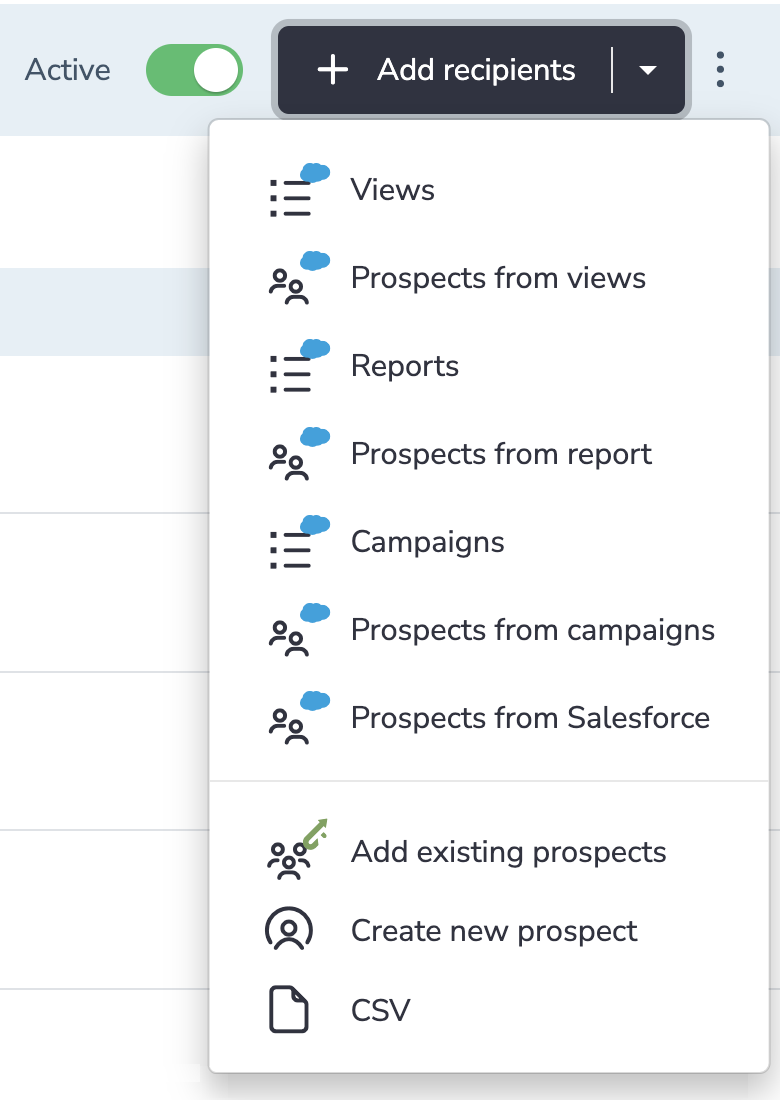
• Views - import all the prospects from a specific Salesforce List view.
• Prospects from views - manually select recipients from a Salesforce view.
• Reports - import all the prospects from a specific Salesforce report.
• Prospects from reports - manually select recipients from a Salesforce report.
• Campaigns - import all the prospects from a specific Salesforce campaign.
• Prospects from campaigns - manually select recipients from a Salesforce campaign.
Note
All types of Reports and Campaigns can be imported into Revenue Grid if a Report/Campaign has Contact or Lead ID column
• Add existing prospects - select and add recipients from Revenue Grid's Audience page. It includes all prospects that had ever been imported from Salesforce, CSV files or manually added.
• Create new prospect - manually create one prospect. It's useful when you need to quickly add a prospect to Revenue Grid.
• CSV - import prospects from an file uploaded from your computer. Refer to this article for a step-by-step guide on importing prospects from a CSV file.
When importing prospects from Views, Reports, or Campaigns, you can:
• Stop all other sequences for selected prospects: all other sequences will be stopped only for the prospects that you are owner of and for prospects that were added to sequences by you.
• Auto-sync selected view every hour: Revenue Grid will check the selected View, Report, or Campaign for new Leads or Contacts every hour and import them automatically. The newly added prospects will be engaged starting from Step 1.
To disable automatic updating of recipients list, go to settings of your sequence and turn off it in the Automatically updated views section.
Tip
You can always add more recipients later even after activating a sequence. The recipients who get added later will be reached out according to sequence’s schedule starting from the 1st step of the Sequence, no matter on what steps other recipients are at that moment
After adding prospects to the sequence, you can review them and their details on the Recipients tab.
Export Recipients to a CSV file
If the settings Allow prospects export into CSV is enabled by your Revenue Grid admin, you’ll be able to download the list of recipients to your local computer in the CSV format.
To download the list of prospects:
1. Go to the Recipients tab of a sequence
2. Click on three dots icon in the upper right-hand corner of the page
3. Select Export prospects into CSV
How to find a recipient in a sequence?
 Use Search field to find a recipient by name, company, email.
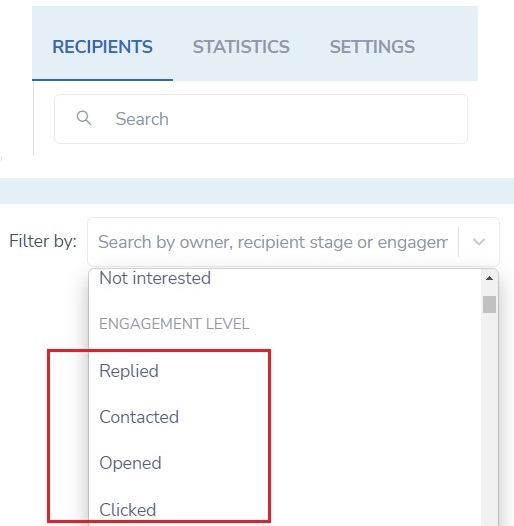
Use Filter by drop-down list to narrow down your search by Salesforce owner, or by current stage. Among many criteria you can select recipients that have reacted to any of outreaches of the sequence (e.g. opened, clicked, replied, etc.).
See the recipients that are on a specific step
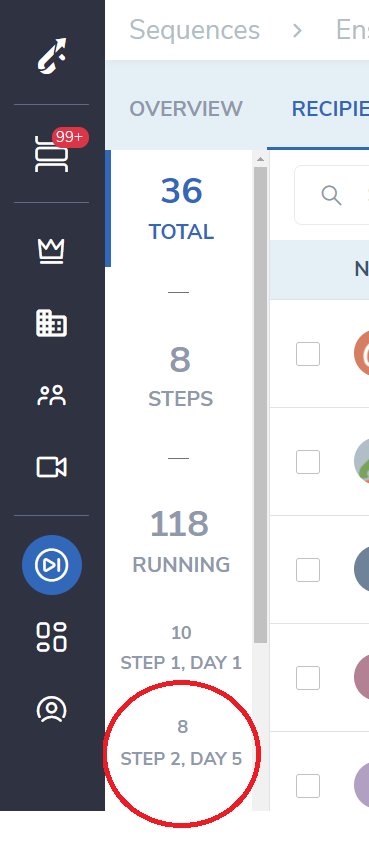
If you need to review the recipients on a specific Step, use the left-hand side pane on the Recipients tab. Click on the necessary step and the table of Recipients tab will be filtered down to the prospects on the selected step.
Recipient’s next step within a sequence
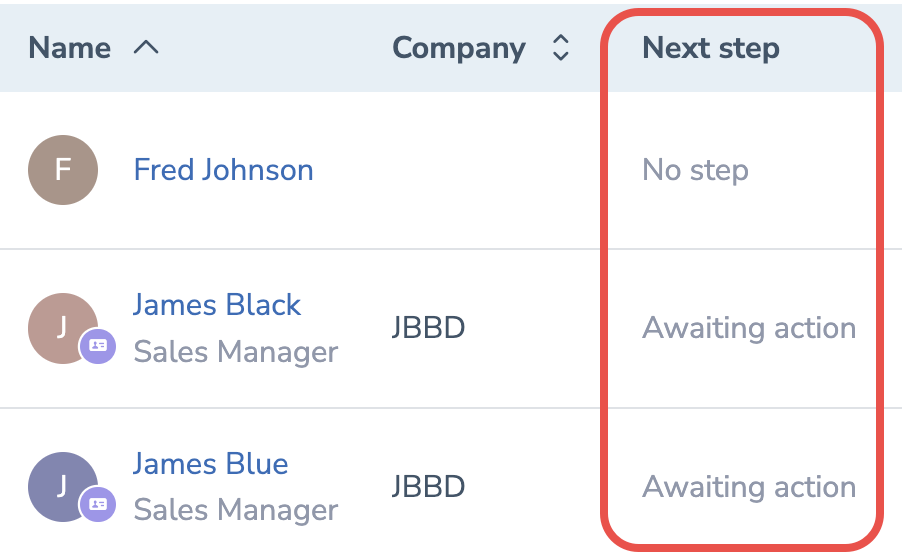
Refer to the Next step column to find out what is planned next for a recipient.
Click here to see the complete list of possible values.
Actions required for a recipient to proceed with the next step
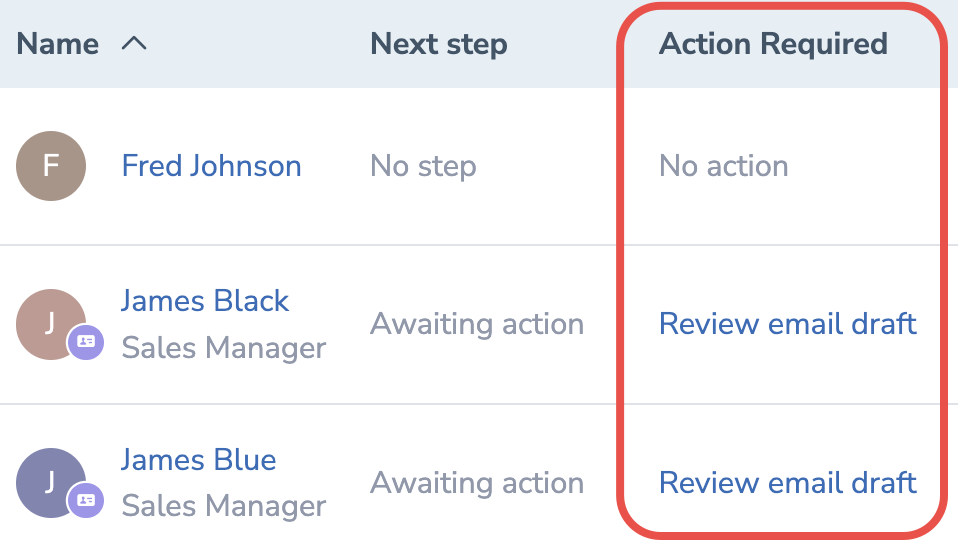 The Action Required column on the Recipients tab lists the actions that the sequence or step owner must take for the sequence to proceed with the next step for a prospect.
If there is any action in the Action Required column for a prospect, it means that the sequence is paused for this prospect. The sequence will continue for a prospect, only after resolving the required action.
To continue sequence for a prospect:
1. Click an action that appears in the table for the prospect
2. You will be redirected to the corresponding item in the Action Center
3. Take the necessary action
Click here to see the complete list of types of Action required.
Important
To run your sequence uninterrupted for all recipients, keep a close eye on the Action Center, it’s your main processing pad for the sequences.
Action required will also appear in the Sidebar’s Sequences widget.
Find out on what stage a recipient currently is
Refer to the Stage column to find out on what stage a recipient currently is.
Possible prospect statuses:
- Not contacted
- Just added
- Bounced
- In progress
- Unsubscribed
- Not interested
- Success
- Unresponsive
Refer to this article for a more detailed overview of the prospect stages.
Find the most engaged recipients
Prospect communication Statistics: the number of conducted calls, sent emails, emails opened, links in the emails clicked, and replies. In order to see the most engaged prospects/leads, click the Opens and Clicks ![]() icons.
icons.
Learn about how email opens and link clicks get counted here.
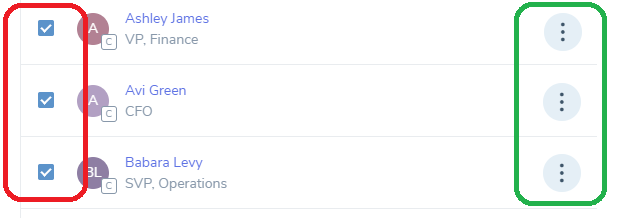
Actions with prospects
You can select several prospect or click on the menu  icon on a single prospect to perform actions with them.
Sequence independent actions
- Add - Add the prospect to another sequence.
- Delete - Completely erase the prospect from Revenue Grid.
- Edit prospect card - Edit prospect details in Revenue Grid.
- Open in Salesforce - Open this prospect in Salesforce.
- Re-import - Use this in case you want changes of a lead or a contact to get pulled from SFDC to Revenue Grid on demand.
- Add tags - Add or remove tags to single or multiple prospects at once.
Sequence dependent actions
- Move to sequence - Stop the sequence for the selected prospects, and move them to another sequence.
- Remove - Withdraw the prospect from the sequence.
- Skip - Skip the current step and run the next step according the current step’s schedule.
- Mute - Skip the current step and run the next step according to the next step’s schedule.
- Pause - Put the sequence for the prospect on hold.
- Continue - Resume the paused sequence for the prospect.
- Stop - Permanently stop the sequence for the prospect. This action is irreversible. If you want to temporarily halt the Sequence for the prospect, use Pause. Prospect status will be set to Stopped. You can map this status to any other Salesforce status in Status mapping settings.
- Reschedule - Schedule the next step on the new time for this prospect.
- Run now - Run the scheduled step right away.
- Personalize - Select when you want to personalize the next scheduled step (edit it before sending). When selected, an additional item will appear in the Action Center, where you can edit the upcoming outreach.
- Bounce - Manually set the Prospect status to Bounced.
- Opt out - Finish the sequence for the prospect with the Opt out Person Status. It means that the prospect requested not to get contacted anymore.
- Finish: Success - Finish the Sequence for the prospect marking Prospect status as Success, meaning that engagement has been successfully completed and further negotiations are being taken care.
- Finish: Not interested - Finish the Sequence for the prospect marking Prospect status as Not interested, meaning that the prospect expressed disinterest in your product. Any custom Person Statuses you create in your Revenue Grid will be available in this menu as well.