Add Steps to Sequence on Overview Tab
Creation of the new sequence in Revenue Grid consists of the following steps:
- Create a new sequence
- Add steps to the sequence
- Add recipients
- Activate your sequence
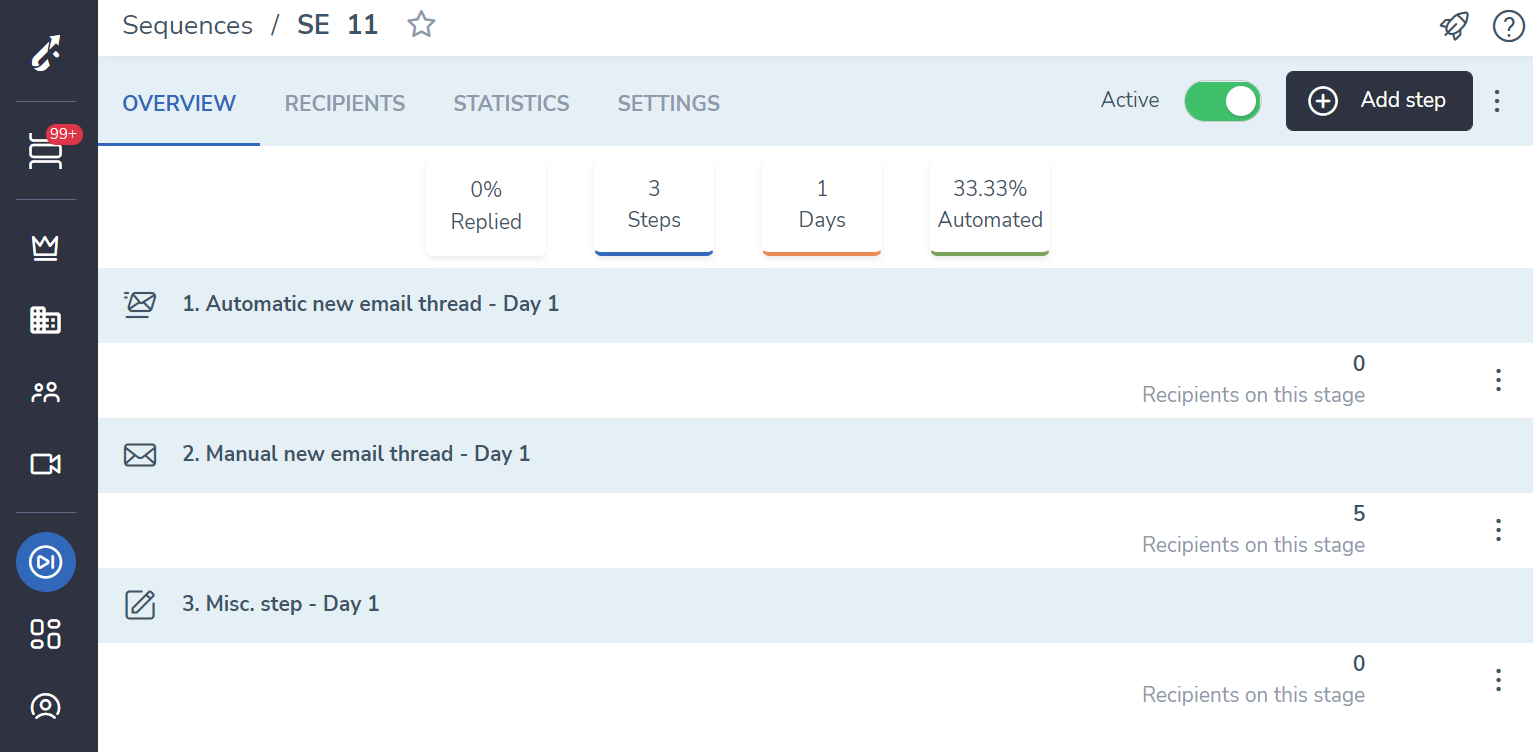
After creating a new sequence, you will see the Overview tab of your sequence. This tab is intended for building/editing a series of outreaches called steps in Revenue Grid.
A step is a scheduled action to reach out to a prospect. There is no limit on the number of steps in a sequence. Once a sequence is activated, added prospects (recipients) will start getting outreaches starting from step 1.
Adding and editing Steps to/of a Sequence
You can add steps both to active sequences and those that haven’t been activated yet.
- On the Overview tab, click
 in the upper right-hand-side corner.
 - Select the type of step you want to create from the picklist.
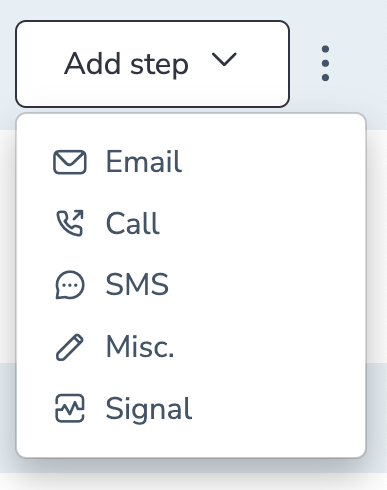
In the current version of Revenue Grid, there are 5 types of Steps you can add to a Sequence:
Each step creation feature some basic configurable adjustments described below. Refer to the Email type of a step for detailed explanation of each component.

Email type of a step
Tip
Email is the most complex step in Revenue Grid. Review the section about creating the email steps before creating a step of any other type. It will give you a comprehensive understanding of creating steps in Revenue Grid.
1. Select step owner
Step owner selection is available only for Multi-owned sequences. When creating Private and Shared sequences, you won’t see this option.
In this field, you can select the person from whose email address the email will be sent out.
By default, three options are available:
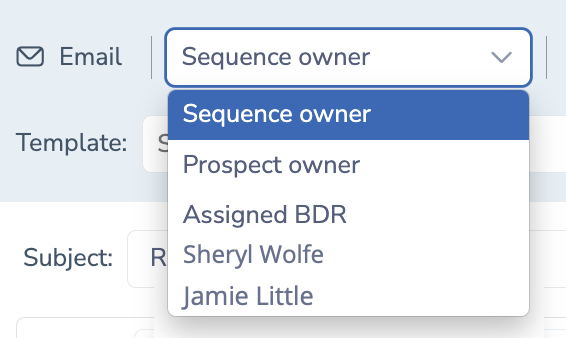
• Sequence owner: the step will be sent out from the person who is sequence owner.
• Prospect owner: the step will be sent out to prospects from the people who are specified as their owners in Salesforce.
• Any specific user in your company: the step will be sent out on behalf of the selected user
Important
On-demand, Revenue Grid can be configured to send out steps from another user position besides sequence and prospect owner, i.e., dynamically retrieve data from another custom field with a user value on Contact or Lead records.
If your company needs to select another position besides sequence and prospect owner for sending out steps, submit a corresponding request to our Support Team.
2. Select email type
Select the email type from the drop-down list: new thread or reply.

New thread
By default, this option is selected for the 1st email in the sequence.
When you select the New thread in this field, the current email will be sent as an email message without any link to previous email steps.
Reply
By default, this option is preselected for all further emails. Reply email type will appear as a reply to a previous or any other sequence email in the prospect’s mailbox. Prospects can review the email to which this is the reply.
You can specify to what email step you want to reply. By default, the previous email step is preselected in this field.

Replies can be particularly useful for follow-up emails when you need to remind the prospect what the previous one (or any other email) was about. For example, you can create three follow-up emails to the 1st email; each follow-up can be a reply to the 1st email. In this way, you can keep your follow-ups to the point.
If the current step is sent out by a different person than the email selected in this field, the prospect will see that it is a reply to a previous email and can review it.
3. Select a template to be used
In the Templates drop-down list select one of premade templates.

If you added any template in this field and do not edit the email body, this step gets linked to the selected template. It means that the statistics about this template performance will include statistics of this step.
If you added any template in this field and edited the email body, this step gets unlinked from the selected template so that the statistics about this template performance will not include the statistics of this step. However, in such cases you can update the template.
Learn more about using templates…
4. Set up Schedule idle for this step
In this section, you can set up a delay in hours and days for your step. That is how long you want this step to wait before being sent out after completing the previous step.

If you add an idle to the step sending, the idle is calculated according to the selected schedule. For example, if your sequence steps are sent only on Mondays, and you have set a 3-day idle for a step, this step will be sent out on the fourth Monday after the previous step.
By default, the Schedule idle is set to 0 days and hours. This step will be sent out after the previous step according to the sequence schedule without any delays.
Immediate follow-up steps
If you set the Schedule idle to 0 days but add a delay in hours, this step will be sent out on the same day that the previous step but after the specified delay in hours, irrespective of the selected schedule.
For example, let’s say your sequence is sent out on Monday-Friday from 10 a.m. to 6 p.m., you have set the 2-hour delay for the step. If the previous step was sent out on Monday, the current step would be sent out with the highest priority after 8 p.m. on that same Monday.
Such steps are called immediate follow up steps.
Important
When you add schedule idle you must also take into consideration the sending limits that could be configured by your admins.
5. Select Schedule
By default, when you create a new step within a sequence, the sequence schedule is applied to the step that is being created. You can set a custom schedule for specific steps.

When you select another schedule for your step, you can review the schedule details by clicking the Schedule details button.
Note
Automated sequence steps are sent out according to the configured schedule. However, the actual send time may vary due to message volume and system-wide sending limits. For details, see How automated sequence step sending works.
Adding Steps with a customized schedule
This feature is especially useful if you want to schedule specific step types at specific times. For example, if you would like the Call steps to be scheduled from 8 am to 12 pm, you can create a corresponding schedule and set it for a specific step.
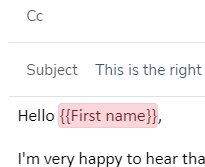
6. Add subject to your email
In the Subject field, you must add the subject of your email.
7. Add CC recipients
In the CC field, add your colleagues’ email addresses to send copies of this email to them. All next created email steps inherit the CC recipients automatically.
Tip
If you are creating a sequence whose steps are sent out on behalf of different people in your company, you may find it useful to add their email addresses in the CC field for all emails you create. In this way, you ensure that they are aware of the emails that are sent out and that prospects can see all relevant senders.
To add the CC recipients to your email, click the ![]() (Add CC recipients) button next to the Subject field.
(Add CC recipients) button next to the Subject field.
8. Write the body of your email
You can create your email
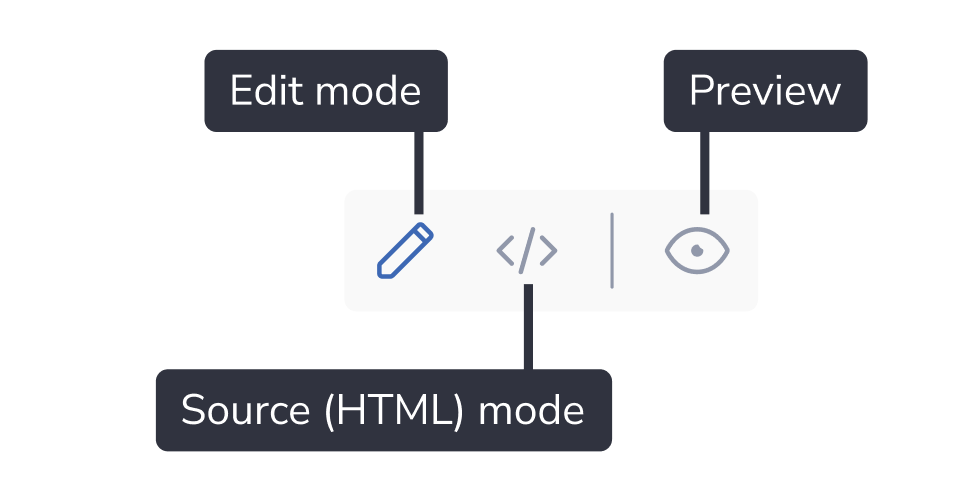 Use the buttons in the bottom right corner of the page to switch between the Edit and Source mode, and show/hide preview.
Edit mode
Use the editor to type the body of your email.
In the upper toolbar, you can find both standard editing tools and some exceptionally valuable ones:
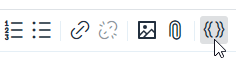
You can format the text, add links, paste inline images from clipboard or from a link, and add attachments  (supported file types are: pdf, doc, docx, xls, xlsx, ppt, pptx, csv, txt, rtf, ods, odt, html, zip, 7z, rar, mp3, mp4, wma, mpg, flv, avi, jpg, jpeg, png, gif, epub, fb2).
Personalize your emails with merge fields. Merge fields  is a powerful tool to personalize your message, to add signatures and unsubscribe links and much more. Refer to the article dedicated to merge field for more information
Note
When your step contains merge fields that are not available for any reason (empty values in Salesforce, wrong syntactic, no API access, etc.), the merge field will be highlighted in red in Preview.
Tip
Keep in mind that based on the setup signature auto-adding to sequence emails in your signature settings, you may see an auto-inserted merge field, {{Auto inserted Signature}}, in the email editor when creating or editing an email type of a step.
Note that admins could disable changing of signature auto-instertion settings for users.Source mode
In the Source mode, you can paste the HTML layout of your email. Use any preferred code editor to create the HTML code, copy and paste the HTML code in this source code window.
Preview your email
In the Preview mode, you can check out how your email will look like for recipients.
To open the preview, click on the ![]() (preview) icon in the bottom right corner of the editor.
(preview) icon in the bottom right corner of the editor.
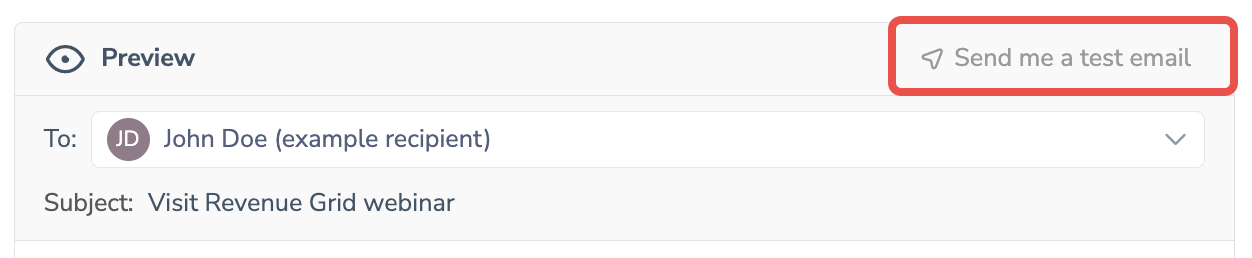
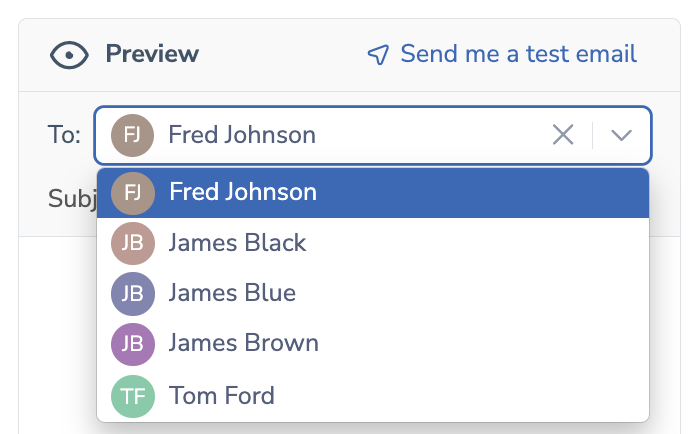 In the “To” field, you can select any of the sequence recipients to preview how this email will look like for them. By default, the example recipient, John Doe, is preselected in this field.
By clicking Send me a test email, you can send a test email to your email address to see how it will actually look in the recipients’ mailboxes.
Review and personalize this step before sending
 Review and personalize this step before sending switch button controls if you want to review an email manually before it gets sent out.
If you enable this switch button, you will get a get to-do item in your Action Center’s To-do tab when each of the recipients reaches this step according to the sequence schedule. In such case, the step will be sent out only when you resolve the to-do item in your Action Center - Send as planned, Send now, or Reschedule this step.
Tip
Use this feature with caution. If your sequence has a large number of recipients, you will get a large number of to-do items to be processed, and the sequence will be paused for recipients until you review this step for them.
Add step
When you are done with the step creation and its configuration, you need to add step so it appears on the sequence.
There are three options for adding a step:
- Add: the step will be added. If it was created based on a template and you did not modify it, this step will be added with a link to the selected template.
- Add & Create new template: the step will be added and a new template will be created.
- Add & Update template: this option becomes available if you had built the step based on a template and modified it. By clicking this button, you will add the step to the sequence and update the related template.
Important
If you click Add & Update template, all steps of all Sequences which use the relevant template will start using the most recently updated version of the template. Including those steps which are waiting for a review in the Action Center.
Phone Call type of a step
Before creating a phone call step type, make sure that you or your colleagues who must call a prospect have a phone number set up.
>>> Click to see more info about phone call step type <<<
When it comes to Phone call type of a step, here is what you have to remember:
Step owner. Here select on whose behalf the step will be sent out/executed.
Template. In this drop-down list, you can select a call script template for this step.
Schedule idle. Here you choose how long you want this step to wait before executing this step out after the previous step is completed.
Schedule. Here, you can select a custom schedule for this step. By default, the sequence schedule is preselected.
Subject is mostly for your own use.
Editor. Use this toolbar to type and customize your phone call script. Along with standard editing tools, you you can use Merge field to personalize your call. Refer to an article dedicated to capabilities of merge field.
Check Phone number settings
In order to be able to add Phone call type of steps:
1. Your company should have a call provider account
2. Your Admins should connect call provider account to Revenue Grid in corresponding settings
3. You should go to Personal Settings → Sequences → General subtab and select a number from Voice number drop-down list. This number must be used only by one user. Adding one number for several users is not supported.
SMS type of a step
Before creating a phone call step type, make sure that you or your collegues who must call a prospect have a phone number set up.
>>> Click to see more info about SMS step type <<<
When it comes to SMS type of a step, here is what you have to remember:
Step owner. Here select on whose behalf the step will be sent out/executed.
Template. In this drop-down list, you can select an SMS template for this step.
Schedule idle. Here you choose how long you want this step to wait before executing this step out after the previous step is completed.
Schedule. Here, you can select a custom schedule for this step. By default, the sequence schedule is preselected.
Subject is mostly for your own use.
Editor. Use this toolbar to type and customize your phone call script. Along with standard editing tools, you you can use Merge field to personalize your call. Refer to an article dedicated to capabilities of merge field.
Check SMS sending settings
In order to be able to use SMS type of steps:
1. Your company should have a call provider account
2. Your Admins should connect call provider account to Revenue Grid in corresponding settings
3. You should go to Personal Settings → Sequences → General subtab and select a number from SMS number drop-down list. This number must be used only by one user. Adding one number for several users is not supported.
Misc. type of a step
If you need to complete a task related to a sequence or a task based on the results of the previous step, you can add a Misc. step to your sequence.
>>> Click to see more info about misc. step type <<<
When it comes to Misc. type of a step, here is what you have to remember:
Step owner. Here select on whose behalf the step will be sent out/executed.
Template. In this drop-down list, you can select an SMS template for this step.
Schedule idle. Here, choose how long you want this step to wait before executing this step out after the previous step is completed.
Schedule. Here, you can select a custom schedule for this step. By default, the sequence schedule is preselected.
Subject is mostly for your own use.
Editor. Use this toolbar to type and customize your phone call script. Along with standard editing tools, you you can use Merge field to personalize your call. Refer to an article dedicated to capabilities of merge field.
Note
Once a Misc. type of a step gets processed in the Action Center, it gets logged to Salesforce as a completed task.
Signal type of a step
>>> Click to see more info about signal step type <<<
When it comes to Signal type of a step, here is what you have to remember:
Step owner. Here select on whose behalf the step will be sent out/executed.
Template. In this drop-down list, you can select an SMS template for this step.
Schedule idle. Here, choose how long you want this step to wait before executing this step out after the previous step is completed.
Schedule. Here, you can select a custom schedule for this step. By default, the sequence schedule is preselected.
Subject is mostly for your own use.
Editor. Use this toolbar to type and customize your phone call script. Along with standard editing tools, you you can use Merge field to personalize your call. Refer to an article dedicated to capabilities of merge field.
Note
Once a Signal type of a step gets generated, it will appear on the Signals tab of the Action Center.
Clone, view to edit, and delete a step
Use More option menu on the right-hand side of a step to clone, view to edit, or delete it.
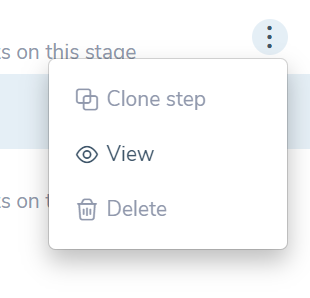
Important
Delete option is disabled if at least one recipient has ever been scheduled for the step.
A/B testing
A/B test different approaches and compare results. Create another up to 3 versions of a step, and recipients will be equally distributed among the versions.
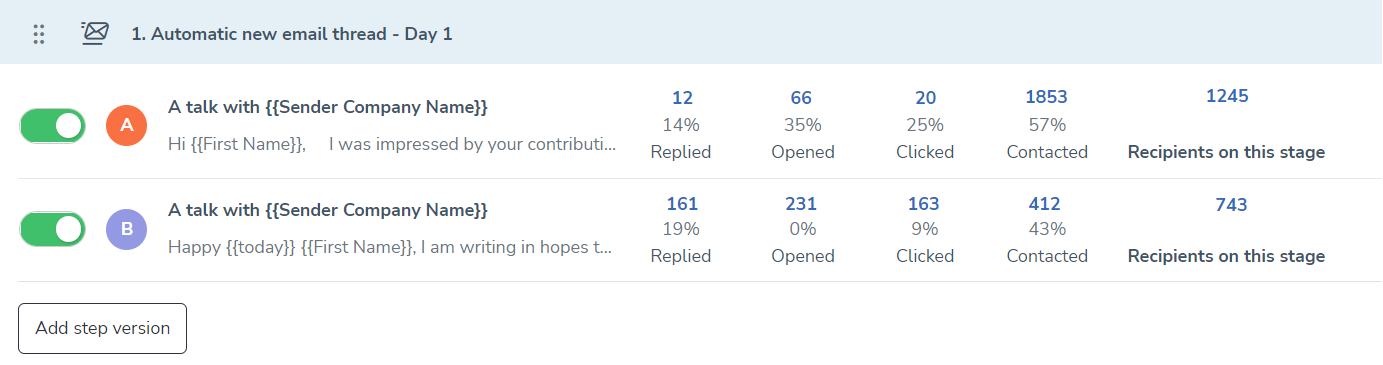
Subject of the both versions stay the same.
For the integrity of Statistics, you cannot delete a version if at least one recipient has received it. Same applies to Steps in general as well. Pause it once you don’t need it.
Click on the stat numbers to view the exact recipients who fell into the category. For example, to see who replied to the step, click on the Replied and you’ll be redirected to Recipients subtab that will be filtered down to selected prospects.
Quick stat of a Sequence
After activating your sequence you can review its statistics which appear above the list of sequence steps.
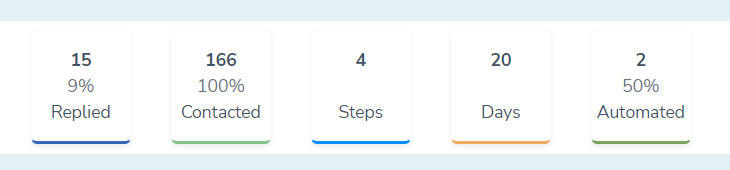
Stat of your sequence includes:
- Replied: percentage of prospects who replied
- Contacted: percentage of prospects that have been contacted by sequence so far
- Steps: total number of steps in the sequence
- Days: total number of days within which these steps are planned to get done from the first step to the last one
- Automated: percentage of steps which are automated and will be sent out without your intervention
Automatic vs Manual type of a step
Automatic steps get send out according to their schedule without your (user’s) manual review. By default, all email and SMS steps are created as automatic.
To make an email or SMS step manual, enable the the Review and personalize this step before sending switch button in the bottom left corner of the step creation page.
>>> Click to see an animation <<<
Manual type of a step generates a separate to-do item per each recipient. To-do items appear in the Action Center.
Important
Use with caution! Say you have 1000 recipients in a sequence and enable the Review and personalize this step before sending switch button, then you will get 1000 to-do items. You will need to manually process every single one of the to-do items to unblock step sending to prospects.